A small home hydroponic lab needs four network capabilities at once: cloud-bound sensor traffic, security camera traffic, automation-controller traffic, and your everyday browsing traffic. Putting all four on a single flat Wi-Fi network exposes the lab to risks ranging from a hijacked sensor flooding your LAN to a camera firmware leak phoning home through your file shares. The fix is VLAN segmentation across two or three logical networks managed by a single capable router.
This guide covers a three-VLAN layout that fits a 1-2 reservoir hobbyist setup and scales to a 6-tray production lab. The hardware target is a small managed switch (8-port is plenty), a Wi-Fi 6 access point with multi-SSID, and an OPNsense or pfSense firewall doing inter-VLAN routing. Total hardware cost runs 500-600 USD depending on switch and access point choice, closer to 600 if you add the UPS. This is the exact layout I run for my own reservoirs — a hydroponic system is really the same control loop as any other smart-home rig: sensors, schedules, and intervention only when the loop fails, and it deserves the same network hygiene as anything else on that loop.
Why a Hydroponic Lab Needs Its Own VLAN
Hydroponic sensors, IP cameras, and automation hubs are the three weakest devices on most home networks. Wi-Fi pH probes ship with default passwords, RTSP cameras leak credentials in plain text, and Tasmota-flashed plug controllers run cleartext MQTT. A single compromised sensor on a flat network reaches every other device in seconds. VLAN segmentation breaks that path.
Beyond security, traffic shaping is easier when device classes are isolated. The pump-cycle controller wants low-latency local routing to the dosing hub; the cloud sensor traffic wants prioritized upstream bandwidth; the camera feeds want isolated bandwidth that does not steal from the rest of the house. Three VLANs let the router prioritize each independently. The detailed firewall-rule walkthrough on OPNsense firewall rules covers the exact rule order needed for inter-VLAN policies.
The third reason is forensics. When something stops working — and it will, because cheap sensors die — VLAN logs identify which segment generated the problem in seconds. A flat network forces packet capture and guesswork. A segmented network shows you the offending VLAN tag immediately.
The Three-VLAN Layout for a Hydroponic Lab
The minimum useful layout uses three VLANs: VLAN 10 for sensors and automation, VLAN 20 for cameras, and VLAN 30 for trusted devices (your laptop, phone, and dosing controller). Sensor traffic gets internet but is blocked from VLAN 30. Cameras get NVR-only, no internet. Trusted devices reach all VLANs for control.
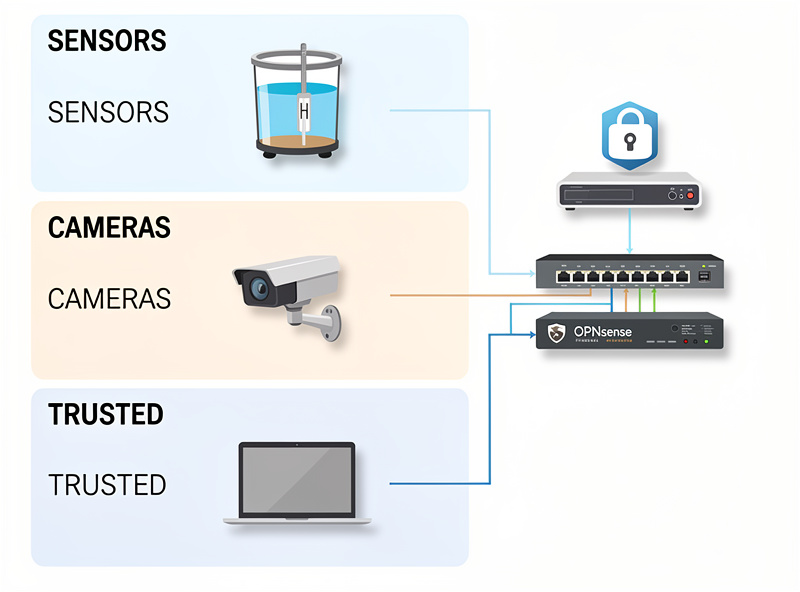
VLAN 10 (Sensors / Automation, /24): pH sensors, EC monitors, water level sensors, smart plugs, dosing pumps, MQTT broker. This VLAN gets outbound HTTPS for cloud dashboards but is firewalled from VLAN 30 except for explicit MQTT and HTTP API ports. Roughly 6-10 devices in a small lab.
VLAN 20 (Cameras, /28): RTSP IP cameras pointing at the reservoir and grow trays. Internet egress blocked entirely. Only the NVR or Frigate server (placed on VLAN 30) is allowed to pull RTSP streams in. This single rule prevents camera firmware from phoning home.
VLAN 30 (Trusted, /24): Your laptop, phone, NVR, dashboard tablet. Full internet access. Allowed to initiate connections into VLAN 10 and VLAN 20. Devices here run firmware you trust and update; do not put cheap sensors on this VLAN no matter how convenient it seems.
Hardware Bill of Materials
The realistic minimum is 500-550 USD: an inexpensive 8-port managed switch (TP-Link TL-SG108E or Mikrotik CSS610-8G-2S+IN), a Wi-Fi 6 access point with multi-SSID and VLAN tagging (TP-Link EAP610 or Ubiquiti U6-Lite), and a small firewall appliance (Protectli FW2B running OPNsense, or a refurbished Dell SFF). Avoid all-in-one consumer routers — most cannot tag VLANs reliably.
| Component | Recommended | Price (USD) | Why |
|---|---|---|---|
| Managed switch | Mikrotik CSS610-8G-2S+IN | 140 | VLAN-capable, 8 gigabit, low fan |
| Wi-Fi 6 AP | TP-Link EAP610 | 90 | Multi-SSID with per-SSID VLAN tag |
| Firewall | Protectli FW2B (OPNsense) | 250 | Two intel NICs, fanless, low power |
| Cabling | Cat6 patch cables | 30 | Required for VLAN tag stability |
| Optional UPS | APC BE600M1 | 80 | Survives 5-min outages, protects pump |
Consumer mesh systems (Eero, Nest Wi-Fi) cannot tag VLANs and should not be used. The Wi-Fi 6 AP must support per-SSID VLAN tagging — broadcast SSID “HydroSensors” tagged 10, “HydroCam” tagged 20, “Trusted” tagged 30 — that single feature is the dividing line between consumer and prosumer networking gear.
Configuring OPNsense for the Three VLANs
The OPNsense workflow is six steps: create three VLAN interfaces on the LAN parent, assign each to an interface, set DHCP per interface, write firewall rules for each VLAN, configure the switch trunk port, and configure the AP per-SSID VLAN. Plan on 90 minutes for first-time configuration; 20 minutes once you have done it before.
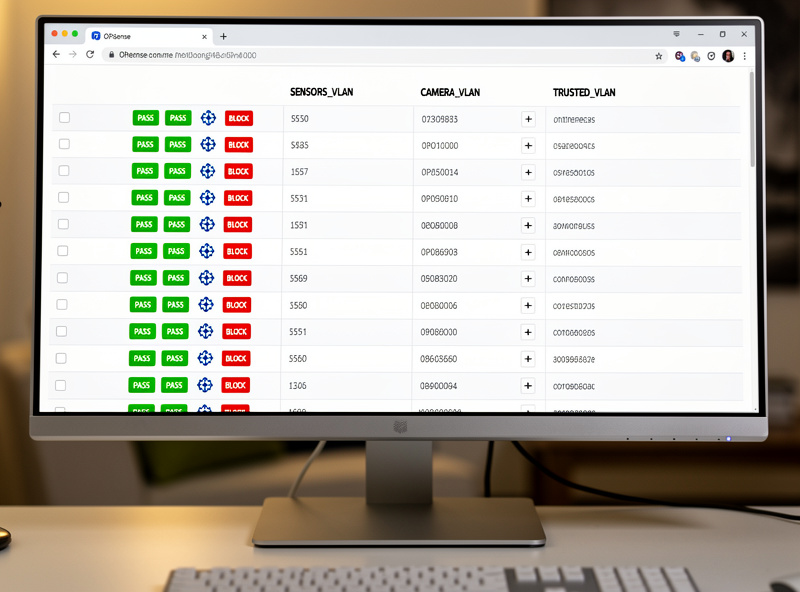
The critical firewall rule order is: deny inter-VLAN by default, then explicit allow for trusted to sensors, trusted to cameras, and sensors to internet. Cameras get only “allow LAN to camera RTSP port from trusted” and nothing else. Sensors get “allow LAN to MQTT port from trusted” plus outbound HTTPS for cloud dashboards. The base firewall rule logic is identical to the patterns used for general home segmentation — see the pfSense firewall rules tutorial for the equivalent pfSense workflow.
DHCP scopes per VLAN should not overlap. Use 10.10.10.0/24 for sensors, 10.10.20.0/28 for cameras (16 addresses is enough), 10.10.30.0/24 for trusted. The /28 on cameras is intentional — it caps how many camera devices can ever join, which makes anomalies obvious. Six cameras is plenty for a 4-tray lab.
Wi-Fi SSID-to-VLAN Tagging
The access point broadcasts three SSIDs, one per VLAN. The AP tags each SSID with the matching VLAN ID before sending the frame to the switch trunk port. Sensor devices join “HydroSensors” and never see the trusted SSID. The trusted SSID uses WPA3-Personal; the sensor SSID can drop to WPA2 if old ESP8266 sensors require it.
Hide the sensor SSID. ESP-based pH probes typically save credentials on first connect — you broadcast briefly during commissioning, then disable broadcast once all sensors are joined. This single step blocks neighbors from even seeing the lab network exists. Camera SSID stays hidden permanently because cameras never join new networks after initial setup. I learned the commissioning-window trick the hard way after leaving a sensor SSID broadcasting for a week and finding a stray device trying to join it — nothing came of it, but it’s the kind of near-miss that makes the extra ten seconds of re-hiding the SSID worth it every time.
Inter-VLAN Routing Rules That Matter
The five rules that actually matter are: (1) trusted to sensors allowed on MQTT, HTTP, and HTTPS only; (2) trusted to cameras allowed on RTSP and HTTP only; (3) sensors to internet allowed for HTTPS, NTP, and DNS only; (4) cameras to internet denied; (5) sensors to trusted denied with logging enabled. Everything else gets a default deny.

The “sensors to trusted denied with logging” rule is the security alarm. If a sensor ever attempts to reach your laptop, the firewall logs that attempt with timestamp and device MAC. That single log entry tells you a sensor is compromised and saves you from a wider breach. I check mine on the same cadence I check my EC and pH logs — weekly during the first month a new sensor is on the network, monthly once it’s proven itself.
Block IPv6 on VLAN 10 and 20 unless you specifically need it. Dual-stack devices can establish IPv6 connections that bypass IPv4-only firewall rules entirely if you haven’t mirrored every rule on the IPv6 side (Internet Society’s IPv6 security FAQ covers why this is a real gap, not a theoretical one). The simplest fix on a small lab network is to disable IPv6 entirely on those interfaces — none of your sensors need it, and cloud dashboards reach over IPv4 reliably.
Frequently Asked Questions
Do I need VLANs for a small hydroponic system?
Once you have 3+ Wi-Fi devices in the lab (one sensor, one camera, one controller), VLAN segmentation pays for itself. Below that, a guest SSID with client isolation covers most of the same risk at zero extra hardware cost.
Can a consumer router do hydroponic VLANs?
Most consumer routers cannot tag VLANs reliably. The minimum capable hardware is a managed switch plus a Wi-Fi 6 access point that supports per-SSID VLAN tagging, plus a firewall like OPNsense. Total cost starts around 350 USD.
Which VLAN should hydroponic sensors live on?
Place all sensors and dosing controllers on a dedicated IoT VLAN (commonly VLAN 10) with outbound HTTPS allowed for cloud dashboards but inbound from the trusted VLAN restricted to MQTT and HTTP API ports only.
Are IP cameras safe on the same VLAN as sensors?
Separate them. Cameras get their own VLAN with internet egress completely blocked, allowing only the NVR on the trusted VLAN to pull RTSP streams. Mixing camera and sensor traffic on one VLAN means a camera firmware leak reaches your sensors directly.
How many VLANs do I need for a hobby hydroponic lab?
Three VLANs cover the realistic threat model: sensors and automation on VLAN 10, cameras on VLAN 20, trusted devices on VLAN 30. Smaller setups can collapse to two VLANs (IoT plus trusted), but cameras really should stay isolated.
Will VLANs slow down my hydroponic dashboard?
No. Inter-VLAN routing on modest hardware adds under one millisecond of latency, far below what any dashboard refresh notices. The bottleneck is always cloud round-trip time, not local routing.