The fastest way to understand a hydroponic reservoir is to build one. A deep-water-culture tote — a tank, a lid with net-pot holes, an air pump and stone, and some plants — is a project you can finish in an afternoon with hardware-store parts, and once you have drilled the lid and watched the roots take off, every other reservoir concept clicks into place. This is the build I steer every new grower toward, and the one I still run as my daily workhorse.
On my bench I make the rigs my own by printing the lids and net-pot collars, but you do not need a 3D printer to do this well — a storage tote, a hole saw, and standard parts get you the same healthy roots. Here is exactly how I build and plumb a reservoir, what each part does, and the choices that decide whether it holds steady or fights you.
What You Need to Build a Hydroponic Reservoir
A basic DWC reservoir needs five things: an opaque food-safe tank, a lid with net-pot holes, net pots and growing media, an air pump with air stone and tubing, and nutrient solution. That parts list builds a working deep water culture system for a handful of plants in an afternoon, with everything available from a hardware store.
The genius of a DWC tote is how little it asks for. Each part has one clear job, and none of them is exotic. Below is the full materials list with what each piece does, so you can shop it in one trip rather than discovering the missing fitting halfway through.
| Part | Job | Notes |
|---|---|---|
| Opaque tote or bucket | Holds the nutrient solution | Black, food-safe; blocks algae |
| Lid | Holds net pots, blocks light | Tight fit cuts evaporation |
| Net pots | Suspend plants over the water | 2-inch or 3-inch typical |
| Growing media | Anchors roots in the net pot | Clay pebbles or rockwool |
| Air pump + air stone | Oxygenates the water | Run 24/7, sized to volume |
| Tubing + check valve | Carries air, prevents backflow | Check valve protects the pump |

Choosing and Preparing the Tank
Pick an opaque, food-safe container — a black storage tote or bucket — sized to your crop, then keep it dark and lidded. Opacity blocks the light that fuels algae, and a tight lid cuts evaporation and seals the surface. Avoid clear or translucent tanks unless you wrap them in reflective film.
The tank is the single most important choice, and the rule is simple: opaque and food-safe. A black food-safe storage tote is my default because it blocks light cheaply and comes with the lid you are about to drill. Size it to your plants using the math in my reservoir sizing guide — roughly a gallon per leafy plant, more for fruiting crops. If all you can find is a translucent tub, wrap the outside in reflective film to keep light out. Before anything else, give a new tank a wash and rinse so you start clean, the same standard covered in my cleaning guide.
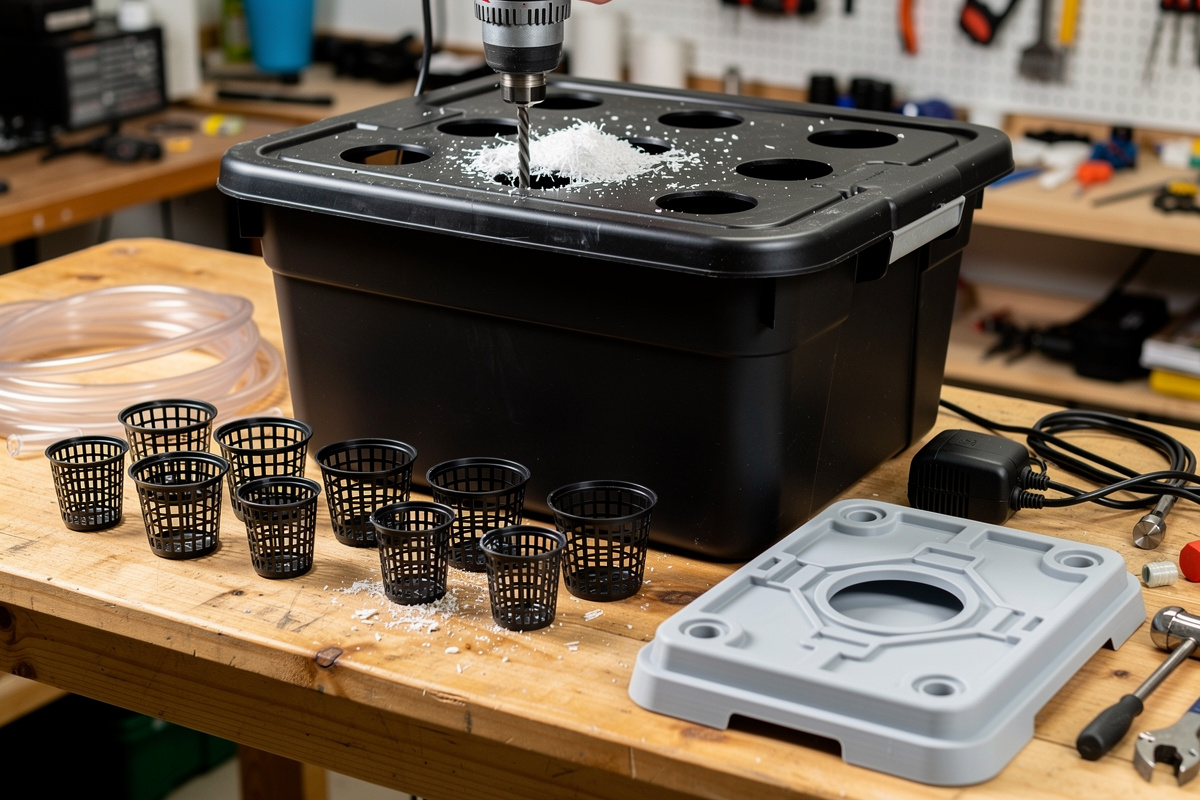
Drilling the Lid and Seating Net Pots
Mark net-pot positions on the lid spaced for mature plant size, then cut each hole with a hole saw sized just under the net pot’s rim so the pot sits without falling through. Two-inch pots suit small greens; three-inch suit larger plants. Spacing too tightly crowds the canopy and starves lower leaves of light.
This is the one step that feels like real fabrication, and it is satisfying. I match the hole saw to my net pots — cut just under the rim diameter so the lip catches and the pot hangs at the right depth with its base near the waterline. Spacing matters more than people expect: lettuce can sit fairly close, but a pepper or tomato needs room to spread or the lower canopy shades out. This is exactly where my maker side shows — I print custom collars and sometimes a whole lid on the same 3D printer that feeds the rest of my projects, so the holes land exactly where I want them. A drilled tote lid does the identical job; the printer is a convenience, not a requirement.
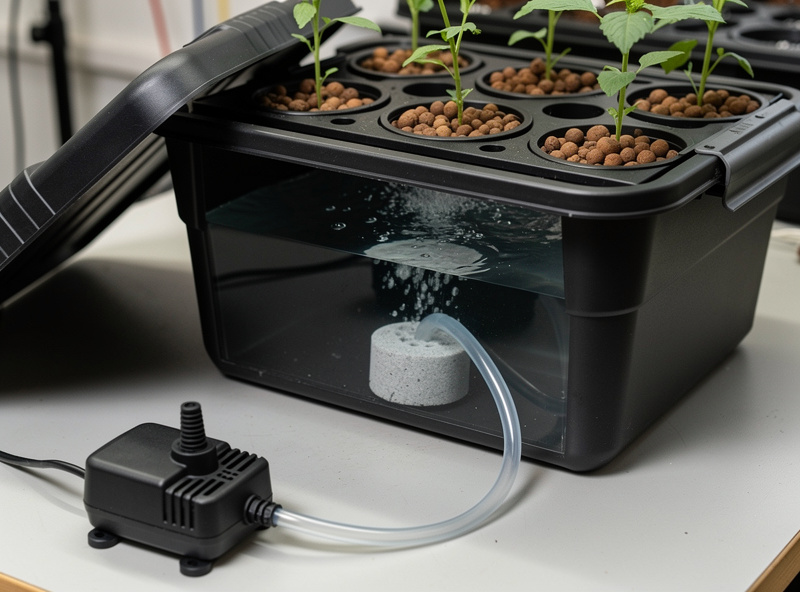
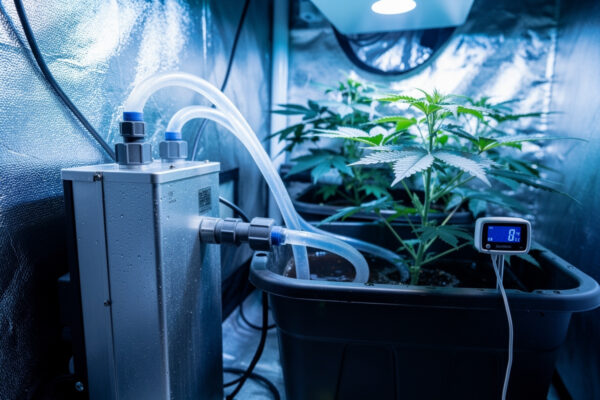
Plumbing the Aeration
Connect the air pump to an air stone with tubing, adding a check valve between them so water cannot siphon back into the pump if power drops. Set the pump above the water line, drop the stone to the bottom of the tank, and run it 24/7. In DWC the air stone is the only source of oxygen for submerged roots.
Aeration is non-negotiable in a deep-water build, so I do not cut corners here. A capable air pump and air stone kit sized to the tank volume gives the dense bubble curtain roots need. The check valve is the detail people skip and regret — without it, a power cut can let water siphon up the tubing and ruin the pump. Mount the pump above the reservoir as a second line of defense, run the stone continuously, and never put aeration on a timer. The full reasoning on oxygen and why warm water makes this harder is in my reservoir guide.
Filling, Mixing, and Going Live
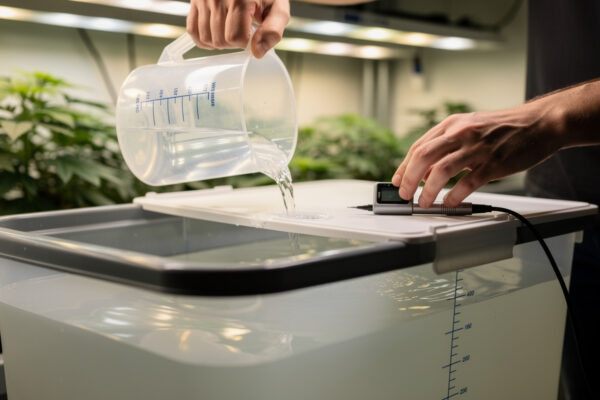
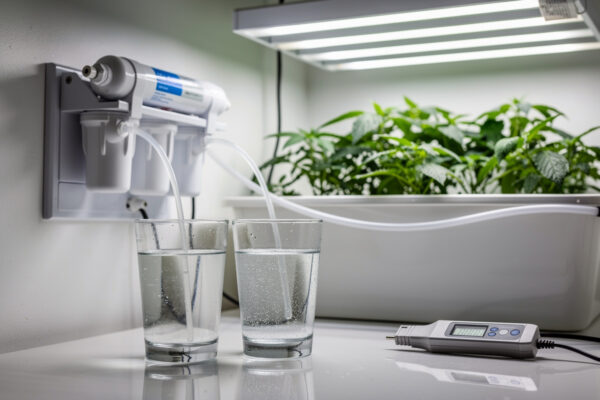
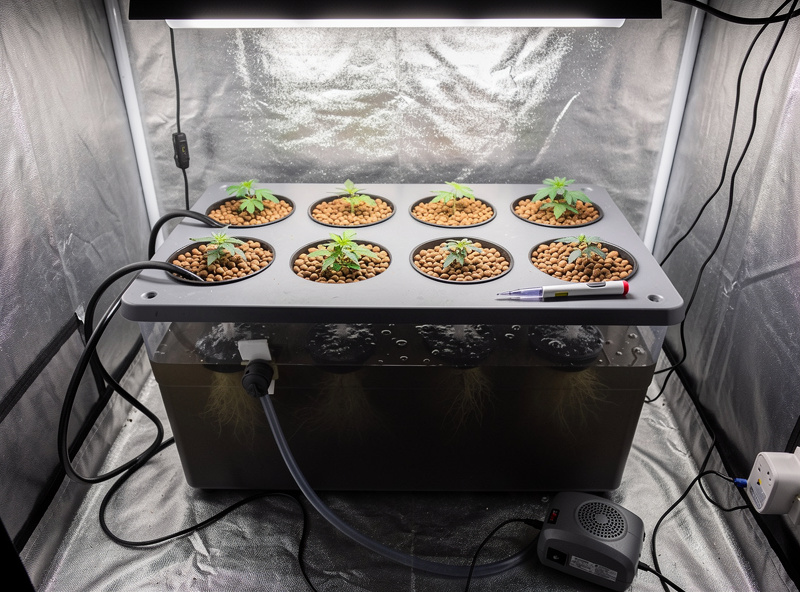
Fill the tank so the water just touches the bottom of the net pots at first, mix nutrients to your target EC, adjust pH into the 5.5–6.0 band, then seat the planted net pots and start the air pump. As roots grow down, lower the water line slightly so an oxygen-rich air gap forms beneath the pots.
The startup sequence matters. Fill, then mix nutrients to target EC and check with a meter, then bring pH into the 5.5–6.0 range before the plants go in. Early on, the water should kiss the base of the net pots so young roots can reach it; as the root mass extends, I let the level drop a little to leave a moist, oxygenated air gap that keeps the upper roots breathing. From here it is all reservoir management — temperature, oxygen, EC drift, and the change cadence — which is the whole story told in the water temperature guide and the pillar. New to all of it? Start with the beginners guide, then come back and build.
Setup Mistakes That Cost You a Crop
The most common reservoir-build mistakes are using a clear tank that grows algae, skipping the check valve so a power cut floods the pump, cutting net-pot holes too large so pots fall through, setting the initial water line too low so young roots cannot reach it, and putting aeration on a timer. Each one is easy to avoid at build time and painful to fix later.
I have made versions of most of these. A translucent tub seemed fine until it greened up within a week. A net-pot hole cut a hair too wide meant a pot sank into the tank mid-grow. The fixes are all upstream: choose opaque, cut holes just under the rim, add the check valve, fill so young roots can drink, and never timer the air pump. Get the build right and you spend your time managing the water, not patching the tank — the management side being the whole point of my reservoir guide.
Building for a Cold or Bright Room
Adapt the build to your environment: in a cold room, plan space for an aquarium heater and insulate the tank; in a hot, bright room, leave room for a chiller and shade the reservoir. Insulation helps in both directions, slowing heat loss in winter and heat gain in summer so whatever device you add barely has to cycle.
My grow room is in Sweden, so I build with short, cold winters in mind — that means leaving a port for a heater and wrapping the tank so the water does not drift down toward room-cold and stall uptake. A grower in a hot climate has the opposite job: route for a chiller and keep the tank out of direct light and off hot floors. Either way, insulation is the cheap win that makes the temperature gear efficient. The thresholds and gear for both extremes are in my water temperature guide, and tank volume — your thermal buffer — comes back to the sizing guide.
Scaling Up: Recirculating Builds
To grow more plants, connect several DWC buckets to one central reservoir with a circulation pump, so all the buckets share one tank you manage in a single place. This recirculating approach makes maintenance easier at scale because you check EC, pH, and temperature on the central res instead of every bucket separately.
A single tote is perfect for learning and for a handful of plants, but once you want a row of them, plumbing them to a shared reservoir is the upgrade. A circulation pump moves solution between the buckets and the central tank, so the whole bank stays uniform and you manage one set of numbers. It is more parts and more to go wrong, but it turns a dozen separate tanks into one. The component choices for that scale-up live in my equipment buying guide, and how the reservoir feeds different system types is covered in the systems guide.
Affiliate disclosure: some links above are Amazon affiliate links. I may earn a small commission at no extra cost to you. I only recommend gear I run on my own reservoirs.
Keep Building
Once your tank is running, these guides take the reservoir from “built” to “dialed in”: