Hydroponics produces 30-50% faster harvests and 20-25% higher yields than soil gardening while using up to 90% less water (saferbrand.com growth-rate research; greengenius.com.au yield comparison), making it one of the most efficient ways to grow fresh food at home even if you have no outdoor space, poor soil, or previous gardening experience. Whether you are a complete beginner wondering how plants grow without soil, an apartment dweller with only a windowsill to spare, or a gardener frustrated with pests and weather, hydroponics offers a reliable path to fresh harvests year-round. This ultimate beginner guide covers everything you need to know—from understanding what hydroponics actually is, through choosing your first system, to harvesting your first crop—with step-by-step instructions that transform complete novices into confident hydroponic growers.
What Is Hydroponics and Why Should Beginners Care?
Hydroponics is simply growing plants without soil. Instead of extracting nutrients from soil through roots, plants receive water and dissolved nutrients directly through their root systems in a controlled solution. The term comes from Greek—”hydro” meaning water and “ponos” meaning work—literally “water working.”
This direct delivery is why hydroponics outperforms traditional gardening. In soil, roots expend significant energy expanding through the medium searching for nutrients. In hydroponics, that energy goes directly into leaf and stem production—producing faster growth and higher yields. The trade-off is that you become responsible for supplying the right nutrient mix yourself — our complete guide to hydroponic nutrients covers what plants actually need and how to mix it.
For beginners, hydroponics eliminates the biggest frustrations of traditional gardening. No weeding. No soil pests like cutworms or grubs. No concern about soil quality, drainage, or contamination. No dependence on seasonal weather patterns. You control the entire growing environment, producing consistent results regardless of external conditions.
Most compelling for beginners: hydroponics works in spaces where traditional gardening is impossible. A few mason jars on a windowsill, a bucket system in a closet, or a vertical tower on an apartment balcony all become productive food gardens. You do not need a yard, good soil, or even outdoor access.
The learning curve is gentler than most beginners expect. If you can follow a simple recipe and check pH occasionally, you can succeed at hydroponics. The systems and techniques have been refined over decades—today’s beginner-friendly methods practically guide you to success.
Hydroponics vs Traditional Gardening: The Beginner Comparison
Understanding how hydroponics differs from soil gardening helps set realistic expectations and choose the right approach for your situation.
| Factor | Hydroponics | Soil Gardening |
|---|---|---|
| Space Required | Minimal—vertical and indoor options | Significant outdoor area preferred |
| Growth Speed | 30-50% faster to harvest | Standard growth rates |
| Water Usage | Up to 90% less water | Regular watering, rain-dependent |
| Pest Problems | Minimal—no soil-borne pests | Weeds, insects, animals common |
| Learning Curve | Moderate—pH and nutrients to learn | Gentle—soil buffers mistakes |
| Startup Cost | $54-300 depending on system | $20-100 for basic tools and soil |
| Year-Round Growing | Easy indoors with lights | Seasonal, climate-dependent |
| Maintenance | Regular monitoring (pH, nutrients) | Weeding, pest control, watering |
| Yield Consistency | High—controlled environment | Variable—weather dependent |
| Best For | Small spaces, indoor growing, speed | Large areas, natural approach, low cost |
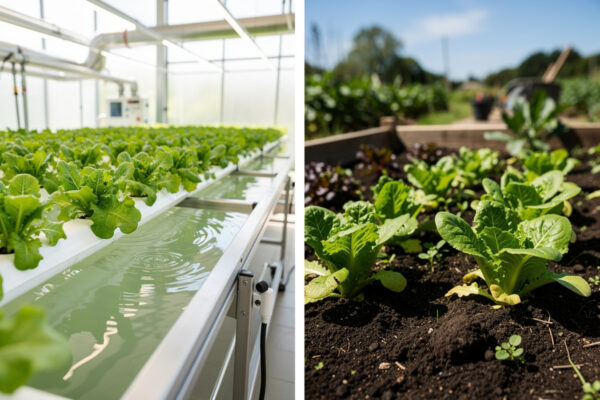
Neither method is universally superior. Hydroponics excels for fast harvests, small spaces, and indoor production. Soil gardening offers lower costs, natural ecosystem benefits, and requires less technical knowledge. Many experienced growers use both—hydroponics indoors for year-round production and soil outdoors in season.
The complete hydroponics vs soil comparison provides deeper analysis to help you decide which method fits your specific situation.
Getting Started: Your First Three Decisions
Before buying any equipment, beginners must make three foundational decisions that determine equipment needs, learning curve, and early success probability.
Decision 1: Where Will You Grow?
Your growing location determines system choices, lighting requirements, and space limitations.
Windowsill Growing: South-facing windows receiving 6+ hours of direct sunlight can support simple Kratky systems growing lettuce and herbs without artificial lighting. This is the lowest-cost entry point—perfect for testing interest before investment.
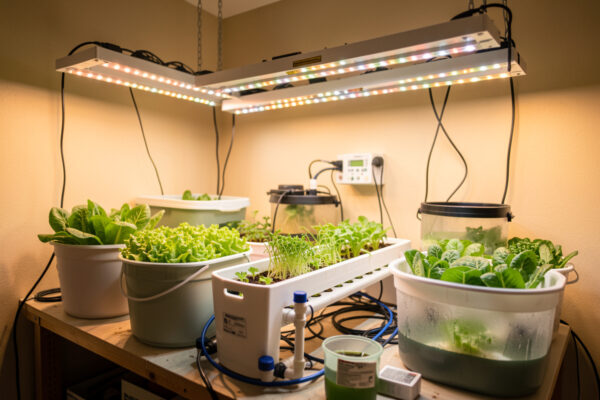
Indoor with Grow Lights: Any indoor space becomes a garden with LED grow lights. Closets, spare rooms, corners of living spaces, and basements all work. This approach costs more initially but provides complete control over growing conditions and year-round production.
Balcony or Patio: Outdoor spaces with electrical access support any hydroponic system type. Natural light reduces or eliminates artificial lighting costs, though you lose the climate control benefits of indoor growing.
For space-efficient growing solutions, the vertical farming systems guide shows how to maximize production in minimal footprint.
Decision 2: What Will You Grow First?
Your first crop selection significantly impacts early success. Some plants forgive beginner mistakes; others punish every error.
Recommended First Crops (Easiest): – Lettuce (any variety)—harvest in 30-45 days, extremely forgiving – Basil—fast growth, continuous harvest, high value – Mint—nearly impossible to kill, thrives in any conditions – Arugula—harvest in 20-25 days, fastest results
Recommended Second Crops (Moderate): – Cherry tomatoes—rewarding but need more attention – Spinach—slightly longer timeline but easy care – Cilantro—fast but bolts quickly in heat
Avoid Initially (Challenging): – Full-size tomatoes—demanding, long timeline – Peppers—slow, need precise nutrients – Fruiting plants generally—master leafy greens first
The complete guide to hydroponic plant growing provides specific variety recommendations and growing timelines for 15+ beginner-friendly crops.
| Crop | Days to Harvest | Difficulty | Best System | Why Start Here |
|---|---|---|---|---|
| Arugula | 20-25 days | Very Easy | Any system | Fastest harvest for quick wins |
| Lettuce | 30-45 days | Very Easy | Any system | Most forgiving of mistakes |
| Basil | 28-35 days | Easy | DWC, NFT | High value, continuous harvest |
| Mint | 30-40 days | Very Easy | Any system | Nearly impossible to kill |
| Spinach | 40-45 days | Easy | DWC, NFT | Nutrient-dense, cold-tolerant |
| Cherry Tomatoes | 60-80 days | Moderate | DWC | First fruiting crop challenge |
| Peppers | 70-90 days | Moderate | DWC, Dutch buckets | Requires mastered fundamentals |
Decision 3: What System Will You Use?
Your first system choice determines cost, complexity, and what you can grow. Beginners should choose between two systems only: Kratky or Deep Water Culture (DWC).
Kratky Method (Passive): – Cost: $15-25 total – Difficulty: Very Easy – Best for: Lettuce, herbs, testing hydroponics – No electricity required – Fill reservoir and harvest 4-6 weeks later
Deep Water Culture (DWC): – Cost: $40-60 total – Difficulty: Easy – Best for: All plants including tomatoes and peppers – Requires air pump (electricity) – Weekly maintenance checks
Start with Kratky if you want the absolute simplest introduction with zero ongoing costs. Choose DWC if you want to grow fruiting plants or prefer learning active system management from the beginning. I still keep a Kratky jar running on my own bench years into this — it’s my zero-pump control method whenever I want to isolate a variable, not just a beginner stepping stone you graduate out of.
The complete hydroponic systems guide breaks down all six major system types with specific recommendations for every skill level.
Equipment Essentials for Beginners
Beginners often feel overwhelmed by equipment choices. Focus on four essentials—everything else is convenience or expansion.
The Four Essentials (Cannot Skip)
1. pH Meter ($25-40): Digital pH meters are non-negotiable. Plants cannot absorb nutrients when pH drifts outside 5.5-6.5. Test strips are too inaccurate for hydroponics. This is your most important purchase.
As an Amazon Associate I earn from qualifying purchases.
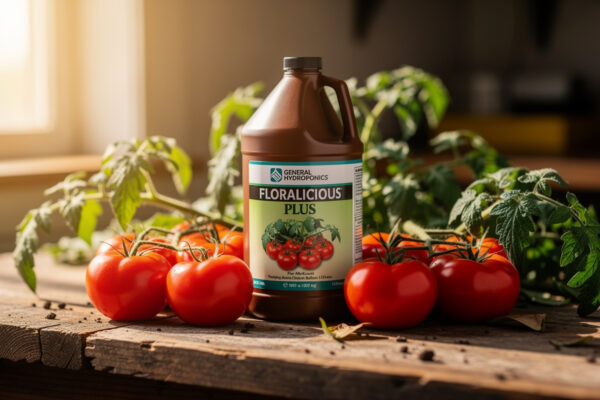
2. Hydroponic Nutrients ($15-30): Plants need 16 essential elements delivered in available forms. The General Hydroponics catalog is the proven mainstream standard — affordable, effective, and widely available. For a true beginner, FloraNova Grow as a single bottle is the simplest practical pick.
3. Growing Medium ($10-20): Clay pebbles (hydroton) support roots inertly without affecting water chemistry. One bag serves multiple small systems.
4. Net Pots ($6-12): These mesh-sided pots hold growing medium while allowing root access to nutrient solution. Assorted sizes accommodate different plants.
Total essential investment: $56-102. Everything else adds convenience or enables expansion.
Important Additions (Defer Initially)
EC/TDS Meter ($20-35): Measures nutrient concentration, preventing overfeeding and underfeeding. Buy after mastering pH management.
LED Grow Light ($30-100): Required for indoor growing without adequate natural light. Not needed for sunny windowsill setups.
Air Pump ($12-25): Required for DWC and beneficial for any standing water. Not needed for Kratky passive systems.
Budget Shopping Lists
The complete hydroponic equipment buying guide provides three complete shopping lists:
- Bare Minimum ($54-66): Kratky setup for lettuce and herbs
- Recommended Starter ($122-155): DWC capability with LED lighting
- Comfortable Indoor ($232-285): Full monitoring and backup systems
For DIY builders, the DIY hydroponics on a budget guide shows how to build complete systems for under $50 using household materials.
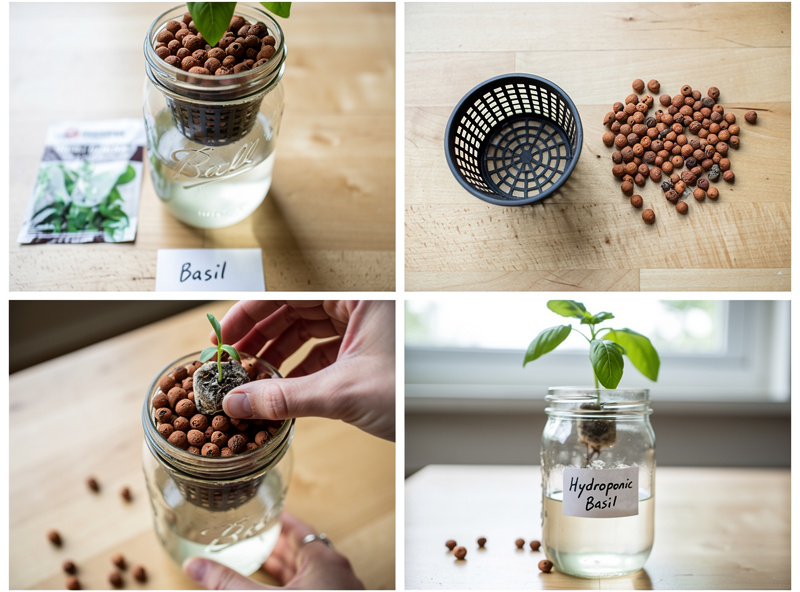
Your First Hydroponic System: Step-by-Step Setup
This walkthrough builds a simple Kratky system—perfect for beginners with minimal investment. Master this, then expand to more complex systems.
Materials Needed
- 1-quart mason jar or food-safe plastic container
- 3-inch net pot
- Clay pebbles (hydroton)
- Lettuce seedling or seeds
- pH meter and pH adjustment solutions
- Hydroponic nutrients
- Water (tap is fine if pH is neutral)
Total cost: $20-30 if buying everything new, $10-15 if you have a jar.
Setup Steps
Step 1: Prepare the Container. Clean your jar thoroughly. If using a mason jar, the opening perfectly fits standard 3-inch net pots. For other containers, cut a hole in the lid slightly smaller than your net pot diameter.
Step 2: Fill with Nutrient Solution. Mix hydroponic nutrients at half the manufacturer’s recommended strength. Test and adjust pH to 5.8-6.2 using your pH meter and adjustment solutions. Fill the jar to within 1 inch of the top.
Step 3: Prepare the Net Pot. Rinse clay pebbles to remove dust. Fill the net pot with pebbles, leaving a small depression in the center for your seedling.
Step 4: Plant Your Seedling. Gently rinse soil from a lettuce seedling’s roots (if using seedlings) or place 2-3 lettuce seeds in rockwool cube in the net pot center. Lower the net pot into the jar opening—the bottom should touch the nutrient solution. Seeds require more precise moisture control than seedlings do, so if you want to germinate your own rather than buying starts, CityRooted has a complete guide to growing plants from seed indoors covering tray setup, timing, light requirements, and the transplant process.
Step 5: Place and Wait. Put your jar in a sunny windowsill or under LED grow lights. Check water level weekly, refilling with pH-balanced water as needed. Harvest in 30-45 days.
This simple system teaches you pH management, nutrient mixing, and plant observation—foundations that transfer to every hydroponic method.
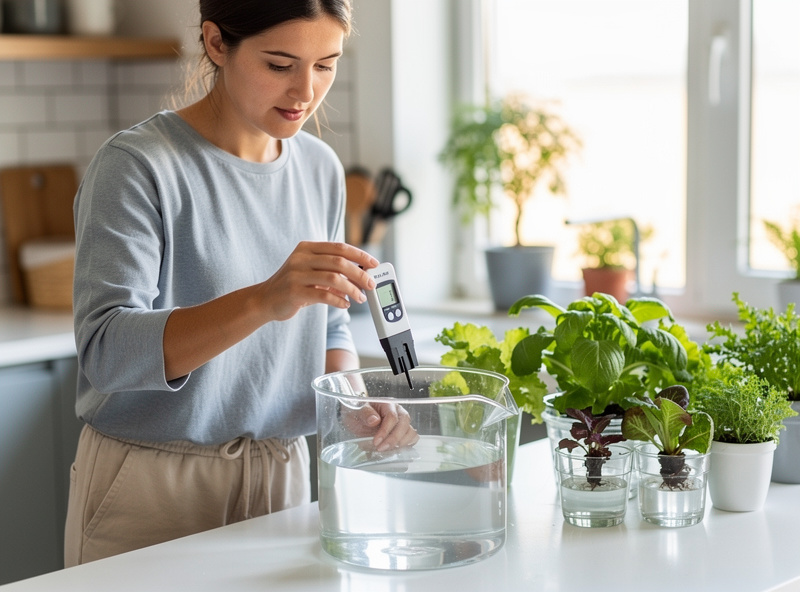
Understanding pH: The Key to Hydroponic Success
pH measures how acidic or basic your nutrient solution is on a scale of 0-14. Plants absorb nutrients best when pH stays between 5.5-6.5. Outside this range, plants starve regardless of how much fertilizer you add.
This phenomenon—nutrient lockout—is the single most common reason beginner grows stall out, and pH drift is the number-one driver of it (UF/IFAS HS1422 covers why pH and EC monitoring matters at every growth stage). The frustrating part: plants show deficiency symptoms (yellowing, stunted growth) that look like they need more nutrients, when actually the pH is preventing absorption of existing nutrients.
pH Management for Beginners
Test Daily Initially: New systems drift as plants establish. Test pH every morning for the first week until you understand your system’s behavior.
Adjust Gradually: Never add more than 1ml of pH Up or Down per gallon at once. Drastic pH swings shock plants. Target 0.2-0.3 pH adjustment per application.
Track Patterns: Some plants acidify solution; others raise pH. Understanding your specific setup’s pattern lets you anticipate adjustments rather than react to problems.
Keep Records: Note pH readings and adjustments in a simple log. Patterns emerge that predict when intervention is needed.
The common hydroponic mistakes guide covers pH problems in detail with troubleshooting steps for lockout recovery.
Your First Week: Daily Checklist
The first week establishes habits that determine long-term success. This daily checklist takes 5 minutes but prevents most of the problems that catch beginners off guard.
Every Morning:
- Visual plant inspection—look for color changes, wilting, or pests
- pH test and adjust if outside 5.5-6.5
- Verify water level covers bottom of net pot
- Check that air pump is running (for DWC systems)
Every 3 Days:
- Top off reservoir with pH-balanced water
- Inspect roots (in transparent containers) for color and health
- Note any changes in growth rate or leaf appearance
Weekly:
- Complete reservoir change with fresh nutrient solution
- Clean any visible algae from containers
- Review your pH log for patterns
These simple checks catch problems while they are still fixable. Neglect leads to cascading failures that surprise beginners with seemingly sudden crop loss.
Common Beginner Mistakes and How to Avoid Them
Learning from others’ mistakes accelerates your success. These are the most common errors beginners make:
Mistake 1: Overfeeding Nutrients More nutrients do not mean more growth—they mean nutrient burn and root damage. Start at half-strength manufacturer recommendations and increase gradually only if plants show deficiency.
Mistake 2: Ignoring pH The cheapest digital pH meter is better than no meter. Test strips are too inaccurate — my own first meter was a strip kit, and it read “fine” right up until my first lettuce crop started yellowing. pH drift outside 5.5-6.5 causes more crop failures than any other factor.
Mistake 3: Insufficient Light Standard room lighting is not enough for plant growth. Either use a sunny windowsill (6+ hours direct sun) or invest in LED grow lights. Leggy, stretched plants scream “more light needed.”
Mistake 4: Starting Too Complex Begin with Kratky or DWC. Save NFT, aeroponics, and Dutch buckets for after you have successfully harvested lettuce at least twice.
Mistake 5: Choosing the Wrong Plants Start with lettuce, not tomatoes. Leafy greens teach fundamentals and harvest quickly. Fruiting plants require mastery of those fundamentals first.
The complete guide to common hydroponic mistakes provides detailed troubleshooting for each error with recovery strategies.
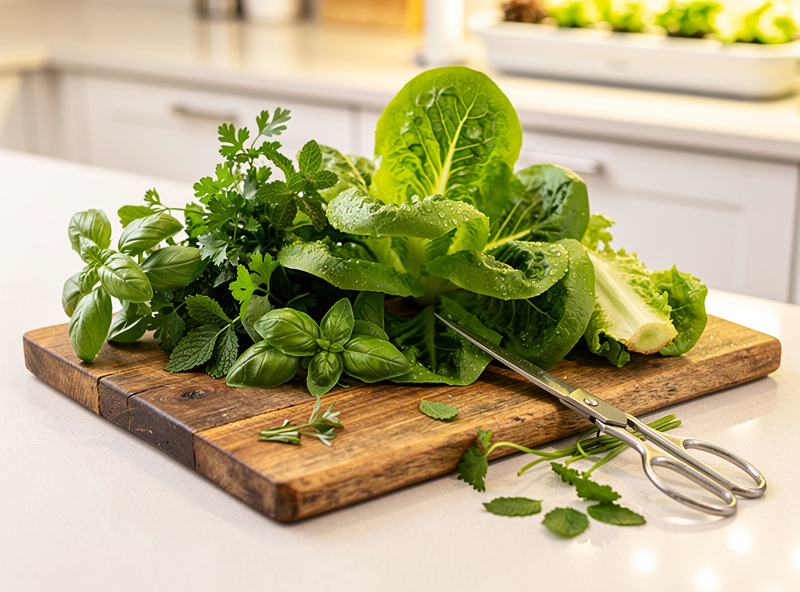
From First Harvest to Continuous Production
Your first successful harvest is a milestone, but it is just the beginning. Transitioning from single-harvest experiments to continuous food production requires planning.
The Staggered Planting Strategy
Instead of harvesting everything at once and starting over, stagger plantings every 2-3 weeks. This creates a perpetual harvest cycle where mature plants are ready as younger plants establish — it’s the same staggering discipline I use across my own DWC totes so I’m never eating store-bought lettuce between harvests.
Example Schedule: – Week 1: Start 4 lettuce plants – Week 3: Start 4 more lettuce plants (first batch maturing) – Week 5: Harvest first batch, start 4 replacement plants – Week 7: Harvest second batch, start replacements
This approach provides continuous fresh greens rather than feast-or-famine cycles.
Scaling Your Operation
As skills develop, expansion follows predictable stages:
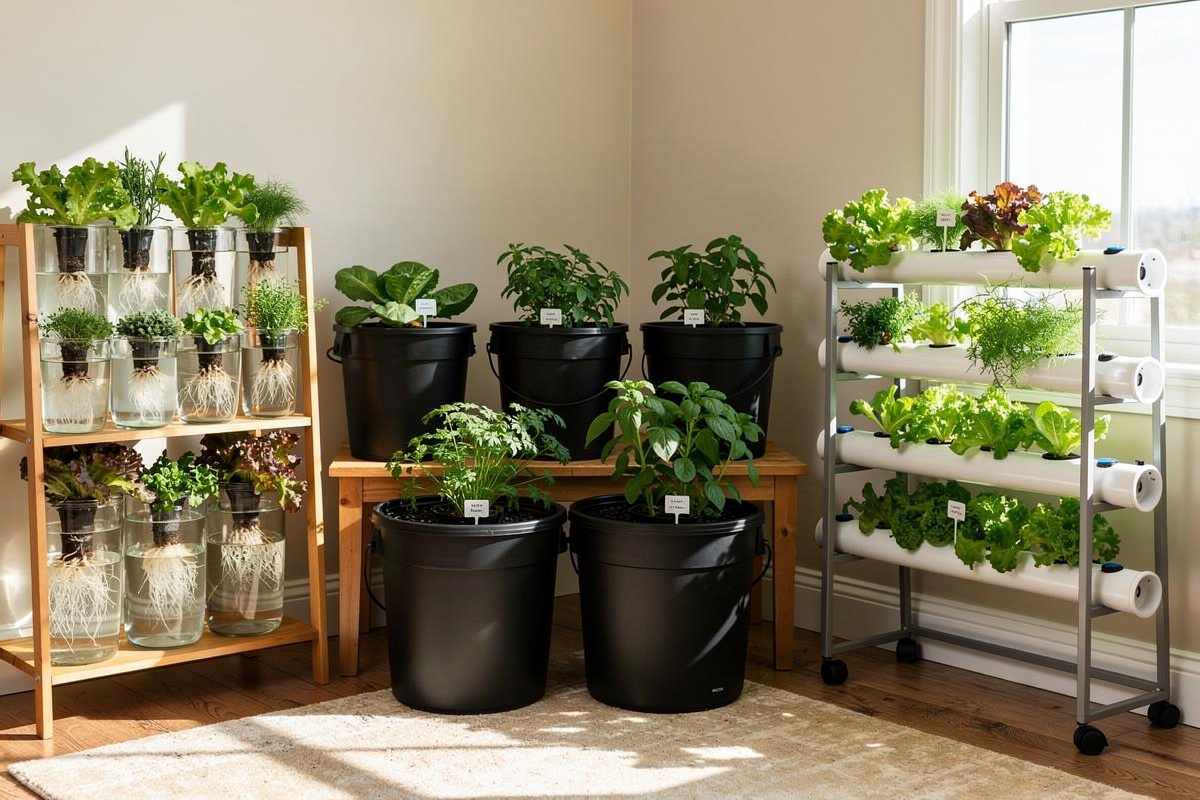
Stage 1 (1-4 plants): Single Kratky jars or small DWC bucket. Master fundamentals with minimal investment.
Stage 2 (5-12 plants): Multiple DWC buckets or NFT channel. Increase production while learning active system management.
Stage 3 (13-40 plants): Multi-channel NFT, vertical systems, or Dutch buckets. Requires environmental controls (ventilation, humidity management).
Stage 4 (40+ plants): Automated systems, professional-grade equipment, commercial considerations.
Only expand after consistently succeeding at your current scale. Each stage teaches skills the next stage requires.
When Problems Arise: Beginner Troubleshooting
Even careful beginners encounter problems. Recognizing symptoms early and knowing responses saves crops.
Yellowing Leaves
Yellowing indicates nutrient deficiency—but which nutrient? Check pH first. If pH is correct (5.5-6.5), the problem is likely nitrogen deficiency in leafy greens or iron deficiency in fruiting plants. Gradually increase nutrient concentration by 25% and observe over 3-4 days.
Leggy, Stretched Growth
Plants reaching for light need more intensity. Lower LED fixtures closer to canopy (minimum 12 inches to prevent burning) or increase daily light hours. This problem appears within days of insufficient lighting—catch it early.
Brown Leaf Tips
Crispy brown tips signal nutrient burn from overfeeding. Immediately reduce nutrient concentration by 50% and flush system with pH-balanced water. Roots recover quickly if caught early.
Root Problems
Healthy roots are bright white. Brown, slimy roots indicate root rot from insufficient oxygen or warm water. For DWC, verify air pump operation. Add beneficial bacteria (Hydroguard) to combat pathogens. Replace reservoir with cool, fresh solution — I keep every res at or below 68°F (20°C), and once it’s past 72°F (22°C) root rot risk climbs fast regardless of how much oxygen you’re pumping in.
Wilting Despite Wet Roots
This looks like underwatering but is usually the opposite problem: root rot or oxygen deprivation. Check root color first—if roots are brown or slimy rather than white, increase aeration and treat as a root rot case rather than adding more water.
Algae in the Reservoir
Green growth in your reservoir or tubing means light is reaching the nutrient solution. Block all light immediately—wrap containers in black tape, foil, or opaque paint. Algae competes with plants for oxygen and nutrients and gets worse the longer it is left unaddressed.
Foul Smell from the System
A bad smell almost always means anaerobic bacteria or dead root matter. Do a full system clean and improve oxygenation immediately—this is a more urgent signal than most other symptoms since it indicates the reservoir has already gone anaerobic.
Slow Growth With No Obvious Symptom
When nothing looks visibly wrong but growth has stalled, work through causes in order: check pH first, then nutrient concentration, then water temperature. Most “mystery” slow growth traces back to one of these three factors once you check them systematically instead of guessing.
For comprehensive troubleshooting guidance, see the common hydroponic mistakes guide.
Learning Path: From Beginner to Expert
Hydroponic skill development follows a clear progression. Understanding this path helps you choose appropriate challenges at each stage.
Month 1-2: Foundation
Master Kratky lettuce growing. Learn pH management, nutrient mixing, and basic plant observation. Harvest your first crops successfully. This stage proves hydroponics works and builds confidence.
Key skills: pH testing, nutrient preparation, planting technique, harvest timing
Month 3-4: Expansion
Transition to Deep Water Culture. Add air pumps and learn active system management. Experiment with different lettuce varieties and herbs. Try your first cherry tomato plant.
Key skills: Pump management, reservoir maintenance, nutrient adjustment, pest identification
Month 5-6: Diversification
Explore NFT or other advanced systems. Grow multiple plant types simultaneously. Develop understanding of different nutrient requirements for leafy greens versus fruiting plants.
Key skills: System selection, environmental control, plant-specific care, problem diagnosis
Month 7-12: Mastery
Run continuous production with staggered plantings. Optimize lighting, nutrients, and environment for maximum yield. Experiment with advanced techniques like training and pruning.
Key skills: Production planning, optimization, scaling, advanced techniques
The hydroponic plant growing guide provides crop-specific guidance for every stage of this progression.
Next Steps: Your Hydroponic Journey Starts Now
You now understand what hydroponics is, why it works, and exactly how to start. The difference between reading about hydroponics and actually growing is the difference between thinking about fresh salad and harvesting it from your windowsill.
Your immediate action plan:
This Week: Order the bare minimum equipment (pH meter, nutrients, clay pebbles, net pots, mason jar). Total investment: $30-50.
Next Week: Set up your first Kratky system with lettuce. Mix nutrients, adjust pH, plant your seedling. Take daily pH readings to learn your system’s behavior.
Weeks 3-6: Watch your lettuce grow. Observe how pH changes, how roots develop, how leaves respond to light. This observation teaches more than any article.
Week 6-8: Harvest your first crop. Taste the difference between hydroponic and store-bought lettuce. Experience the satisfaction of food you grew yourself.
Month 2+: Expand using the guides below. Try new plants, new systems, new techniques. Each success builds confidence for the next challenge.
Hydroponics is not complicated—it is simply different from soil gardening. Follow the steps, trust the process, and you will be growing fresh food in weeks, not months.
What is the easiest hydroponic system for beginners?
The Kratky method is the easiest hydroponic system for beginners. It requires no electricity, no pumps, and no moving parts—just a container with nutrient solution and a plant in a net pot. Total cost is $15-25, and lettuce harvests in 30-45 days with minimal maintenance. Deep Water Culture (DWC) is the second easiest, adding an air pump for oxygenation while remaining simple to operate. Both systems teach hydroponic fundamentals before advancing to more complex methods.
How much does it cost to start hydroponics?
Starting hydroponics costs $54-66 for a basic Kratky setup, $93-122 for a starter Deep Water Culture system, or $122-155 with LED grow lights for indoor growing. The essential equipment includes a pH meter ($25-40), hydroponic nutrients ($15-30), growing medium ($10-20), and net pots ($6-12). DIY builds using household containers cost well under the price of pre-made kits. The DIY hydroponics budget guide shows complete setups for under $50.
Do I need special lights for hydroponics?
Indoor hydroponic systems need full-spectrum LED grow lights providing photosynthetically active radiation (PAR) in the 400-700nm range. Standard household LED bulbs do not provide sufficient intensity or spectrum for plant growth. However, if you have a south-facing window with 6+ hours of direct sunlight daily, you can grow lettuce and herbs without artificial lights. For indoor growing without adequate natural light, a quality 100W LED panel ($50-80) covers 2-3 square feet of growing area.
What should I grow first in hydroponics?
Start with lettuce for your first hydroponic grow. Butterhead and looseleaf varieties germinate in 2-3 days, tolerate pH fluctuations, and harvest in 30-45 days. Basil is an excellent second crop—fast growth and continuous harvesting. Avoid tomatoes, peppers, and other fruiting plants until you have successfully grown lettuce at least twice. The hydroponic plant growing guide provides detailed variety recommendations and timelines for 15+ beginner-friendly crops.
How often do I need to check my hydroponic system?
Check hydroponic systems daily for the first week, then every 2-3 days once established. Daily checks take 5 minutes: visual plant inspection, pH test, and water level verification. Weekly maintenance includes reservoir changes and thorough cleaning. The common hydroponic mistakes guide provides checklists and troubleshooting for every maintenance task. Consistent 5-minute daily checks prevent problems that require hours to fix later.
Can hydroponics be done without electricity?
Yes, the Kratky method works entirely without electricity. This passive system uses no pumps, timers, or lights—just a container with nutrient solution and a plant in a net pot. Perfect for off-grid locations or anyone wanting the simplest possible hydroponic setup. Lettuce and herbs thrive in Kratky systems with only natural light from a sunny windowsill. For indoor growing without electricity, choose south-facing windows receiving 6+ hours of direct sunlight daily.
How long until my first hydroponic harvest?
Most beginners harvest their first hydroponic crop in 30-45 days starting with lettuce. Arugula provides the fastest harvest at 20-25 days. Basil and herbs harvest in 28-40 days. Cherry tomatoes take 60-80 days—grow lettuce first while waiting for fruiting plants. This is 30-50% faster than soil-grown equivalents. The best plants for hydroponics guide provides specific days-to-harvest timelines for 15+ beginner-friendly crops.
Complete Guide Library: Your Learning Path
Use these specialized guides to deepen your knowledge as you progress from beginner to expert:
Getting Started
- DIY Hydroponics on a Budget — Build complete systems for under $50
- Hydro Indoor Garden Setup Guide — Complete walkthrough for first-time growers
- Essential Hydroponic Equipment Guide — What you actually need to get started
Understanding Systems
- Hydroponic Systems: Complete Guide — Compare Kratky, DWC, NFT, and more
- Hydroponic Systems Explained — Deep dive into system mechanics
- Best Hydroponic Growing Kits — Pre-configured systems reviewed
Growing Plants
- Complete Guide to Hydroponic Plant Growing — Master plant selection and care
- Best Plants for Hydroponics — 15 beginner-friendly crops with timelines
- Hydroponic Lettuce vs Soil — Grow your first crop successfully
- Hydroponic Herbs vs Soil — Basil, mint, cilantro, and more
- Hydroponic Tomatoes vs Soil — First fruiting plant guide
- Hydroponic Peppers vs Soil — Sweet and hot varieties
- Hydroponic Strawberries vs Soil — Long-term production
Equipment and Buying
- Hydroponic Equipment: Complete Buying Guide — Budget shopping lists from $54-352
- Best Hydroponic Growing Kits — Pre-made systems reviewed and rated
- Essential Hydroponic Equipment Guide — Detailed equipment breakdown
Avoiding Problems
- Common Hydroponic Mistakes and How to Fix Them — Prevent the most common beginner failures
- Hydroponics vs Soil: Complete Comparison — Choose the right method
Advanced Growing
- Vertical Farming Systems — Maximize production in limited space
Start with this guide, follow the step-by-step instructions, and reference specialized guides as your skills develop. Your first harvest is closer than you think.