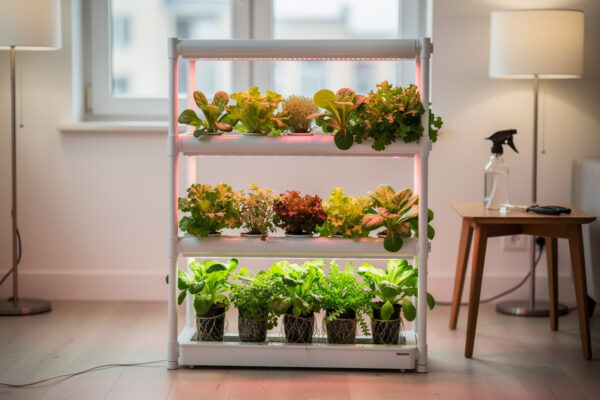
Vertical gardening systems let you grow upward instead of outward — stacking plants on multiple levels to produce meaningfully more food per square foot of floor space than a single flat hydroponic tray or bucket row. For indoor growers working with limited floor space, the right vertical system turns a small corner into a productive food garden.
This guide compares every major vertical system type, breaks down plant capacity, cost, and complexity, and helps you choose the best design for your indoor hydroponics setup.
As an Amazon Associate I earn from qualifying purchases.
Vertical System Types Compared
There are four main categories of vertical gardening systems used in indoor hydroponics. Each has distinct advantages, limitations, and ideal use cases.
| System Type | Plant Sites | Floor Space | Height | DIY Cost | Commercial Cost | Difficulty |
|---|---|---|---|---|---|---|
| Tower (aeroponic) | 20-40 | 2.5 x 2.5 ft | 5-6 ft | $80-$150 | $350-$600 | Moderate |
| Stacked NFT | 12-36 | 2 x 4 ft | 4-6 ft | $60-$120 | $200-$400 | Easy-Moderate |
| Wall-mounted | 12-48 | 0 (wall) | 3-5 ft | $40-$80 | $150-$300 | Easy |
| A-frame | 20-40 | 3 x 2 ft | 4-5 ft | $60-$120 | $300-$500 | Easy-Moderate |
Tower Systems (Aeroponic Vertical)
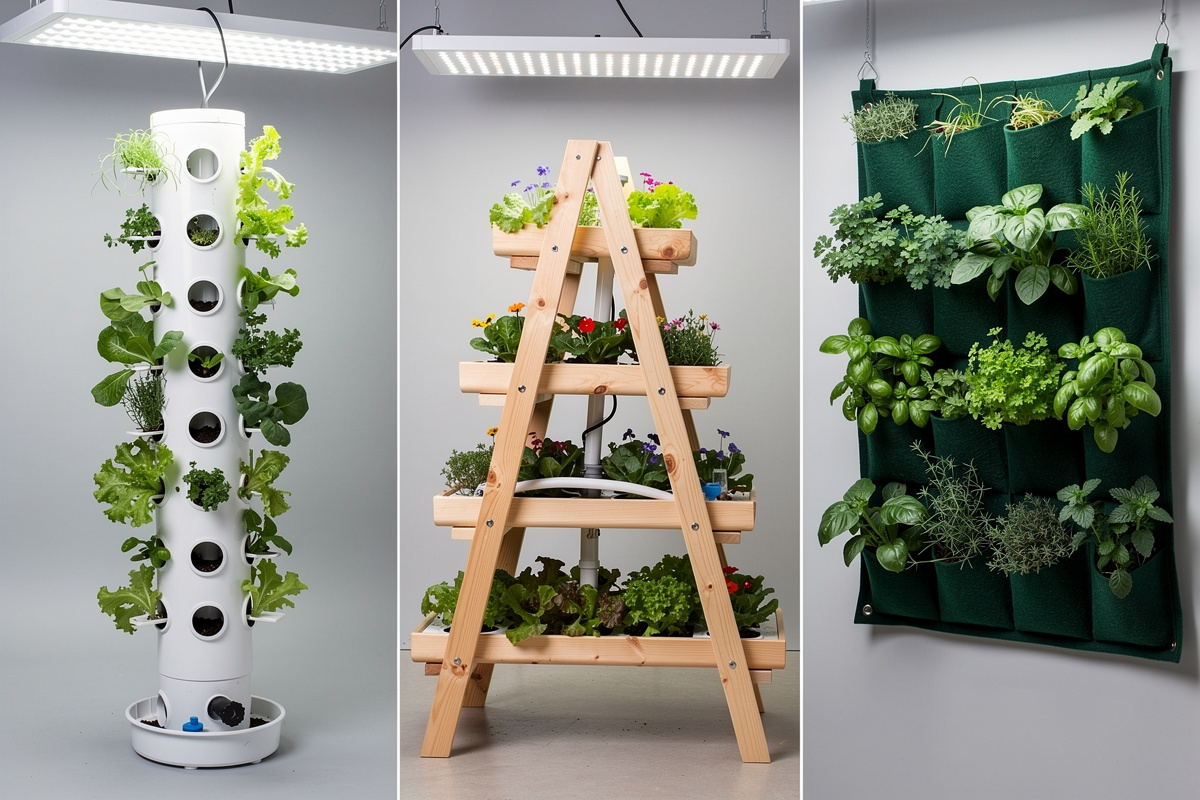
A commercial vertical hydroponic tower garden is the setup I get asked about most when floor space is the constraint — it’s the most popular vertical hydroponic design for home use. A central column holds stacked growing modules with plant sites around the circumference. A pump lifts nutrient solution to the top, where it flows down through the tower, misting roots along the way (aeroponic delivery).
How Tower Systems Work
- Reservoir at the base holds 10-20 gallons of nutrient solution.
- Submersible pump pushes solution to the top of the tower through a central pipe.
- Solution cascades down through each module, contacting roots through misting or drip exposure.
- Excess solution drains back into the reservoir for recirculation.
- Each module has 4-8 plant sites angled outward at 30-45 degrees for light access.
Best Tower System Plants
Towers favor lightweight plants with compact root systems. The angled growing pockets support plants up to about 12 inches tall. Beyond that, plants become top-heavy and droop.
- Ideal: Leaf lettuce, basil, cilantro, parsley, mint, baby kale, bok choy
- Good: Strawberries (fruit hangs naturally), spinach, chard, arugula
- Marginal: Dwarf peppers (need pollination and support)
- Not suitable: Tomatoes, full-size peppers, cucumbers, melons
Tower System Pros and Cons
| Pros | Cons |
|---|---|
| Highest plant density per sq ft | Expensive commercial kits ($350-$600) |
| Visually attractive, works as decor | Needs wrap-around or rotating lighting |
| Efficient water recirculation | Pump failure drains system within minutes |
| Easy harvesting at standing height | Limited to small, lightweight plants |
| Modular — add sections for more capacity | Bottom sections get less light than top |
Stacked NFT Channel Systems
Stacked NFT (Nutrient Film Technique) systems arrange horizontal growing channels at multiple heights on a shelving rack or wall bracket. Each channel is a separate growing level — a thin film of nutrient solution flows through the bottom of each channel, and plant roots sit in the flowing film (Virginia Cooperative Extension covers the same core design for commercial NFT).
How Stacked NFT Works
- Reservoir on the floor holds nutrient solution.
- Pump feeds solution to the top channel through tubing.
- Solution flows through the top channel by gravity (channels slope 1-2% downward).
- Return line from each channel drains back to the reservoir, or the output of one channel feeds the input of the one below (cascade design).
- Each channel holds 4-8 plant sites using net pots or growing cups.
Stacked NFT Advantages
- Each tier is independently accessible — You can reach any plant without disturbing others. Towers require reaching through or around other plants.
- Easy to clean — Individual channels slide out for cleaning between crops. Towers require full disassembly.
- Flexible sizing — Add or remove channels as needed. Start with 2 tiers and expand to 5.
- Simple lighting — Mount one LED bar under each shelf. Light distribution is even across each tier.
- DIY-friendly — Standard PVC gutters, vinyl fence posts, or food-grade plastic channels work as growing troughs.
Stacked NFT Limitations
- Channels must be precisely leveled — even a small tilt causes dry spots or pooling, a point Oregon State University Extension’s NFT guidance flags as one of the most common home-build mistakes.
- Pump-dependent — if the pump stops, roots dry out within 1-2 hours.
- Lower plant density than towers (12-36 plants vs 20-40 in the same floor space).
- Roots can clog narrow channels — periodic trimming required for long-running crops.
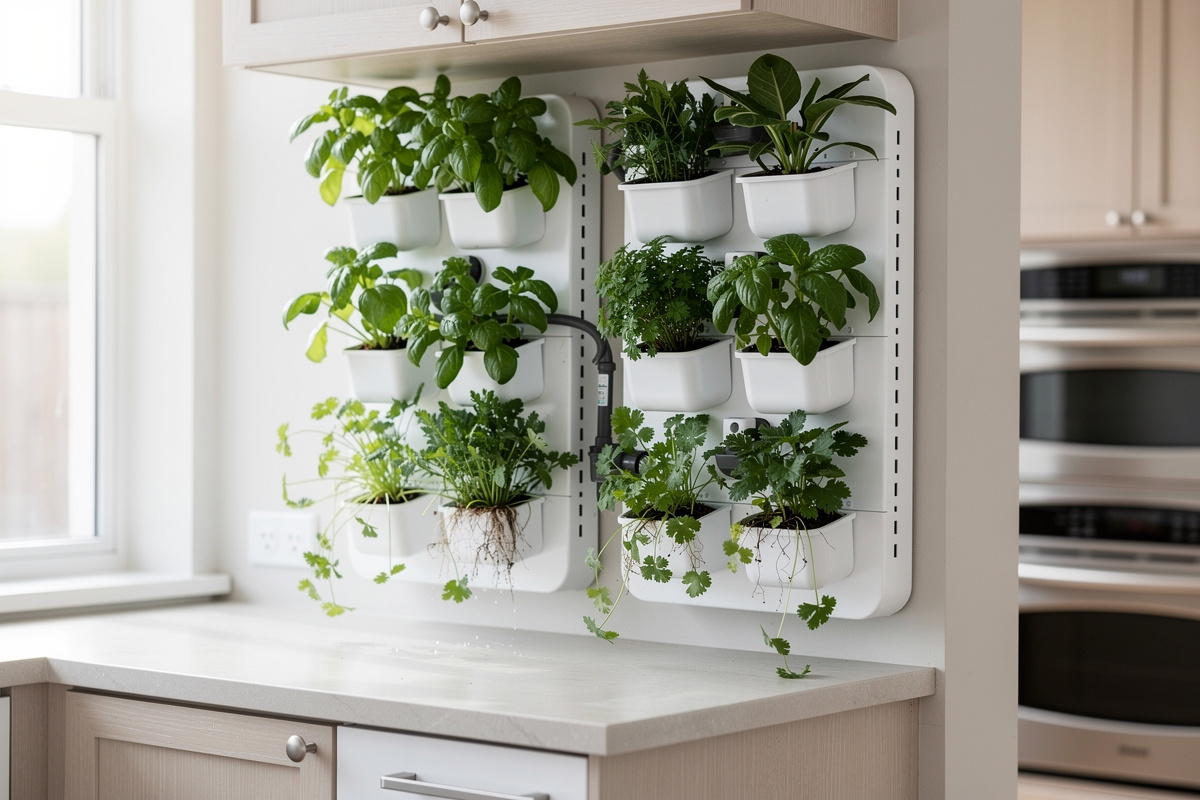
Wall-Mounted Vertical Systems
Wall-mounted systems use zero floor space — plants grow from pockets, pouches, or modular panels attached to a wall. Drip irrigation delivers nutrient solution from a supply line at the top, gravity pulls it through each pocket, and a gutter at the bottom collects runoff for recirculation.
Types of Wall Systems
- Felt pocket panels: Fabric pockets sewn onto a waterproof backing. Cheapest option ($30-$60 for a 12-pocket panel). Roots grow into the felt. Drawback: uneven moisture distribution, pockets dry at different rates.
- Modular plastic panels: Snap-together rigid plastic modules with built-in reservoirs per pocket. More expensive ($100-$250) but better water retention and easier maintenance.
- DIY gutter/channel wall: Horizontal gutters or PVC halves mounted to the wall in rows. Essentially a wall-mounted stacked NFT system. Best DIY approach for food production.
Wall System Considerations
| Factor | Details |
|---|---|
| Wall protection | Always use a waterproof backing. Moisture damage to drywall is the biggest risk |
| Weight | A 24-pocket panel with plants and water weighs 30-50 lbs. Use wall anchors rated for the load |
| Lighting | Needs flat panel or floodlight aimed at the wall from 2-3 feet away. Uneven lighting = uneven growth |
| Water management | Drip systems need precise flow control. Too much = dripping mess. Too little = dry upper pockets |
| Maintenance access | Upper pockets easy to reach. Lower pockets require bending. Center pockets on wide panels are hard to access |
A-Frame and Pyramid Systems
A-frame systems lean two angled growing surfaces against each other, forming a triangular cross-section. Plant sites face outward on both angled surfaces, and nutrient solution drips from the peak down both sides.
Why A-Frames Work Well Indoors
- Natural light angle — The 45-60 degree growing surfaces face upward toward an overhead grow light, giving better light distribution than vertical tower surfaces.
- Structural stability — The triangular shape is inherently stable. No wall mounting needed.
- Dual growing surfaces — Both sides of the A-frame produce food, effectively doubling the growing area within the footprint.
- Easy DIY build — Two PVC gutter sections leaning against a central support beam, with a drip line at the peak.
A-Frame Limitations
- Wider footprint than towers (3×2 feet vs 2.5×2.5 feet for the same plant count).
- Bottom plants receive less light than top plants. The angle helps but does not eliminate the gradient entirely.
- Drainage collects at the base — needs a proper gutter or drip tray to catch runoff.
- Not as visually clean as commercial towers — works better in utility spaces than living rooms.
Choosing the Right System for Your Situation
Use this decision guide to narrow your options based on your primary constraint:
| If Your Priority Is… | Choose This System | Why |
|---|---|---|
| Maximum plants, minimum floor space | Tower garden | 20-40 plants in 2.5×2.5 ft — best density ratio |
| Easiest maintenance and access | Stacked NFT | Each channel slides out independently, simple to clean |
| Zero floor space used | Wall-mounted | Mounts to wall, no floor footprint at all |
| Best light distribution | A-frame | Angled surfaces face the light, more even coverage |
| Lowest cost | DIY wall or stacked NFT | $40-$120 for materials, basic tools needed |
| Best looking (living room/kitchen) | Commercial tower | Designed as furniture, clean aesthetic |
| Growing fruiting crops vertically | Stacked NFT with support | Horizontal channels handle heavier plants better than towers |
DIY vs Commercial: What You Get for the Money
Every vertical system can be built from standard hardware store materials. The question is whether your time and skill level make DIY worthwhile.
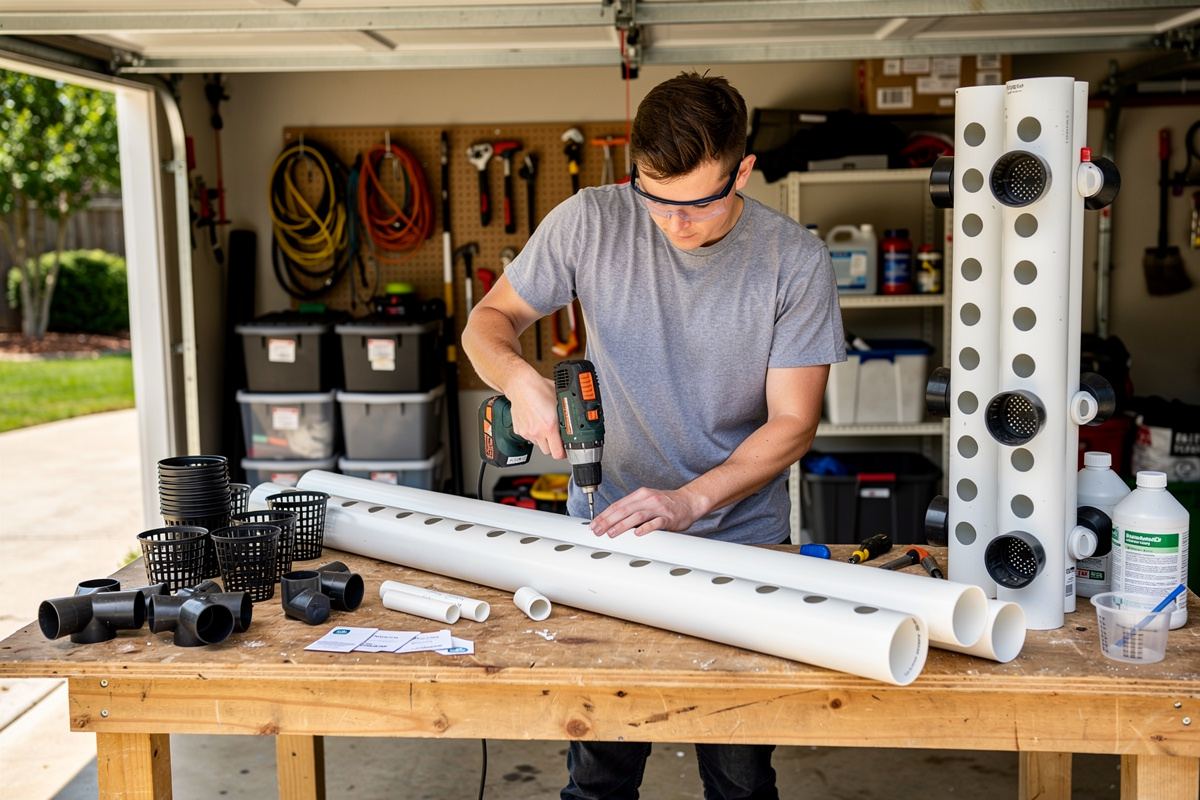
DIY Build Materials
A basic DIY PVC tower requires: 4-inch PVC pipe (6 ft), PVC end caps, 2-inch hole saw, net pots, a submersible pump like the ones I run on my own totes, 5-gallon bucket reservoir, vinyl tubing, and clay pebbles. Total: $80-$150 plus 3-5 hours of build time.
A DIY stacked NFT uses: PVC gutters or vinyl fence posts (3-5 sections), wire shelving unit, submersible pump, tubing and fittings, net pots. Total: $60-$120 plus 2-4 hours of build time.
For detailed build instructions, see our DIY hydroponics on a budget guide which includes step-by-step plans for both systems.
When to Buy Commercial
- You want a system that works out of the box with no assembly beyond stacking modules.
- Aesthetics matter — the system will be in a visible living space.
- You want customer support and replacement parts readily available.
- Your time is worth more than the $150-$400 price difference.
Setting Up Your Vertical System
Regardless of which system you choose, the setup fundamentals are the same. Follow this checklist for a smooth first run.
Pre-Setup Checklist
- Choose location: Near a power outlet (lights + pump), away from direct heat/AC vents, on a waterproof surface or with a drip tray beneath.
- Check weight capacity: A loaded vertical system weighs 30-80 lbs. Ensure the floor, shelf, or wall can support it. Use appropriate wall anchors for wall-mounted systems.
- Plan drainage: Even sealed systems occasionally drip during reservoir changes or overflow. Protect flooring beneath and behind the system.
- Position lighting: Install grow lights before loading plants. Adjust height and angle so every tier or section receives adequate coverage.
First-Run Procedure
- Assemble the system completely before adding water or plants.
- Fill the reservoir with water and run the pump for 30 minutes to test for leaks. Fix any drips before proceeding.
- Add nutrients to half strength. Mix Part A first, stir, then Part B.
- Test and adjust pH to 5.8-6.2.
- Add growing medium (pre-soaked clay pebbles or rinsed rockwool) to each plant site.
- Plant seedlings or starter plants — begin with lettuce and herbs for your first vertical grow.
- Turn on lights (16 hours on / 8 off) and pump.
- Monitor daily for the first week: check pH, water level, and plant health.
For complete nutrient management and pH guidance, see our hydroponics for beginners guide.
Maximizing Yield from Your Vertical System
Succession Planting
Do not plant every slot at once. Stagger plantings every 2 weeks so you have a continuous harvest rather than a glut followed by an empty system. Plant 1/3 of your slots on week 1, another 1/3 on week 3, and the final 1/3 on week 5. By the time you harvest the first batch, the second batch is growing and the third is starting. It took me a full glut-then-nothing cycle on my own stacked channels before I bothered staggering — worth doing from day one instead of learning it the way I did.
Strategic Placement
- Top positions (most light): Light-hungry crops — basil, kale, chard
- Middle positions (moderate light): Lettuce, spinach, herbs
- Bottom positions (least light): Shade-tolerant crops — mint, cilantro, microgreens
Harvest Technique
Use the cut-and-come-again method for leafy greens. Harvest outer leaves only, leaving the growing center intact. The plant continues producing new leaves from the center, giving you 3-5 harvests from a single planting. This maximizes yield per plant site and keeps your system continuously productive. For a comparison of harvest methods in hydroponics vs traditional growing, see our hydroponics vs soil guide.
What is the best vertical hydroponic system for beginners?
Stacked NFT channels on a shelving unit are the best vertical hydroponic system for beginners. They cost $60-120 to build from PVC pipe or rain gutters, are easy to assemble, and grow 12-36 plants in a 2×4 foot footprint. Tower gardens are simpler but cost $350-600 for commercial kits.
How many plants can you grow in a vertical hydroponic system?
A single tower garden holds 20-40 plants in a 2.5×2.5 foot footprint. Stacked NFT channels grow 12-36 plants depending on the number of tiers. Wall-mounted pocket systems hold 12-48 plants using zero floor space. A multi-tier vertical setup fits meaningfully more plants into the same floor footprint than a single horizontal tray or bucket row.
What plants grow best in vertical hydroponic systems?
Leafy greens (lettuce, spinach, kale, arugula) and herbs (basil, cilantro, parsley, mint) are ideal for vertical systems. Strawberries grow well in towers with fruit hanging naturally. Avoid heavy fruiting plants like tomatoes and peppers — they become top-heavy and shade lower levels in vertical arrangements.
Do vertical hydroponic systems need special lighting?
Yes, each vertical level needs its own light source or the system must rotate plants through a central light zone. For tower systems, wrap-around LED strip lights work well. For stacked NFT, mount individual LED panels above each channel. Budget $30-60 per level for adequate lighting coverage.
Can I build a vertical hydroponic system for under $100?
Yes. A 3-tier stacked NFT system from 4-inch PVC pipe costs $60-90 in materials: PVC pipe ($25-40), end caps and fittings ($10-15), submersible pump ($10-15), vinyl tubing ($5), and net pots ($10-15). A wall-mounted pocket system from a shoe organizer costs $20-40 plus a small pump and reservoir.
How do you water a vertical hydroponic system?
Most vertical systems use a recirculating pump that lifts nutrient solution from a bottom reservoir to the top level. Gravity distributes the solution downward through each tier back to the reservoir. A single 100-200 GPH pump feeds the entire system. Check flow rate weekly and clean pump intake monthly.
Related Articles
- Hydroponic Systems: Complete Guide to All Methods — Compare Kratky, DWC, NFT, and more to find your ideal growing system
- Hydro Indoor Garden Setup Guide — plan your complete indoor garden
- Hydroponic Systems Explained — understand DWC, NFT, and ebb and flow
- Best Hydroponic Growing Kits — starter kits for beginners
- Hydroponics for Beginners
- Best Plants for Hydroponic Growing
- DIY Hydroponics on a Budget — build your own for under $50