On my bench, hydroponic tomatoes reliably beat soil to first harvest and carry a heavier fruit load per plant when nutrients and lighting are dialed in — in my own side-by-side buckets that’s landed in roughly the 20-30% faster / 25-40% higher-yield range, in line with the direction extension research on soilless tomato production points. Soil tomatoes cost less to start and many growers prefer their flavor profile from diverse soil microbiome interactions. This guide compares both methods across growth speed, yield per plant, flavor, startup cost, and daily maintenance so you can choose the best approach for your indoor growing space.
As an Amazon Associate I earn from qualifying purchases.
Hydroponic Tomatoes vs Soil Grown: Key Differences at a Glance
| Factor | Hydroponic Tomatoes | Soil-Grown Tomatoes |
|---|---|---|
| Growth speed | Faster to first harvest — 20-30% in my own side-by-side runs | Standard growth rate |
| Yield per plant | Higher with optimized nutrients — 25-40% on my bench | Good — depends on soil quality and feeding |
| Setup cost | $80–$250 depending on system | $15–$40 for containers and soil |
| Ongoing cost | Nutrient solution, pH supplies, electricity | Fertilizer, potting mix replacement |
| Difficulty | Moderate — requires pH and EC monitoring | Easy — forgiving of mistakes |
| Space needed | Compact — vertical and stacked systems possible | More floor space per plant |
| Pest risk | Lower — no soil-borne pests or diseases | Higher — fungus gnats, damping off, soil pathogens |
| Flavor | Excellent — consistent, clean taste | Excellent — traditional, complex flavor |
| Water usage | 80–90% less than soil | Standard — frequent watering required |
How Hydroponic Tomato Growing Works
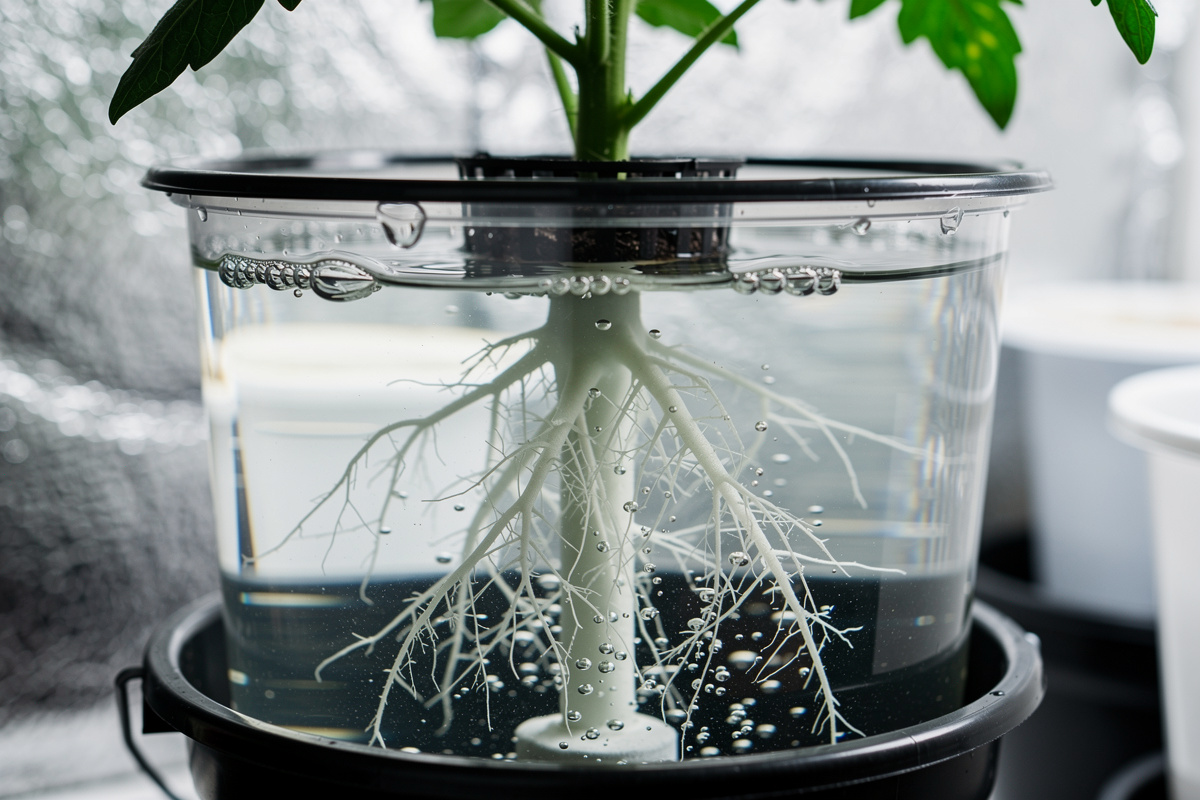
In hydroponic systems, tomato roots grow in an inert medium — clay pebbles, perlite, rockwool, or coco coir — and receive water and dissolved nutrients directly through a circulating solution. The plant never searches for food or pushes roots through dense soil. Everything it needs is delivered to the root zone in precise, measurable concentrations.
This direct delivery is why hydroponic tomatoes grow faster and produce more. In soil, roots expend significant energy expanding through the medium and competing with microorganisms for nutrients. In hydroponics, that energy goes directly into stem growth, leaf production, flowering, and fruit development. Recirculating hydroponic systems also use dramatically less water than soil containers — research on hydroponic water productivity puts the savings in the 80-90% range, which tracks with what I top off on my own res versus what a soil container drinks in the same week.
Best Hydroponic Systems for Tomatoes
Tomatoes are large, heavy-fruiting plants with substantial root systems. Not every hydroponic method handles them equally well. The system must provide strong physical support, consistent nutrient flow, and adequate oxygenation for roots that can grow several feet long.
| System Type | Tomato Suitability | Pros | Cons |
|---|---|---|---|
| Dutch Bucket / Bato Bucket | Excellent | Best for full-sized tomatoes, scalable, easy to manage, great drainage | More components, needs drain-to-waste or recirculation setup |
| Deep Water Culture (DWC) | Excellent for compact varieties | Fast growth, simple setup, great oxygenation, affordable | Needs air pump, reservoir temperature control critical, limited to smaller varieties |
| Ebb and Flow | Good | Reliable, periodic flooding promotes strong root development | Heavier setup, flood table needed, timer-dependent |
| Drip System | Excellent | Precise nutrient delivery, scales to any number of plants | Emitters can clog, needs good filtration |
| NFT (Nutrient Film) | Poor for tomatoes | Water efficient, good for leafy greens | Channels too shallow — tomato roots clog and overflow the system |
| Kratky (Passive) | Fair for cherry tomatoes only | No pumps, no electricity, zero noise | Only works for small cherry varieties, limited yield, reservoir management tricky |
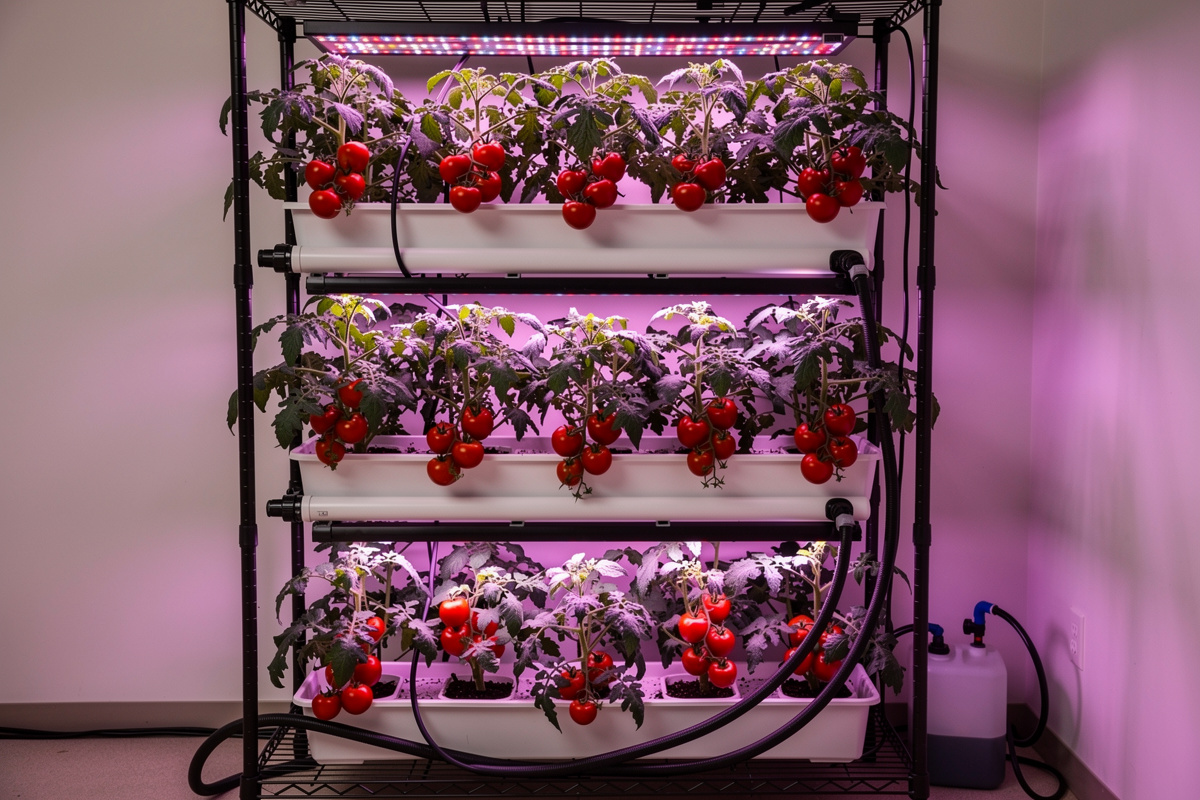
For most home growers, Dutch bucket or DWC systems offer the best balance of performance and manageability for indoor tomatoes. Dutch buckets are the industry standard for hydroponic tomatoes and scale from one plant to dozens. DWC works well for 1 to 4 compact or cherry tomato plants. On my own bench I run tomatoes in the ebb-and-flow hydroton bed rather than a straight DWC bucket once fruit sets — the flood cycle gives the root mass more oxygen and the bed itself more physical support for a top-heavy, trellised plant than a floating net pot lid does. Dutch bucket is the system most growers scaling past a plant or two land on, even though it isn’t one I run myself. If you are still deciding which system type to build, the complete hydroponic systems guide compares all six methods side by side.
Nutrient Requirements for Hydroponic Tomatoes
Tomatoes are among the heaviest feeders in any growing system. They require substantial amounts of nitrogen during vegetative growth and significant phosphorus and potassium during flowering and fruiting. A two-part or three-part hydroponic nutrient system is essential for controlling the N-P-K ratio at each stage.
Seedling stage (weeks 1–3): Light feeding at quarter strength. EC 0.4–0.8, pH 5.8–6.2. Young tomato seedlings are sensitive to nutrient burn. Use a mild seedling formula or half-strength vegetative nutrients.
Vegetative stage (weeks 3–6): Higher nitrogen for rapid stem and leaf growth. EC 1.2–1.8, pH 5.8–6.2. Use the “grow” formula of your nutrient line. Tomatoes at this stage are building the structural framework that will support fruit later.
Flowering stage (weeks 6–10): Reduce nitrogen, increase phosphorus and potassium. EC 1.8–2.4, pH 5.8–6.0. Switch to the “bloom” formula. Add calcium-magnesium supplement — tomatoes are highly susceptible to blossom end rot when calcium is insufficient. This staged EC ramp and the elevated-calcium push late in fruiting lines up with the growth-stage nutrient guidance in Ohio State University Extension’s hydroponic greenhouse tomato nutrient solution fact sheet. I lost part of my first hydro tomato truss to blossom end rot despite the pH holding steady — it was the calcium ramp I hadn’t dialed in yet, not the pH — which is why CalMag goes into the mix by default now rather than as a reaction to symptoms.
Fruiting stage (weeks 10+): Maintain bloom nutrients at full strength. EC 2.0–2.8, pH 5.8–6.0. Potassium drives fruit size, sugar content, and flavor development. Tomatoes drink heavily during fruiting, which concentrates the nutrient solution — monitor EC daily and top off with plain water as needed. I check EC on my pen every day once a truss is filling out; a tomato reservoir can drink down and creep in concentration faster than peppers or lettuce ever did on my bench.
If you are new to managing nutrient solutions, the essential equipment guide covers the pH meters, EC meters, and mixing tools you need for accurate measurements.
How Soil-Grown Tomato Growing Works
Soil growing is the traditional approach: fill a large container with quality potting mix, plant the tomato, water regularly, and fertilize on a schedule. The soil acts as both the physical support structure and the nutrient reservoir. Beneficial microorganisms break down organic matter and fertilizer into forms the plant can absorb through its roots.
The simplicity of soil growing makes it the natural starting point for most indoor tomato growers. There is no pH meter to calibrate, no EC meter to read, no nutrient mixing ratios to calculate, and no air pump to maintain. You water when the soil feels dry, feed with a general-purpose fertilizer every 1 to 2 weeks, and the soil buffers minor mistakes in timing or concentration.
If you prefer the container approach and want a comprehensive walkthrough from seed to harvest, CityRooted has a complete indoor tomato grow light guide that covers variety selection, container sizing, soil mix, lighting requirements, pollination techniques, and the full seed-to-harvest timeline using traditional methods.
Best Soil Setup for Indoor Tomatoes
Indoor tomatoes in containers need a well-draining potting mix — never garden soil, which compacts in containers and suffocates roots. A standard recipe for tomatoes is 50% quality potting mix, 25% perlite or vermiculite for drainage, and 25% compost or worm castings for nutrients and moisture retention. Adding a handful of agricultural lime raises the pH slightly, which tomatoes prefer.
Container size is critical for tomatoes. Full-sized varieties need at least 20 to 30 liters (5 to 8 gallons) per plant. Cherry and compact varieties can manage in 15 to 20 liters (4 to 5 gallons). A 25-liter (7-gallon) fabric grow bag with drainage holes is the sweet spot for most indoor tomato varieties — fabric pots provide excellent aeration and prevent root circling.
Fertilizing Soil-Grown Tomatoes
Unlike hydroponics where nutrients are delivered continuously, soil-grown tomatoes need periodic feeding. Start with a slow-release granular fertilizer mixed into the potting soil at planting. Supplement with liquid fertilizer every 10 to 14 days once flowering begins.
Use a balanced formula (10-10-10) during vegetative growth and switch to a high-potassium, high-phosphorus formula (5-10-10 or tomato-specific fertilizer) once flowers appear. Calcium supplementation is important — add crushed eggshells or garden lime to the soil to prevent blossom end rot, the most common problem in container-grown tomatoes. University of Maryland Extension traces most container-grown blossom end rot back to inconsistent watering disrupting calcium transport rather than a true calcium shortage in the soil — consistent watering matters as much as the amendment itself.
Head-to-Head Comparison: Growth Speed and Yield
Germination to Transplant (Weeks 1–6)
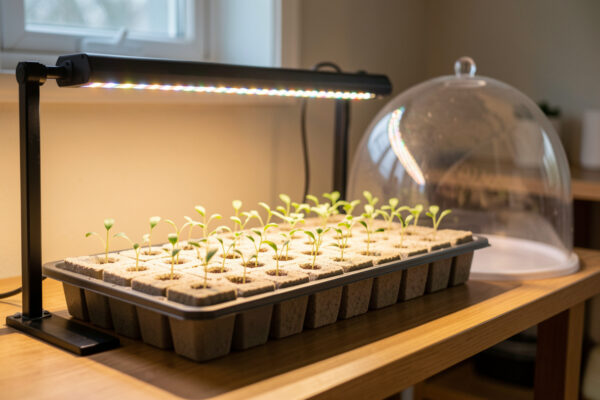
Both methods start identically: seeds germinate in moist seed starting mix or rockwool cubes under warmth (24°C–29°C / 75°F–85°F). There is no speed difference during germination — the seed does not know what system it will eventually grow in.
The divergence begins after transplanting into the final system. Hydroponic seedlings typically establish roots within 3 to 5 days and show visible vegetative acceleration within a week. Soil-grown seedlings need 7 to 14 days for roots to colonize the new potting mix before growth rate increases noticeably.
Vegetative Growth (Weeks 6–10)
This is where hydroponics pulls ahead measurably. With optimized nutrient delivery and constant access to water, hydroponic tomato plants grow 20 to 30 percent faster during the vegetative phase. Plants develop more branching points and thicker stems, which translates directly to more flower sites and stronger fruit-bearing structure.
Soil-grown plants grow at a solid pace but are more dependent on watering consistency and fertilizer timing. A missed feeding or a dry spell slows growth noticeably. Hydroponic systems deliver nutrients continuously, eliminating the peaks and valleys of soil feeding schedules.
Flowering and Fruiting (Weeks 10–16+)
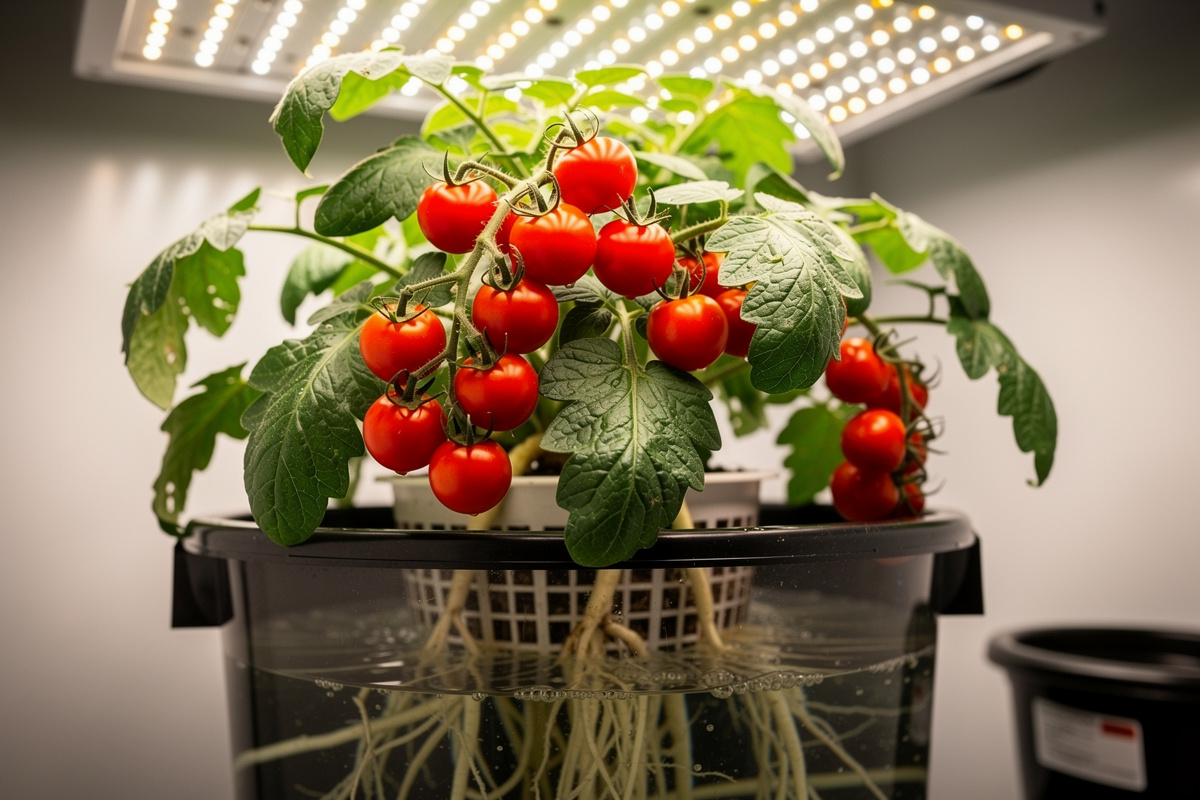
Hydroponic tomatoes typically flower 1 to 2 weeks earlier than soil-grown equivalents and produce more flowers per truss. Extension-adjacent research comparing soilless and soil yields puts the general advantage in a similar band, and what I’ve tracked in my own truss counts lands in the 25-40% range, though real-world results depend heavily on light quality, temperature management, pollination effectiveness, and grower experience.
Soil-grown tomatoes often produce fruit with slightly more complex flavor — likely due to the diverse microbial activity in soil that produces trace organic compounds absent in sterile hydroponic solutions. The difference is subtle but noticeable in side-by-side taste tests, particularly with heirloom varieties where flavor complexity is the primary goal.

Cost Comparison: First Year and Ongoing
| Expense | Hydroponic Setup | Soil Container Setup |
|---|---|---|
| Growing system | $80–$200 (Dutch bucket kit or DWC with reservoir) | $15–$35 (fabric grow bags or plastic pots) |
| Growing medium | $20–$40 (clay pebbles, perlite, or rockwool) | $20–$35 (potting mix, perlite, compost) |
| Nutrients | $30–$50 (hydroponic nutrient concentrate, Cal-Mag) | $15–$25 (slow-release + liquid fertilizer) |
| pH/EC meters | $30–$60 | $0 (not needed) |
| Grow light | $60–$150 (200W+ LED for tomatoes) | $60–$150 (same light requirement) |
| Air pump (DWC) | $15–$30 | $0 |
| Trellis/support | $10–$20 | $10–$20 |
| Year 1 Total | $245–$550 | $120–$265 |
| Annual ongoing | $50–$90 (nutrients, pH supplies) | $35–$55 (soil replacement, fertilizer) |
Hydroponics costs roughly twice as much in the first year, but the gap narrows significantly after that. If you are growing 3 or more plants and value higher yields, the per-tomato cost of hydroponics drops below soil growing within 2 growing seasons. For a budget DWC build under $50, the breakeven point comes even sooner.
Tomato Varieties That Perform Best in Each System
Not all tomatoes respond equally to hydroponics. Compact determinate varieties and cherry tomatoes tend to benefit most from the consistent nutrient delivery of hydroponic systems, while large indeterminate varieties with massive root systems do well in large soil containers.
Best for hydroponics: Cherry tomatoes (Sweet 100, Sungold, Super Sweet 100), compact determinate varieties (Patio Princess, Tiny Tim, Micro Tom), and dwarf varieties. These stay manageable in DWC buckets and Dutch bucket systems, produce prolifically, and respond dramatically to optimized nutrient delivery.
Best for soil containers: Large indeterminate varieties (Beefsteak, Brandywine, Cherokee Purple), paste tomatoes (Roma, San Marzano), and full-sized slicers. These need 30+ liters of root space and grow tall, making large soil containers the simpler and more practical choice.
Excellent in both: Early Girl, Celebrity, Better Boy, and most hybrid slicing tomatoes. These adaptable varieties perform well in either system when given adequate light and nutrients.
Light Requirements: Same for Both Methods
Whether you grow in hydroponics or soil, indoor tomatoes need 14 to 16 hours of intense light per day from a full-spectrum LED grow light. Light is the one variable that does not change between methods — tomatoes are extremely high-light crops regardless of what their roots sit in.
A minimum of 400 PPFD (photosynthetic photon flux density) at the canopy is needed for tomato flowering and fruiting. For serious production, 600 to 800 PPFD produces significantly better results. A 200 to 400 watt LED panel covers 1 to 3 tomato plants adequately. Budget panels under 100 watts will keep plants alive but produce minimal fruit.
Common Problems: Hydroponic vs Soil
| Problem | Hydroponic Cause | Soil Cause |
|---|---|---|
| Yellowing lower leaves | pH drift locking out nutrients, or nitrogen deficiency in solution | Nitrogen deficiency, overwatering, or natural aging |
| Blossom end rot | Calcium deficiency in nutrient solution, or pH blocking calcium uptake | Inconsistent watering disrupting calcium transport to fruit |
| Flower drop | Temperature above 32°C, EC too high, poor pollination | Temperature stress, underwatering, poor air circulation |
| Slow growth | Low EC, pH out of range, root rot from warm reservoir | Compacted soil, insufficient fertilizer, root-bound container |
| Root problems | Root rot from warm reservoir (keep at or below 20°C/68°F), Pythium | Overwatering, poor drainage, root rot, fungus gnats |
| Pest issues | Aphids, whiteflies, spider mites (no soil pests) | Fungus gnats, soil mites, plus aphids, whiteflies, and spider mites |
| Cracking fruit | Inconsistent nutrient concentration, rapid water uptake | Irregular watering — dry then flood cycle |
Hydroponic problems tend to be nutrient or pH-related and are fixable by adjusting solution parameters. Soil problems tend to be moisture-related and are fixable by adjusting watering frequency and improving drainage. Both systems share above-ground pest issues (aphids, whiteflies, spider mites) that require identical treatment regardless of growing method. For troubleshooting hydroponic-specific issues, see the common mistakes guide.
Which Method Should You Choose?
Choose hydroponics if: You want maximum yield per plant, enjoy monitoring and optimizing systems, plan to grow tomatoes year-round, have limited floor space, or are already running a hydroponic setup for other crops like lettuce, peppers, and herbs. Hydroponic tomatoes reward the extra attention with significantly higher production.
Choose soil if: You are a beginner who wants the simplest path to growing tomatoes, prefer lower startup costs, do not want to manage pH and EC meters, or value the hands-off simplicity of traditional container gardening. Soil is forgiving, intuitive, and produces excellent tomatoes with minimal technical knowledge.
Choose both: Many experienced indoor growers run both methods simultaneously. Start a few tomato plants in large soil containers for reliability and flavor, while experimenting with one or two plants in a Dutch bucket or DWC system to learn hydroponic techniques. Compare results side by side and scale whichever method works best for your situation.
Growing Hydroponic Tomatoes: Quick Start Checklist
If you decide to go the hydroponic route, here is the minimum viable setup for your first hydroponic tomato plant:
1. System: Single Dutch bucket or 20-liter DWC bucket with net pot lid, air pump, and air stone. Dutch bucket total cost: $40–$80. DWC total cost: $25–$50.
2. Medium: Clay pebbles (hydroton) for Dutch buckets, or a mix of perlite and vermiculite in the net pot for DWC.
3. Nutrients: Three-part hydroponic nutrient system (General Hydroponics Flora series or similar) plus calcium-magnesium supplement. Start at half strength for seedlings, increase to full strength during flowering.
4. Monitoring: Digital pH meter and EC/TDS meter. Check pH daily during the first month, then every 2 to 3 days once the system stabilizes. Check EC every 2 to 3 days.
5. Light: Full-spectrum LED, 200W minimum for one tomato plant, 14 to 16 hours daily, positioned 30 to 45 cm above the plant canopy.
6. Environment: Temperature 21 to 27°C (70 to 80°F) during the day, 18 to 21°C (65 to 70°F) at night. Reservoir temperature at or below 20°C (68°F) — treat 22°C (72°F) and up as the danger zone for root rot. Humidity 50 to 70 percent. Gentle air circulation for pollination and stem strengthening.
The indoor garden setup guide covers the full installation process if you are building your first hydroponic system from scratch.
Are hydroponic tomatoes better than soil-grown tomatoes?
Hydroponic tomatoes typically grow 20-30% faster and produce 25-40% higher yields per plant compared to soil-grown tomatoes. However, soil-grown tomatoes are simpler to manage and many growers find they have more complex, nuanced flavor. Neither method is objectively better — it depends on whether you prioritize yield and speed (hydroponics) or simplicity and lower cost (soil).
What is the best hydroponic system for growing tomatoes?
Dutch bucket (Bato bucket) systems are the best choice for growing tomatoes hydroponically. They provide excellent support for large plants, scale from one plant to dozens, and are the industry standard for commercial hydroponic tomato production. For home growers with 1-4 compact or cherry tomato plants, Deep Water Culture (DWC) is a simpler and more affordable alternative. Avoid NFT systems for tomatoes — the shallow channels cannot handle large tomato root systems.
What pH do hydroponic tomatoes need?
Hydroponic tomatoes grow best at a pH of 5.8 to 6.2. This range allows optimal uptake of all essential nutrients including calcium, which is critical for preventing blossom end rot. Check pH daily with a digital meter and adjust using pH up or pH down solutions. pH drift is the most common cause of nutrient deficiency symptoms in hydroponic tomatoes, even when nutrient concentrations are correct.
How long does it take to grow tomatoes hydroponically?
From seed to first harvest, hydroponic tomatoes take approximately 10 to 14 weeks for cherry and compact varieties and 14 to 18 weeks for full-sized varieties. This is roughly 2 to 3 weeks faster than soil-grown tomatoes of the same variety. Once producing, tomato plants continue fruiting for 4 to 6 months or longer under indoor grow lights with proper nutrient management.
Can you grow large beefsteak tomatoes hydroponically?
Yes, but it requires a robust system. Large indeterminate varieties like Beefsteak and Brandywine need Dutch bucket or drip systems with strong physical support (trellis or string system), a reservoir of at least 20 liters per plant, and high-intensity lighting (600+ PPFD). These varieties are more challenging in hydroponics than compact or cherry types due to their massive size and heavy fruit load. For beginners, starting with cherry or determinate varieties is recommended.
Related Articles
- Complete Guide to Hydroponic Plant Growing — Master plant selection, nutrient schedules, and harvest timing for all hydroponic crops
- Hydroponic Systems Explained: DWC, NFT, Ebb and Flow — Understand which system matches your growing goals
- Essential Hydroponic Equipment Guide — pH meters, EC meters, lights, and everything you need
- DIY Hydroponics on a Budget — Build a DWC system for under $50
- 7 Common Hydroponic Mistakes — Avoid the pitfalls that kill tomato plants
- Hydroponic Peppers vs Soil Grown — Same comparison for another popular indoor crop