Hydroponic seed starting is the practice of germinating seeds in an inert, soilless medium — usually rockwool or a peat-free plug — and feeding the seedling a dilute nutrient solution (around EC 0.6–0.8 mS/cm) instead of potting mix. Done right, you get a clean white root mass ready for a net pot in 10–18 days with no soil-borne pests riding along.
This is the guide I wish I had when I started the first DWC tote in my spare room. Across the methods I run side by side — DWC, NFT, Kratky and ebb-and-flow — every one of them lives or dies on the propagation step. A seedling that starts weak never recovers in water culture; there is no forgiving soil buffer to bail it out. So I treat seed starting as its own discipline, with its own bench, its own light, and its own logbook. Everything below is what my res logs and my own crop failures taught me, organized so you can skip the failures.
Why Hydroponic Seed Starting Is Different From Soil
In soil, the medium feeds and buffers the seedling. In hydroponics, the medium does almost nothing except hold the seed and the roots in place — you are the buffer. That single difference changes every decision. You control moisture, oxygen, EC, and pH directly, which is exactly why hydroponic seedlings can be faster and cleaner, and also why they crash harder when you get the basics wrong.
The first thing I tell anyone moving from soil is to stop thinking about “watering.” A rockwool cube or a clay-pebble bed is not a sponge you keep saturated. Roots need oxygen as much as they need water, and a waterlogged starter plug is the single most common way I see beginners drown seedlings before the first true leaves even open. The whole skill of soilless propagation is keeping the medium damp but never soggy, so the emerging root finds both moisture and air.
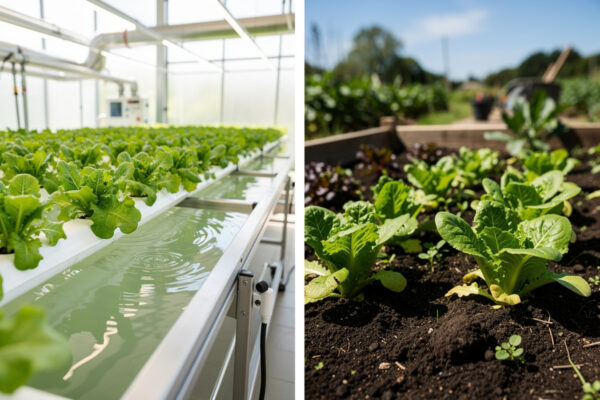
The payoff is real. A seedling started in clean rockwool carries zero fungus gnats, zero soil-borne Pythium, and transplants into a net pot with its root structure already adapted to a wet-but-aerated zone. There is no transplant shock from soil-to-water — the root never knew soil. That continuity is the reason I start everything soilless, even crops I will eventually move to an ebb-and-flow clay bed.
The Seed-Starting Bench: What You Actually Need
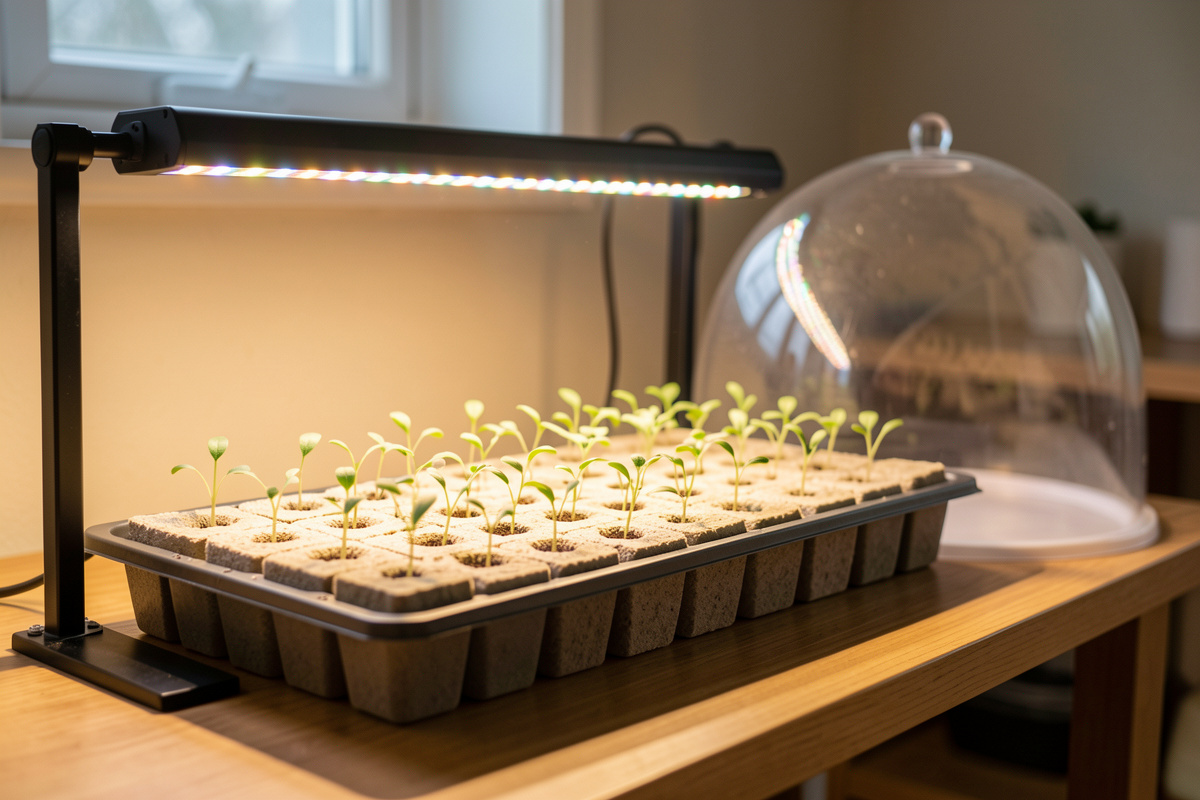
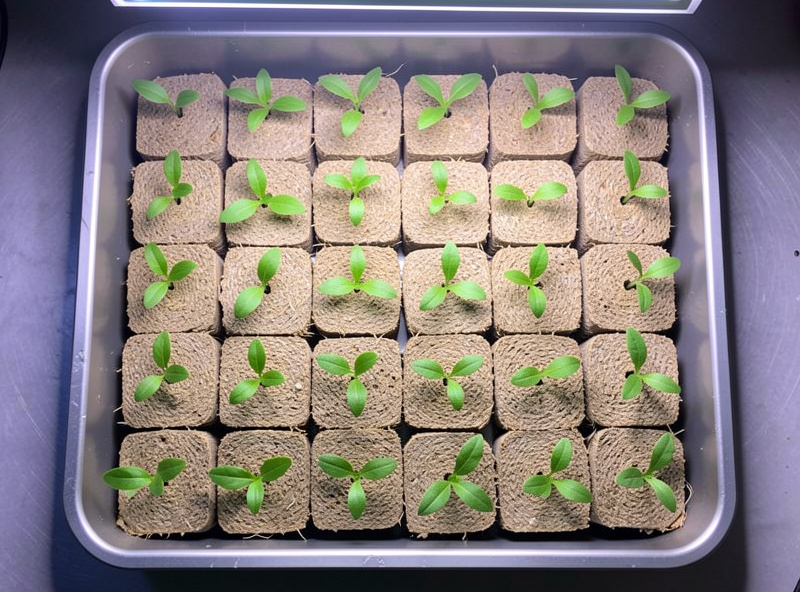
You do not need much, and most of the kits sold as “seed starting systems” are marked-up versions of four cheap parts. The bench I run is a humidity dome over a 1020 tray, a seedling heat mat, a starter medium, and a light. That is the whole rig. Everything else is refinement.
Here is the honest hardware stack. A 1020 tray with a humidity dome holds the moisture during germination — seeds want roughly 90–100% humidity until they crack, then you vent it down. A seedling heat mat matters more than people think: most vegetable seeds germinate fastest at a root-zone temperature of 22–26°C (72–79°F), and in a Swedish spare room in winter my ambient sits closer to 18°C, which stalls germination for days. The mat is the cheapest speed I can buy. For the medium, rockwool cubes are my default, with peat-free plugs as the eco alternative. And the light — a modest full-spectrum LED bar run at the right distance is plenty; you do not need a flowering-grade panel for seedlings.
If you only buy one instrument, buy an EC/TDS pen so you can mix your seedling solution to a number instead of by feel. I cover how to read and calibrate one in my EC meter guide. As an Amazon Associate I earn from qualifying purchases.
| Starter Medium | Best For | Watch-Out | My Verdict |
|---|---|---|---|
| Rockwool cubes | Most crops, all methods | Needs pH 5.5 pre-soak; holds water | Default workhorse |
| Peat/coir plugs | Growers avoiding rockwool | Can stay too wet; variable quality | Solid eco choice |
| Oasis/foam cubes | Bulk leafy greens | No buffering; pH neutral but inert | Good for NFT trays |
| Clay pebbles (hydroton) | Transplant target, not start | Dries seeds out; poor seed contact | Net-pot filler, not starter |
| Paper towel (pre-germ) | Testing seed viability | Must transfer at radicle stage | Great for old seed |
I keep rockwool starter cubes and a sleeve of 2-inch net pots on the shelf at all times, because the cube drops straight into the net pot when the roots show. The full media breakdown lives in my rockwool seed starting guide.
Step One: Germination — The Part Most People Rush
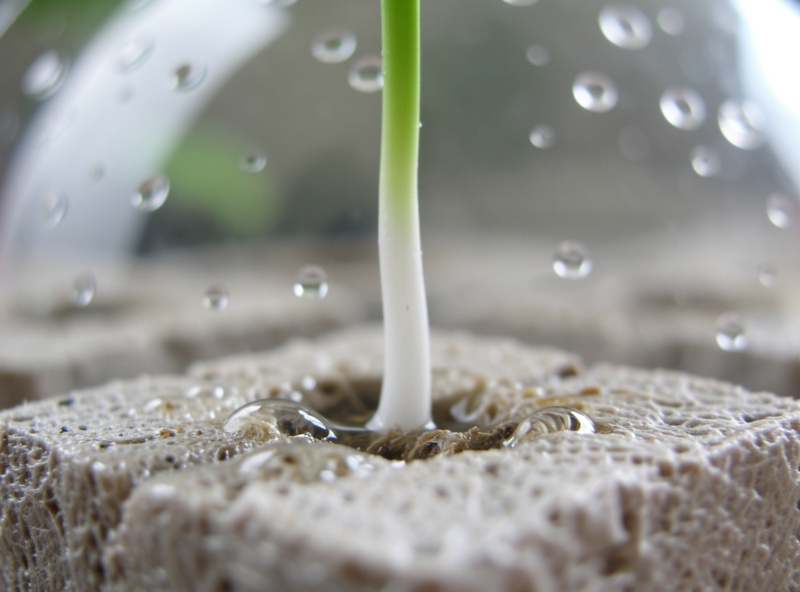
Germination is a moisture-and-temperature problem, not a nutrient problem. A seed carries its own food reserves; it needs water to imbibe, oxygen to respire, and warmth to trigger the enzymes. You do not feed a seed. I germinate in plain pH-adjusted water (5.5–6.0) or a very weak quarter-strength solution at most, and I keep the heat mat under the tray and the dome on top.
Pre-soak rockwool in pH 5.5 water for an hour before you set seeds — rockwool ships alkaline (often pH 7–8 straight from the bag) and that high pH will stall a seedling. Drop one or two seeds per cube into the pre-punched hole, pinch the top closed, and cover. From there it is patience: lettuce and brassicas crack in 2–3 days at 20°C; tomatoes and peppers want 24–28°C and take 5–10 days. Cold and wet is the killer combination — that is when seeds rot instead of sprout.
The moment you see green, the rules flip. Get the seedlings under light immediately and start venting the dome, or you grow leggy, stretched stems reaching for light in a humid sauna. I lose more first-time growers to this 24-hour window than to anything else. There is a deeper walkthrough in my hydroponic germination guide, including the paper-towel pre-germination trick for old or expensive seed.
Step Two: Light and the Nordic-Winter DLI Problem
Once the cotyledons open, light becomes the limiting factor — and if you grow indoors in a short-daylight climate the way I do, this is where most propagation goes wrong. Seedlings do not need intense light, but they need enough, delivered over a long enough day. The metric that matters is DLI (Daily Light Integral), and for seedlings a target of roughly 12–17 mol/m²/day is plenty.
The mistake is hanging a flowering-grade light too close and cooking the seedlings, or hanging any light too far and growing leggy stretch. For starts I run a full-spectrum LED bar measured at about 150–250 µmol/m²/s PPFD at canopy, on a 16–18 hour photoperiod. In a Nordic winter there is essentially no useful window light from November to February, so 100% of the seedling’s light is mine to supply, and the DLI math is not optional — it is the whole game. I keep a PAR meter on the bench for exactly this. If you want the numbers behind the targets, my PPFD and DLI guide breaks them down, and there is a dual-use light spectrum piece for anyone running one fixture for both starts and grown plants.
Photoperiod control is also the easiest place to add a little “smart” to the lab — a simple smart plug on a schedule means the lights come on before I wake and the seedlings never miss a day. I treat the whole propagation rig as a control loop: sensors, schedules, and intervention only when the loop fails.
Step Three: First Feed — When and How Much
The first true leaves are the signal. Cotyledons (the seed leaves) run on stored reserves; the first true leaves mean the plant is now photosynthesizing and ready to feed. That is when I introduce nutrients, and I start low — around EC 0.6 mS/cm (roughly 300–400 PPM on the 500 scale), climbing to EC 1.0–1.2 as the seedling fills out before transplant.
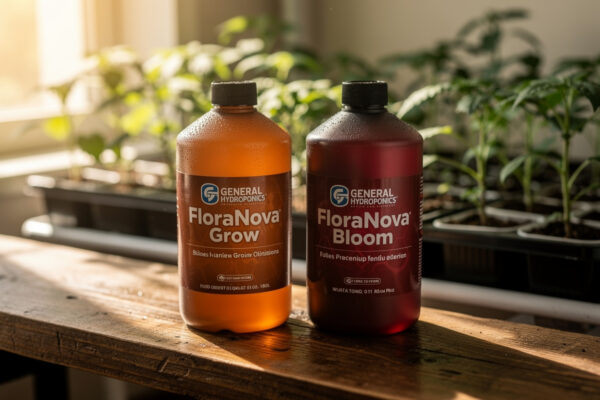
Mix to a target EC, never by feel. I run the General Hydroponics Flora trio for propagation because it is forgiving and easy to dial weak, though Masterblend works fine too once you are comfortable mixing dry salts. Whatever you use, add CalMag if you are on RO or very soft water — seedlings throw calcium-deficiency symptoms fast, and the new growth distorts before you realize what happened. My nutrient mixing guide walks the order of operations, and the GH Flora series guide covers the trio ratios I use for seedlings versus mature plants.
Keep the pH in the 5.5–6.0 band the whole time. Outside that window seedlings lock out nutrients even when the EC reads correct — the classic “I’m feeding it but it looks starved” trap. A pH pen with calibration solution earns its place here; my pH Down guide covers safe adjustment.
Step Four: Roots, Oxygen, and Avoiding the Damp-Off Crash
Healthy seedling roots are bright white and branching. The instant they go tan, slimy, or smell swampy, you have Pythium — root rot — and in propagation it spreads fast because the seedlings are fragile. The cause is almost always the same trio: medium too wet, oxygen too low, and starter solution too warm.
Keep the starter zone below 22°C if you can; above that, dissolved oxygen drops and Pythium wakes up. Do not let cubes sit in standing water — a propagation tray should be damp, drained, and aerated, not flooded. I run an air stone in any reservoir feeding seedlings to keep dissolved oxygen high, and on recirculating starts I add a beneficial Bacillus inoculant at each top-off to crowd out the bad organisms. Damping-off — where a seemingly healthy seedling topples at the soil line overnight — is the same problem at the stem. The root and oxygen story is deep enough that I gave it its own root development guide, and the full pathogen playbook is in my root rot and Pythium guide.
Step Five: Net Pots and Transplanting Into the System
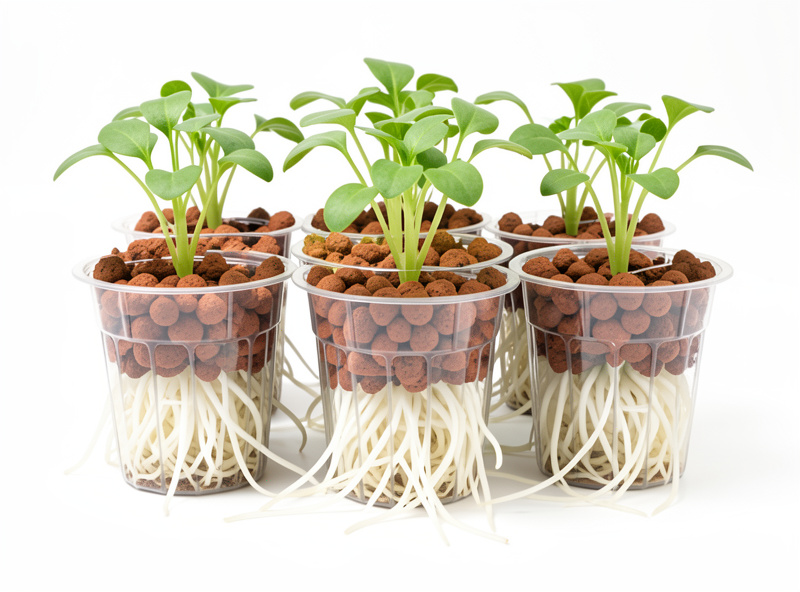
A seedling is ready to transplant when roots are visibly poking out the bottom of the cube and the plant has two or more sets of true leaves — usually 10–18 days from sowing for leafy greens, longer for fruiting crops. The move itself is simple because there is no soil to disturb: the whole cube drops into a net pot, you pack clay pebbles around it for support, and you set the net pot into the system so the bottom of the cube just kisses the solution or sits in the wet zone.
Net pot sizing matters. I run 2-inch net pots for leafy greens and herbs and 3-inch for anything that gets top-heavy like tomatoes or peppers. The cube should sit so the roots reach water but the stem base stays dry and aerated — a stem sitting in solution is an invitation to rot. The mechanics of seating the cube, packing the pebbles, and getting the water line right are covered step by step in my net pot seedling setup guide, and the timing-and-shock side is in the transplanting guide.
Which system you transplant into changes the details. A DWC bucket wants the cube near the waterline with an air stone running; an NFT channel wants the roots reaching the film; the Kratky method wants a falling water line the roots chase down; and an ebb-and-flow bed wants the cube nested in clay pebbles on the flood cycle. If you have not picked a system yet, my how-to-choose guide matches method to crop and space.
Cloning: Propagation Without Seeds
Seeds are not the only way in. For any plant you want to reproduce exactly — a basil you like, a tomato variety, a mother plant you are keeping — cloning from cuttings skips germination entirely and gives you a genetic copy that is already weeks ahead. You take a cutting, dip it in rooting hormone, set it in a moist rockwool cube or aeroponic cloner, and keep humidity high until roots form, usually in 7–14 days.
Cloning is its own skill with its own failure modes — wilting before roots form, stem rot, hormone over-application — so I gave it a full walkthrough in my cloning for hydroponics guide. The short version: high humidity, low light at first, clean tools, and patience. A clone has no roots to drink with, so it survives on humidity through the leaves until the root primordia push out.
A Realistic Propagation Timeline
People want a calendar, so here is the one my logs actually show for leafy greens, the fastest and most forgiving category to learn on. Days 0–3: germination under the dome on the heat mat, no light needed until green shows. Days 3–5: first light, dome venting, cotyledons open. Days 5–8: first true leaves, first weak feed at EC 0.6. Days 8–14: leaf development, EC climbing toward 1.0, roots filling the cube. Days 14–18: roots out the bottom, transplant to the system. Fruiting crops like tomatoes and peppers run roughly double that timeline and want the warmer germination temperatures.
Do not chase speed. A seedling pushed too hard — too much light, too much EC too early — grows fast and weak. A seedling grown a touch slower with strong roots outperforms it the moment it hits the main system. I have raced both, side by side, and the patient one wins every time.
The Mistakes I See Most Often
After years of watching trays — mine and other growers’ — the same handful of errors account for nearly every failed propagation. Overwatering the medium so roots suffocate. Skipping the rockwool pH pre-soak so seedlings stall at high pH. Feeding too early or too strong and burning tender roots. Hanging the light too far and growing leggy stretch. Letting the starter solution run warm so Pythium moves in. And transplanting too late, so root-bound seedlings sulk for a week after the move.
Every one of those is preventable with a thermometer, an EC pen, and a pH pen on the bench. That is the whole point of running this as a measured lab instead of guessing — propagation is where measurement pays off fastest, because a seedling tells you it is unhappy days before it dies, if you are reading the instruments. For the broader list of beginner traps across the whole grow, see my common hydroponic mistakes guide, and to match a crop to the method, my best hydroponic plants list and the hydroponic systems guide are the next stops.
Crop-by-Crop Starting Notes From My Bench
Not every seed plays by the same rules, and the differences are worth knowing before you sow. Lettuce and most leafy greens are the easy win — they germinate cool (18–20°C), crack in 2–3 days, and tolerate a weak feed early, which is why I always tell new growers to learn on a tray of lettuce before touching anything fussier. Brassicas like kale and pak choi behave the same way and are nearly foolproof.
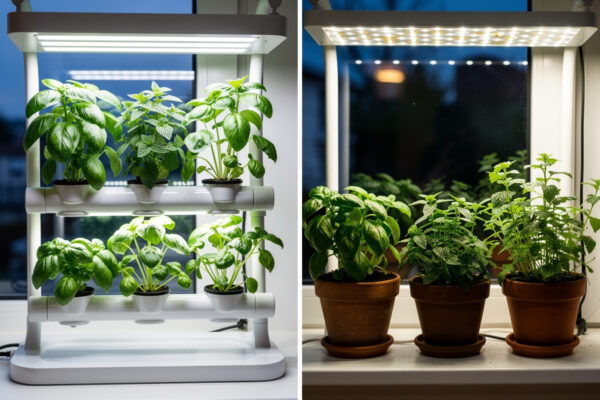
Herbs split into two camps. Basil is fast and grateful and starts like a leafy green. Rosemary, oregano, and thyme are slow, erratic germinators that test your patience — I sow extra cubes and accept that half may not take. Tomatoes and peppers are the warm-season crops that make the heat mat mandatory: peppers in particular can sit for 10–14 days at room temperature and have you convinced the seed is dead, then sprout the moment the root zone hits 26°C. Cucumbers and other cucurbits germinate fast and warm but resent transplanting, so I start them in a larger cube and move them early before the roots circle. Knowing these quirks up front saves a tray of “why won’t it sprout” frustration, and it pairs well with picking the right method in my system selection guide.
Water Quality: Tap, RO, and Why Seedlings Care
The water you mix the starter solution with matters as much as the nutrients you add to it, and it is the variable most new growers never test. Tap water carries dissolved minerals that register on the EC pen before you add a single drop of nutrient — my own tap reads around EC 0.3 mS/cm straight from the line, which means a “weak” 0.6 seedling feed is really only 0.3 of actual added nutrient. I measure the starting EC of the raw water first and account for it, so the seedling gets the dose I think it is getting.
Hard tap also runs alkaline, fighting the 5.5–6.0 band you are trying to hold in the cube. Reverse-osmosis water solves both problems — near-zero EC and neutral pH — but it strips calcium and magnesium too, so on RO I add CalMag back before anything else or seedlings throw distorted, hooked new growth within days. The rule on my bench is simple: know your water’s baseline EC and pH before you mix, whether that is tap, filtered, or RO. A seedling started on untested water is a seedling fed by guesswork.
Frequently Asked Questions
Do hydroponic seeds need nutrients to germinate?
No. Seeds carry their own food reserves and germinate on water, warmth, and oxygen alone. Germinate in pH-adjusted plain water (5.5 to 6.0) and only introduce a weak nutrient solution at around EC 0.6 when the first true leaves appear.
How long does hydroponic seed starting take?
Leafy greens are transplant-ready in 10 to 18 days from sowing. Fruiting crops like tomatoes and peppers take roughly twice as long and need warmer germination temperatures of 24 to 28 degrees Celsius to crack on schedule.
What EC should I use for hydroponic seedlings?
Start around EC 0.6 mS/cm once true leaves appear, then climb gradually to EC 1.0 to 1.2 before transplant. Feeding stronger than that too early burns tender roots and stalls growth rather than speeding it up.
Why are my hydroponic seedlings tall and leggy?
Leggy stretch means not enough light or light hung too far away, often combined with a humidity dome left on too long. Get seedlings under a full-spectrum light at 150 to 250 PPFD the moment they sprout and vent the dome within the first day.
Can I start seeds directly in clay pebbles or net pots?
It works poorly. Clay pebbles dry seeds out and give bad seed-to-medium contact. Start in a rockwool or peat plug that holds moisture, then drop the whole plug into a net pot packed with clay pebbles once roots show.
Do I need a heat mat for hydroponic seed starting?
In a cold or short-winter climate, yes. Most vegetable seeds germinate fastest at a root-zone temperature of 22 to 26 degrees Celsius. If your ambient room sits near 18 degrees, a seedling heat mat is the cheapest way to cut germination time by days.