Building a complete hydroponic setup costs 54-232 dollars depending on features and quality, and in my experience most first-time buyers get the order backward — they spend on automation before they’ve earned the need for it, then skimp on the $25 pH meter that actually determines whether the grow succeeds. The difference between a thriving indoor garden and a costly disappointment often comes down to equipment selection—not how much you spend, but whether you buy the right tools in the right order. This complete buying guide cuts through marketing hype and shows you exactly what hydroponic equipment you need, what you can defer, and what you should skip entirely, with specific product recommendations for every budget level from bare-basics to professional-grade setups.
As an Amazon Associate I earn from qualifying purchases.
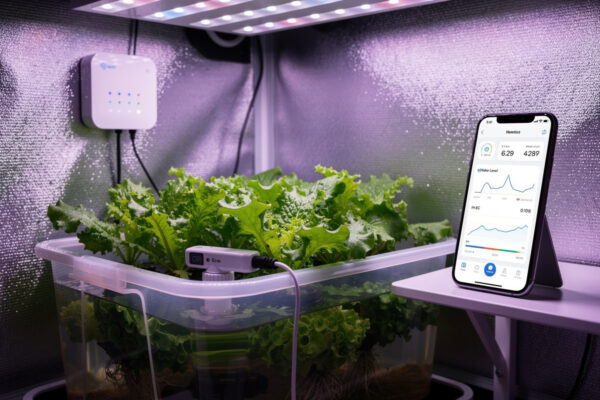
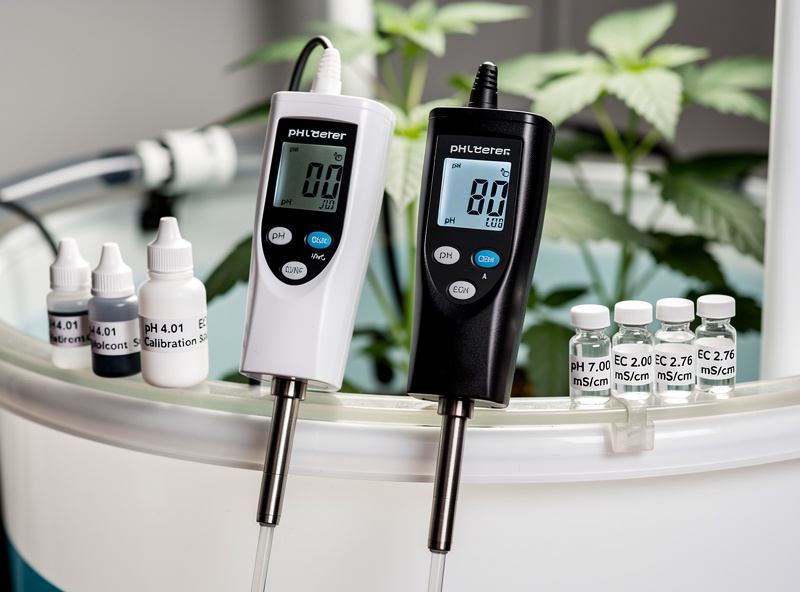
Two pieces of measurement gear cover 90% of daily monitoring: an EC meter and a pH meter. Our EC meter for hydroponics guide covers the budget pen versus premium options, and the Bluelab Truncheon buyer’s guide walks through whether the $130-180 commercial-grade unit is worth it for your setup.
The Essential Equipment Philosophy
Successful hydroponic growing requires understanding the difference between equipment that enables success and equipment that merely adds convenience. Beginners often confuse the two categories, buying expensive automation systems while neglecting fundamentals like accurate pH measurement.
The essential equipment philosophy focuses on buying tools that solve real problems you will actually encounter. A $200 automated pH doser sounds impressive, but a $25 manual pH meter and 10 minutes of daily attention produces identical results for most home growers. Conversely, skipping a quality EC meter to save $30 often leads to nutrient problems that waste months of growing time. For continuous Wi-Fi or Zigbee monitoring rather than handheld testing, the smart hydroponic sensors guide covers the controller and probe options that integrate with home-automation systems.
This guide categorizes equipment into three tiers: must-haves you cannot succeed without, important items that make growing easier, and nice-to-haves that add convenience but are not essential. Understanding these tiers helps you prioritize spending for maximum growing success per dollar invested.
For system-specific equipment lists, the complete hydroponic systems guide breaks down exactly what each system type requires.
Equipment Priority Matrix
Before diving into specific products, this matrix helps you understand which equipment matters most for hydroponic success:
| Equipment | Priority | Budget Cost | Premium Cost | Impact on Success |
|---|---|---|---|---|
| pH Meter | Must-Have | $25-40 | $80-150 | Critical—prevents most nutrient-lockout problems |
| Nutrients | Must-Have | $15-25 | $40-80 | Critical—plants cannot grow without |
| Growing Medium | Must-Have | $10-20 | $25-40 | Critical—root support essential |
| EC/TDS Meter | Important | $20-35 | $60-100 | High—prevents nutrient burn/deficiency |
| LED Grow Light | Important | $30-60 | $100-300 | High—indoor growing requires |
| Air Pump | System-Dependent | $12-25 | $40-80 | High—for DWC and aeroponics |
| Water Pump | System-Dependent | $15-40 | $60-150 | High—for NFT, Ebb and Flow |
| Timer | Convenient | $8-15 | $25-50 | Medium—automates light cycles |
| Reservoir Chiller | Climate-Dependent | $150-250 | $300-600 | Medium—for warm climates |
| pH Doser | Nice-to-Have | $200-400 | $500-1000 | Low—convenience automation |
Notice that the must-haves focus on measurement and nutrients—knowledge and inputs plants actually need. The expensive automation equipment appears in nice-to-have territory, indicating where beginners often waste money.
Must-Have Equipment: The Foundation
These four equipment categories are genuinely non-negotiable. You cannot grow hydroponically without them, and skimping here directly causes plant failure.
pH Testing and Adjustment
pH management is the single most critical skill in hydroponics. When pH drifts outside the 5.5-6.5 range, plants become unable to absorb specific nutrients regardless of how much fertilizer you add. This condition—nutrient lockout—is the single most common reason beginner grows stall out, and pH drift is the number-one driver of it (UF/IFAS HS1422 covers why pH and EC monitoring has to happen at every growth stage, not just at setup).
Digital pH Meter ($25-40): Do not use test strips or liquid test kits. They are inaccurate by ±0.5 pH, which is the difference between perfect nutrient uptake and total lockout. A basic digital meter provides the ±0.1 accuracy hydroponics demands. My first meter was a $12 strip kit, and it told me my reservoir was fine right up until the leaves started yellowing — that mistake is why every reservoir I run now gets a real digital pen. Some growers still keep a set of cheap pH test strips as a $6-10 backup for a quick sanity check between calibrations, but they should never be your primary tool.
Calibration Solution ($8-12): pH meters drift over time and require monthly calibration. Purchase pH 4.0 and pH 7.0 calibration solutions—do not use homemade alternatives. Uncalibrated meters provide worse information than no meter at all.
pH Up and pH Down ($10-15): These concentrated acid and base solutions adjust your water into the target range. Buy both—you will need both directions as plants naturally alter pH as they feed. The small bottles last months for home growers.
Hydroponic Nutrients
Plants cannot grow on water alone. Hydroponic nutrients provide the 16 essential elements plants need, delivered in forms immediately available to roots. This direct delivery is why hydroponics outperforms soil.
Two-Part or Three-Part Formula ($15-25): These systems separate nutrients that chemically react when concentrated, allowing higher concentrations than single-bottle solutions. General Hydroponics Flora Series is the industry standard—proven, affordable, and widely available. A quart set ($25-30) lasts 3-6 months for small home setups.
Calcium-Magnesium Supplement ($12-18): Essential for fruiting plants. Tomatoes, peppers, and strawberries are particularly sensitive to calcium deficiency, which causes blossom end rot and tip burn. Even if your base nutrients contain calcium, supplementing prevents deficiency in demanding crops.
pH Buffer/Adjustment Agents: Some nutrient lines include pH buffers that help stabilize solution pH. While not essential, they reduce adjustment frequency from daily to every 2-3 days.
Growing Medium
Unlike soil, hydroponic growing media provide only physical support—roots obtain all nutrition from the water solution. Choosing the right medium affects root health, drainage, and transplanting ease.
Clay Pebbles/Hydroton ($12-20): The most popular hydroponic medium. These fired clay balls provide excellent drainage, do not degrade, and are reusable after cleaning. Their pH-neutral nature does not affect solution chemistry. One bag covers multiple systems.
Rockwool Cubes ($8-15): Ideal for starting seedlings and cuttings. The fibrous structure holds moisture while providing air pockets for oxygen. Rockwool requires pre-soaking in pH-adjusted water to neutralize its naturally high pH.
Coco Coir ($10-18): An increasingly popular alternative. This coconut fiber medium offers soil-like handling with hydroponic performance. Coco requires buffering with calcium-magnesium before use but provides excellent root support for larger plants.
Perlite ($5-10): The budget option—volcanic glass heated until it pops like popcorn into white, lightweight granules. Very affordable and widely available at any garden center, with good drainage and aeration. It can float in DWC reservoirs, so mix it with vermiculite if you go this route, and always wet it before handling since the dust irritates lungs.
Containers and Net Pots
Plants need physical containment that holds the growing medium while allowing root access to nutrient solution. The specific containers depend on your chosen system type.
Net Pots ($6-12): These plastic pots with mesh sides hold growing medium while allowing roots to grow through. Sizes range from 2-inch for lettuce to 6-inch for tomatoes. Buy assorted sizes—you will use different sizes for different plants.
5-Gallon Buckets with Lids ($5-8): The standard container for DWC systems. Food-grade buckets prevent chemical leaching. Drilling a hole in the lid for your net pot creates the simplest hydroponic system possible.
Reservoir Totes ($15-30): For NFT and larger systems, plastic storage totes serve as nutrient reservoirs. Opaque or black containers prevent algae growth that translucent containers encourage.
Important Equipment: The Upgrade Path
Once you have the must-haves operating successfully, these equipment additions significantly improve growing efficiency and plant performance. Defer these purchases initially, but prioritize them as your skills grow.
EC/TDS Meter
Electrical conductivity (EC) meters measure the total dissolved solids in your nutrient solution—the concentration of nutrients available to plants. While not absolutely essential (you can follow mixing ratios), EC meters prevent the two most common nutrient mistakes: underfeeding and overfeeding.
Digital EC Meter ($20-35): Like pH meters, digital EC meters provide far more useful information than test strips. Target EC ranges vary by plant type: leafy greens prefer 0.8-1.2 mS/cm, while fruiting plants need 1.4-2.0 mS/cm. I mix every reservoir to a target EC reading rather than trusting the bottle’s scoop measurements — tap water mineral content varies enough that “follow the label” gets you in the right neighborhood but not on target.
Overfeeding causes nutrient burn—brown, crispy leaf edges that reduce plant health and yield. Underfeeding produces pale, slow-growing plants that never reach potential. An EC meter catches both problems before visible symptoms appear.
LED Grow Lights
Plants grown outdoors receive full-spectrum sunlight at intensities exceeding 1000 PPFD (photosynthetic photon flux density). Indoor growing requires replicating this light—or at least providing the minimum intensity plants need for healthy growth.
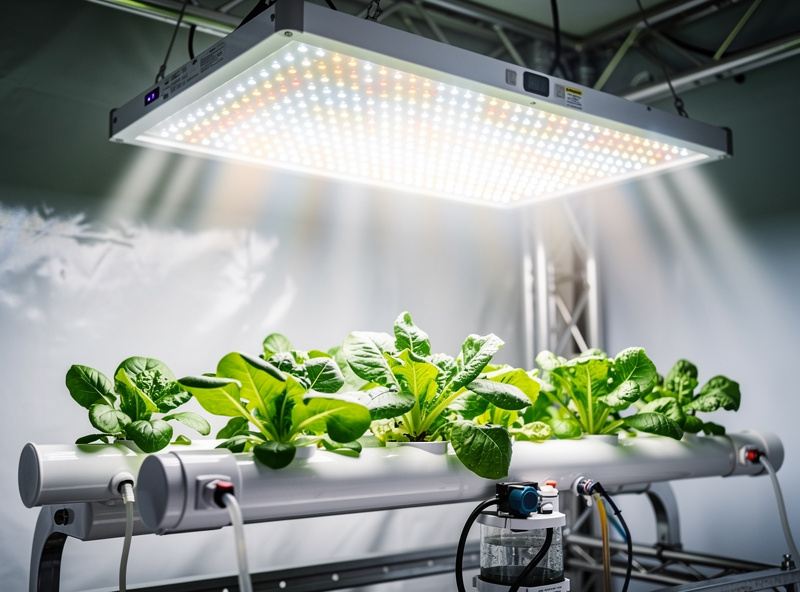
Full-Spectrum LED Panels ($30-60 for small systems): LED technology has revolutionized indoor growing, providing the exact wavelengths plants need (400-700nm PAR) with minimal heat production. A 100-watt LED panel covers 2-3 square feet of growing area—perfect for beginners.
Light Requirements by Plant Type: – Leafy greens: 150-250 PPFD for 12-14 hours daily – Herbs: 200-400 PPFD for 14-16 hours daily – Fruiting plants: 400-600 PPFD for 14-16 hours daily (600-900 PPFD during flowering)
Hang lights 12-18 inches above lettuce and 18-24 inches above fruiting plants. LED grow lights produce dramatically less heat than older HID systems, allowing closer placement without burning plants.
For a detailed breakdown of light requirements across different vegetable crops, CityRooted has a complete grow lights for vegetables guide covering PPFD targets, coverage areas, and positioning for indoor soil-based growing.
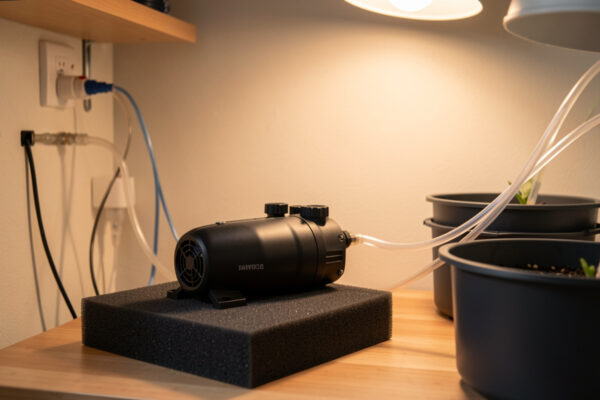
Air and Water Pumps
Active hydroponic systems require pumps to move air or nutrient solution. The specific pumps depend entirely on your chosen system type.
Air Pumps ($12-25): Required for Deep Water Culture and beneficial for any system with standing water. Air pumps bubble oxygen through the solution, preventing root suffocation. Size your air pump to your reservoir—approximately 1 liter per minute of air flow per gallon of water. In wattage terms: a small 2-4 watt pump covers one standard 5-gallon bucket, a medium 5-10 watt pump handles 2-4 buckets or one large tote, and anything above 10 watts is for multiple containers or commercial-scale setups. When in doubt, size up—a pump that is too large just means more dissolved oxygen, while one that is too small leaves roots starved.
Water Pumps ($15-40): Required for NFT, Ebb and Flow, Dutch buckets, and aeroponics. These pumps recirculate nutrient solution through the system. Choose submersible pumps rated for your system’s total head height and flow rate requirements.
Backup Power ($20-30): Battery-powered air pumps provide critical insurance against power outages. For NFT and aeroponics—where pump failure kills plants within hours—uninterruptible power supplies (UPS) provide longer protection.
Convenient Equipment: The Extras
These equipment categories make growing easier or more productive but are not essential for success. Purchase these after mastering fundamentals and when the convenience justifies the cost.
Timers and Automation
Mechanical Timers ($8-15): Simple plug-in timers automate light cycles and pump schedules. Digital timers offer more programming options and battery backup to maintain schedules during outages.
Smart Plugs ($25-40): WiFi-enabled plugs allow remote monitoring and control via smartphone apps. Useful for travelers who want to check systems while away, but not essential for local growers.
Environmental Monitoring
Digital Thermometer/Hygrometer ($10-20): Monitor air temperature and humidity in your grow space. Most plants thrive at 65-75°F with 40-60% humidity. Exceeding these ranges invites pests and diseases.
Reservoir Thermometer ($8-12): Water temperature critically affects dissolved oxygen levels. I keep every reservoir at or below 68°F (20°C); once it climbs past 72°F (22°C), dissolved oxygen craters and root rot pathogens multiply fast. A $10 thermometer is the cheapest insurance in this entire list.
Infrared Thermometer ($20-35): Point-and-shoot temperature reading of leaf surfaces. Useful for verifying that lights are not overheating the canopy, but a nice-to-have rather than essential.
Advanced Monitoring
Continuous pH Monitors ($150-300): These probes stay in your reservoir 24/7, logging pH changes and alerting you to drift. Useful for large systems where frequent manual testing becomes tedious, but overkill for small home setups.
Automated pH Dosers ($200-500): These systems automatically detect pH drift and dispense pH Up or Down to maintain target ranges. They solve a problem that takes 5 minutes of manual attention daily—a convenience luxury, not a necessity.
Reservoir Chillers ($150-250): Keep reservoir temperature below 68°F to prevent root rot and maximize dissolved oxygen, but only truly needed in hot climates or during summer heat waves. Before spending this money, try frozen water bottles in your reservoir first—rotate two bottles, freezing one while the other cools your nutrient solution. This free method works surprisingly well for most home growers.
Equipment by System Type
Different hydroponic systems require different equipment packages. This breakdown helps you budget accurately for your chosen growing method.
| System | Must-Have Equipment | System-Specific Equipment | Total Setup Cost |
|---|---|---|---|
| Kratky | pH meter, nutrients, growing medium, net pots | Container/jar, no pumps needed | $54-66 |
| DWC | pH meter, nutrients, growing medium, net pots | 5-gallon bucket, air pump, air stone | $93-122 |
| NFT | pH meter, EC meter, nutrients, growing medium | Channels, water pump, reservoir, timer | $180-250 |
| Ebb and Flow | pH meter, EC meter, nutrients, growing medium | Flood table, water pump, timer, drainage | $160-220 |
| Dutch Bucket | pH meter, EC meter, nutrients, growing medium | Buckets, water pump, drip lines, return plumbing | $200-350 |
| Aeroponics | pH meter, EC meter, nutrients | High-pressure pump, misting nozzles, pressure tank | $400-700 |
These costs include only the hydroponic-specific equipment. Add LED grow lights ($30-100) if growing indoors without adequate natural light.
For system-specific setup instructions, see the complete hydroponic systems guide.
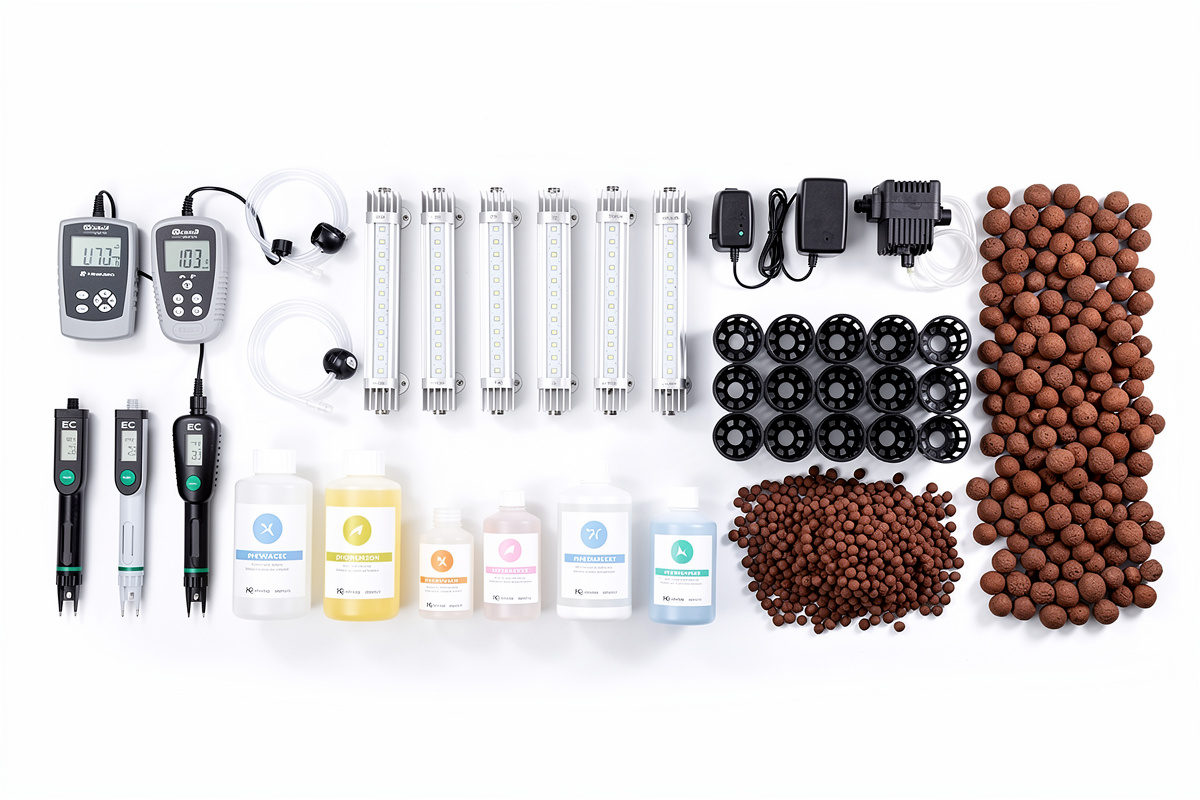
Complete Shopping Lists by Budget
These three shopping lists provide everything you need at different investment levels. Each list includes the must-haves plus appropriate upgrades for that budget tier.
Bare Minimum Setup ($54-66)
This lean setup focuses on Kratky systems—the simplest hydroponic method. You will produce excellent lettuce and herbs with minimal investment while learning fundamentals.
- pH meter (digital): $25
- pH Up/Down solutions: $12
- Hydroponic nutrients (small): $18
- Clay pebbles: $12
- Net pots (10-pack): $8
- Mason jars or food containers: $0 (household items)
Total: $75 (or $54 if you already have jars/containers)
This setup grows 4-6 lettuce plants or herbs simultaneously. No electricity required—perfect for testing hydroponics before major investment.
Recommended Starter Setup ($122-155)
This more capable setup adds DWC capability, allowing you to grow any plant type including fruiting vegetables. The equipment investments here serve you for years.
- pH meter (better quality): $35
- pH Up/Down solutions: $12
- EC meter: $28
- Hydroponic nutrients (quart size): $30
- Clay pebbles (large bag): $18
- Rockwool cubes: $10
- Net pots (assorted): $12
- 5-gallon bucket with lid: $6
- Air pump with air stone: $18
- LED grow light (small): $40
Total: $209 (or $122 if you already have a suitable south-facing window for natural light)
This setup supports multiple DWC buckets for tomatoes, peppers, or many lettuce plants. The EC meter prevents nutrient mistakes that frustrate beginners.
Comfortable Indoor Setup ($232-285)
This complete setup adds full indoor growing capability with professional-grade monitoring and redundancy. Everything you need for year-round production regardless of outdoor conditions.
- pH meter (quality with calibration): $40
- pH Up/Down solutions (large): $15
- EC meter (quality): $35
- Hydroponic nutrients (full set): $45
- Calcium-magnesium supplement: $15
- Clay pebbles (large bag): $18
- Rockwool cubes: $10
- Net pots (assorted sizes): $15
- 5-gallon buckets with lids (2): $12
- Air pump with multiple air stones: $25
- LED grow light (quality 100W): $65
- Mechanical timer: $10
- Digital thermometer/hygrometer: $15
- Reservoir thermometer: $10
- Backup battery air pump: $22
Total: $352 (or $232 without the backup air pump and second LED panel)
This comprehensive setup handles serious indoor production with monitoring, backup systems, and quality equipment that lasts for years of growing.
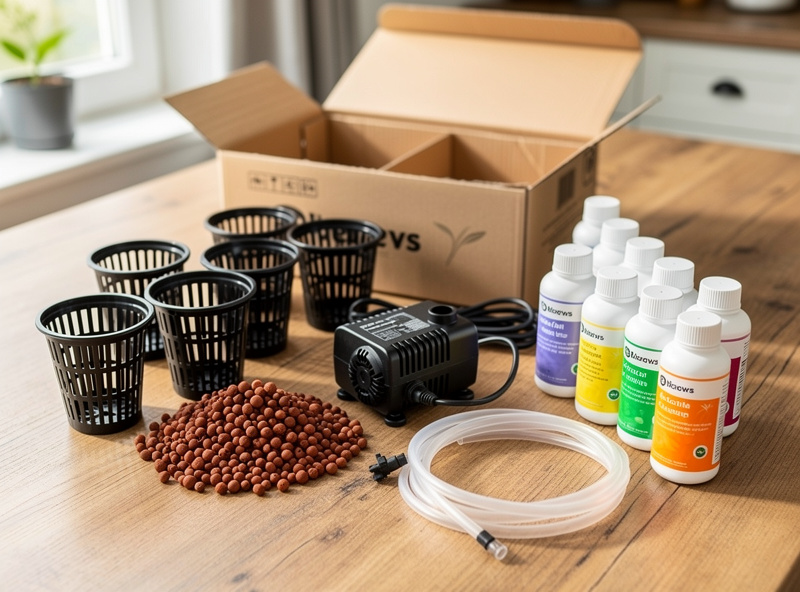
Pre-Made Kits vs DIY Equipment
Pre-configured hydroponic kits offer convenience but cost noticeably more than buying the same components separately. Understanding when kits make sense helps you make the right choice for your situation.
When Kits Make Sense
Absolute beginners: If you have no idea where to start, a quality kit eliminates decision paralysis. Everything works together out of the box, and instructions guide your first grow.
Gifts: Kits package attractively and include everything needed. Giving someone a jar, net pot, and nutrients separately feels less substantial than a complete kit in a box.
Proven combinations: Established kits use components that work together. For beginners unsure which air pump size matches which reservoir, kits eliminate compatibility guesswork.
The best hydroponic growing kits guide reviews specific pre-made options by quality and value.
When DIY Makes Sense
Budget constraints: Building your own system costs roughly half the price of comparable kits. If cost matters more than convenience, DIY is the clear choice.
Customization: DIY lets you choose exactly which components meet your needs. Want a larger reservoir? Better quality pH meter? Specific nutrient brand? DIY provides control kits cannot match.
Scalability: DIY systems expand more easily. Add another bucket to your DWC, extend your NFT channels, or build additional Kratky jars using the same knowledge and tools.
Learning value: Understanding how each component works makes you a better grower. Kits hide this knowledge behind pre-assembly. Building from components teaches skills that transfer to troubleshooting and upgrades.
Equipment Buying Mistakes to Avoid
These common equipment errors waste money and cause frustration:
Buying the cheapest pH meter: A $15 pH meter seems like a bargain until it provides inaccurate readings that cause nutrient lockout. Spend the extra $10-15 for a reliable digital meter—it pays for itself in prevented crop losses.
Skipping the EC meter: Beginners often think mixing nutrients by the label instructions is sufficient. But water sources vary dramatically in mineral content. An EC meter reveals your actual nutrient concentration, preventing both deficiency and burn.
Oversizing equipment: A 400-watt LED panel for 2 lettuce plants is massive overkill. Match your equipment to your actual growing area and plant needs. You can always upgrade as you expand.
Buying everything at once: Resist the urge to purchase all possible equipment before your first grow. Start with must-haves, add important equipment as skills develop, and only then consider conveniences. This staged approach prevents wasting money on unused gear.
Neglecting backup power: Air pumps and water pumps are lifelines for your plants. A $20 battery backup air pump prevents catastrophic losses during power outages. This cheap insurance is essential for anyone with more than a few plants — I skipped it on my first DWC bucket, lost a tote of lettuce to a multi-hour outage, and haven’t run a reservoir without one since.
Where to Buy Hydroponic Equipment
Sourcing equipment from the right places saves money and ensures quality.
Amazon and Online Retailers: Best selection and often best prices for hydroponic-specific items. Read reviews carefully—quality varies dramatically between brands. Prime shipping gets you growing faster.
Hardware Stores (Home Depot, Lowes): Excellent for containers, buckets, and basic tools. Best prices on PVC fittings, plastic storage totes, and building supplies. Limited hydroponic-specific stock.
Pet/Aquarium Stores: Surprisingly good source for air pumps, air stones, and tubing. Aquarium equipment is designed for exactly the water-use conditions hydroponics requires. Sometimes cheaper than hydroponic-specific brands.
Hydroponic Specialty Shops: Highest prices but expert advice and complete selection. Worth visiting to see equipment in person and ask questions, even if you ultimately buy online.
Dollar Stores: Useful for measuring cups, small containers, and basic supplies. Quality varies—test before trusting critical equipment.
Maintaining Your Equipment
Quality equipment lasts years with proper care. Neglecting maintenance causes premature failure and growing problems.
pH Meter Care
Always store pH meters with the probe in storage solution or pH 7.0 buffer—never let the probe dry out. Rinse the probe with distilled water after each use to prevent salt buildup. Calibrate monthly using fresh calibration solutions. Replace the probe every 12-18 months as accuracy degrades.
Pump Maintenance
Clean air stone pores monthly by soaking in hydrogen peroxide or vinegar to dissolve mineral deposits. Check airline tubing for kinks that restrict airflow. For water pumps, clean intake filters weekly to prevent clogging. Lubricate pump impellers annually if the manufacturer recommends it.
LED Light Care
Dust accumulation on LED panels reduces light output by 10-20% over time. Wipe panels monthly with a dry microfiber cloth. Check hanging hardware quarterly for wear. LED diodes last 50,000+ hours, but drivers may fail earlier—quality fixtures include replaceable drivers.
Your Equipment Buying Action Plan
You now understand exactly what hydroponic equipment you need, what you can defer, and where to buy it. Your next step is making purchases and starting your first grow.
For budget-conscious beginners: Start with the Bare Minimum list ($54-66). Grow lettuce in Kratky jars to learn pH management and nutrient mixing before investing in pumps and lights.
For serious beginners: Build the Recommended Starter setup ($122-155). The air pump and larger reservoir open DWC growing, teaching you active system management with room to expand.
For indoor growers: Invest in the Comfortable Indoor setup ($232-285). Quality LED lighting, monitoring equipment, and backup systems provide professional growing capability from day one.
Remember: plants need pH management, nutrients, and proper environment far more than they need expensive automation. Master the fundamentals with basic equipment before upgrading to convenience features.
Buy your equipment, set up your system, and start growing. Your first harvest is one equipment purchase away.
What equipment do I need to start hydroponics?
To start hydroponics you need four essential items: a digital pH meter ($25-40), hydroponic nutrients ($15-25), growing medium like clay pebbles ($10-20), and net pots ($6-12). For Deep Water Culture systems, add an air pump ($12-25) and 5-gallon bucket ($5-8). For indoor growing, add a full-spectrum LED grow light ($30-100). An EC meter ($20-35) is strongly recommended for preventing nutrient problems. The DIY hydroponics budget guide shows complete setups for under $50.
How much does hydroponic equipment cost?
Complete hydroponic equipment setups cost $54-66 for basic Kratky systems, $93-122 for starter DWC systems, $180-250 for NFT channels, and $232-352 for full indoor setups with LED lighting. Individual components: pH meters cost $25-40, LED grow lights $30-300, air pumps $12-25, and nutrient solutions $15-45. Pre-made hydroponic kits cost noticeably more than buying the same components separately but offer convenience and guaranteed compatibility.
Do I need a pH meter for hydroponics?
Yes, a digital pH meter is absolutely essential for hydroponics. When pH drifts outside the 5.5-6.5 range, plants cannot absorb nutrients regardless of fertilizer concentration—pH drift is the single most common driver of nutrient lockout in beginner grows. Test strips are inaccurate by ±0.5 pH, which is the difference between success and nutrient lockout. A quality digital pH meter ($25-40) is the most important equipment purchase you will make.
What is the best hydroponic growing medium?
Clay pebbles (hydroton) are the best all-around hydroponic growing medium. They provide excellent drainage, are pH-neutral, reusable after cleaning, and work in every system type. Rockwool cubes are best for starting seedlings. Coco coir offers soil-like handling for larger plants. Avoid soil or potting mix in hydroponics—it clogs systems and introduces pathogens. The growing medium provides only physical support—all nutrition comes from the water solution.
Do hydroponic systems need special lights?
Indoor hydroponic systems need full-spectrum LED grow lights that provide photosynthetically active radiation (PAR) in the 400-700nm range. Standard household LED bulbs do not provide sufficient intensity or spectrum for plant growth. Leafy greens need 150-250 PPFD for 12-14 hours daily, herbs need 200-400 PPFD for 14-16 hours, and fruiting plants need 400-600 PPFD. A quality 100W LED panel ($50-80) covers 2-3 square feet of growing area.
Are hydroponic growing kits worth it?
Hydroponic growing kits are worth it for absolute beginners who want guaranteed compatibility and detailed instructions. Kits cost noticeably more than DIY builds but eliminate guesswork. Quality kits include properly matched components that work together out of the box. For budget-conscious growers or those who enjoy building, DIY setups cost half the price and provide equivalent performance.
Can I use regular fertilizer for hydroponics?
No. Standard garden fertilizer will not dissolve completely and will clog your system. Hydroponic nutrients are formulated as fully soluble salts that provide all essential macro and micronutrients in the correct ratios—garden fertilizer also lacks the micronutrients like iron, manganese, zinc, and boron that soil naturally provides. General Hydroponics Flora Series is the industry standard.
What size air pump do I need for hydroponics?
Size your air pump to your reservoir volume using approximately 1 liter per minute of air flow per gallon of water. A standard 5-gallon DWC bucket needs a 5 L/min air pump ($15-20). Choose pumps with multiple outlet nozzles if running multiple air stones. Air pumps must run continuously—buy a backup battery air pump ($20) for power outage protection. Higher quality pumps run quieter and last longer but cost $30-40 versus $12-18 for basic models.
Related Guides
- Best Hydroponic Growing Kits for Beginners — Pre-configured systems reviewed and rated
- Hydroponic Systems: Complete Guide — Match equipment to your chosen growing method
- DIY Hydroponics on a Budget — Build complete systems for under $50
- Hydro Indoor Garden Setup Guide — Complete walkthrough for equipment installation
- Common Hydroponic Mistakes — Equipment errors that kill plants
- Complete Guide to Hydroponic Plant Growing — Match plants to equipment requirements
- Hydroponics for Beginners — Getting started with your first grow
- Hydroponic Systems Explained — Equipment needs by system type
- Hydroponic Tomatoes vs Soil — Equipment for fruiting plants
- Vertical Farming Systems — Space-efficient equipment setups
- Hydroponics vs Soil — When hydroponic equipment investment pays off