Rockwool cubes are the default seed-starting medium for hydroponics because they hold the rare combination of high water retention and high air porosity that seedling roots need. The catch is pH: rockwool ships alkaline at around pH 7–8, so it must be pre-soaked in pH 5.5 water before a seed ever touches it. Skip that step and your seedlings stall.
Rockwool is spun from melted basalt rock — it is essentially mineral wool, the same family as some insulation, drawn into fine fibers and pressed into cubes. On my bench it is the medium I reach for first across every method I run, because the same cube that germinates a lettuce seed drops straight into a net pot for DWC or nests into an ebb-and-flow clay bed without ever disturbing the root. That continuity is why I keep a stack on the shelf year-round. This guide is the exact process I use, including the two preparation steps almost every beginner skips.
Why Rockwool Beats Most Other Starter Media
The reason rockwool dominates seed starting is air-to-water ratio. A properly drained rockwool cube holds roughly 80% water and still keeps around 18% air space — that pocket of air is what keeps the emerging root oxygenated while it sits in a damp medium. Peat plugs hold water well but can go anaerobic when overwatered; clay pebbles drain too fast for seeds to stay moist. Rockwool sits in the sweet spot.
It is also inert and sterile. Straight from a sealed bag, rockwool carries no fungus gnats, no weed seeds, and no soil pathogens — which matters enormously in propagation, where a single Pythium outbreak can take a whole tray. And because it is structurally rigid, the cube supports the seedling stem and gives you a clean handle to lift and transplant without touching the roots. The trade-off is that it is not biodegradable and it demands pH management, which is the price of admission. If you would rather avoid it, peat-free plugs are the alternative I cover in the main seed starting guide.
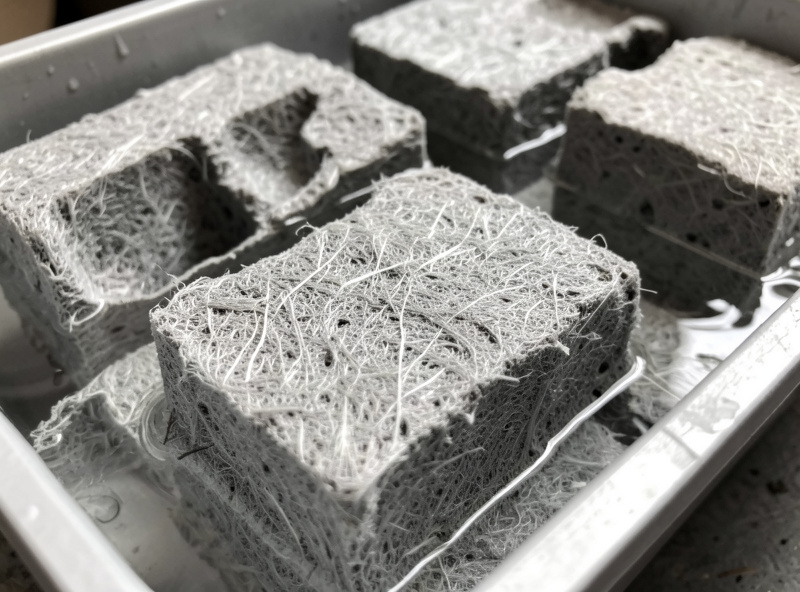
Step One: The pH Pre-Soak Nobody Should Skip
This is the step that separates working rockwool from frustrating rockwool. Because the raw cubes are alkaline, dropping a seed into them as-is exposes the seedling to pH 7–8 — well outside the 5.5–6.0 band where roots can actually take up nutrients. The fix is a soak.
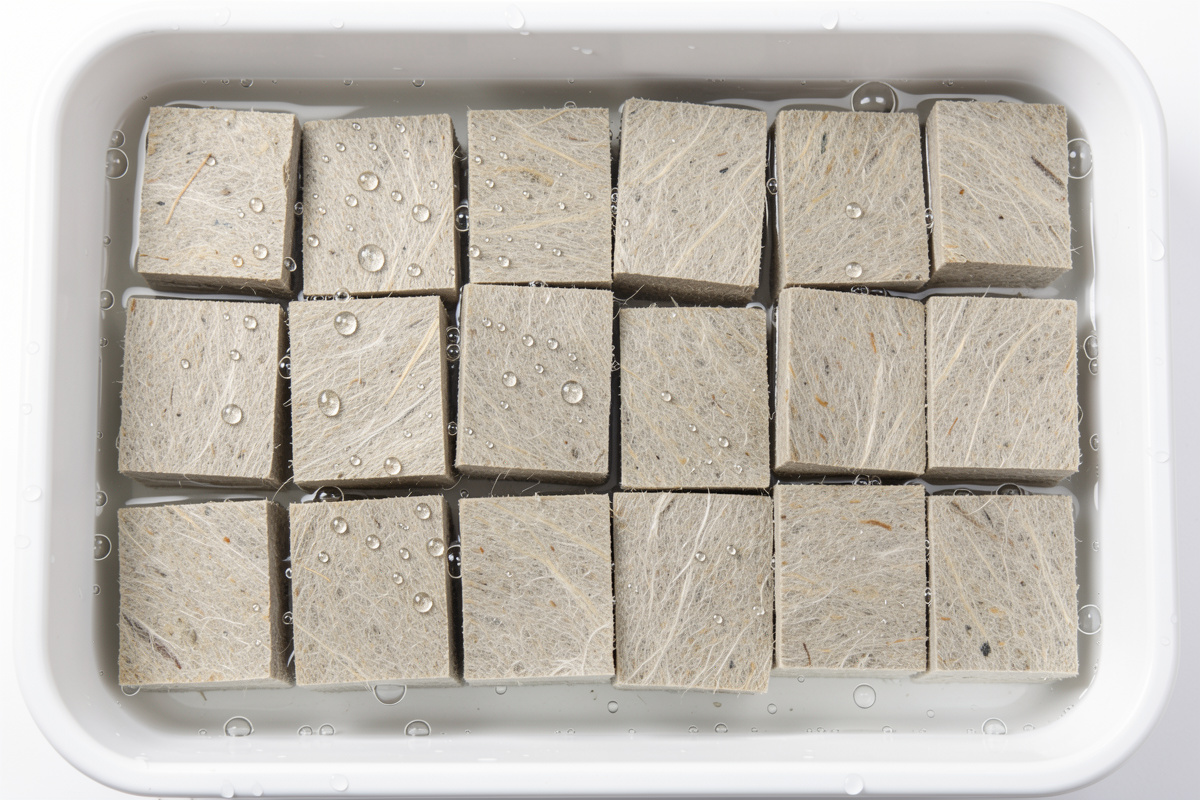
Fill a tray with clean water and adjust it to pH 5.5 using pH Down. Submerge the cubes and let them sit for an hour or more; some growers soak overnight. Do not squeeze them — rockwool is not a sponge you wring out, and crushing the fibers destroys the air pockets you are trying to preserve. After the soak, let them drain so they are damp, not dripping. That is it. I run plain pH 5.5 water for the soak, no nutrients, because the seed does not need feeding yet. My pH Down guide covers safe dosing, and a calibrated pH pen takes the guesswork out. As an Amazon Associate I earn from qualifying purchases.
Step Two: Sowing the Seed at the Right Depth
Rockwool cubes come with a pre-punched hole in the top, and that hole is where the seed goes. Drop one or two seeds into the hole — I sow two for older seed and thin to the strongest later — and then pinch the top of the cube gently closed over them. You want the seed about 6–8 mm down, covered enough to stay dark and humid but not buried at the bottom.
The pinch matters. An exposed seed dries out and a seed sitting in open air at the top of the hole germinates erratically. Closing the fibers over it recreates the dark, moist contact a seed needs to imbibe water evenly. Set the sown cubes in a tray, cover with a humidity dome, and put them somewhere warm — on a seedling heat mat if your room runs cold like my Swedish spare room does in winter.
| Cube Size | Best Use | Net Pot Fit | Notes |
|---|---|---|---|
| 1 inch starter | Leafy greens, herbs | 2-inch net pot | Most economical; tray of dozens |
| 1.5 inch starter | All-round seed starting | 2 to 3-inch net pot | My default size |
| 2 inch / blocks | Tomatoes, peppers, cucurbits | 3-inch net pot | More root room before transplant |
| 3-4 inch grow blocks | Stepping up clones/transplants | Direct to system | Slot smaller cube inside |
Step Three: Moisture and Temperature During Germination
Once sown, the job is to keep the cube damp and warm without drowning it. Rockwool holds water for days, so resist the urge to keep adding more — a cube sitting in a pool of standing water has lost its air space and the seed will rot rather than sprout. I keep maybe a centimeter of pH 5.5 water in the bottom of the tray and let the cubes wick it up, topping off only when they feel light.
Temperature drives the timeline. Lettuce and brassicas crack in 2–3 days at 20°C; tomatoes and peppers want 24–28°C and take 5–10. The heat mat under the tray is the single biggest lever in a cold room. Keep the dome on until you see green, then start venting it immediately to drop humidity and prevent the leggy stretch that kills first attempts. The deeper germination playbook lives in my germination guide.
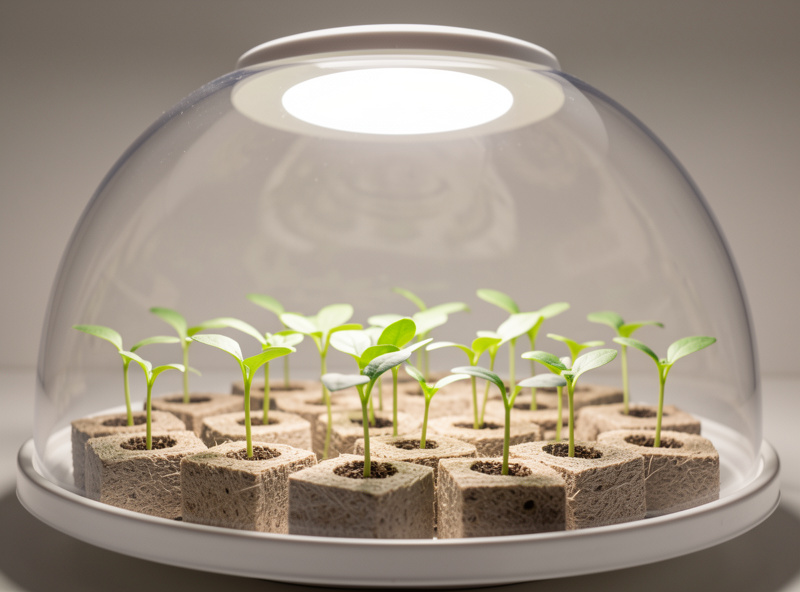
Step Four: First Feed and Watching the Roots
Seedlings in rockwool run on water alone until the first true leaves appear. At that point, switch the tray water to a weak nutrient solution — around EC 0.6 mS/cm — and keep the pH in the 5.5–6.0 band. Because rockwool is inert, what you put in the water is exactly what the roots get; there is no buffering, so an EC pen is not optional. I mix the GH Flora trio weak for this stage; the nutrient mixing guide and EC meter guide cover the details.
Watch the sides and bottom of the cube. When white roots start poking through the mesh of the cube, the seedling is telling you it is ready to move. Healthy roots are bright white; tan or slimy roots mean the cube has been too wet and too warm, and root rot has set in. Keeping the tray solution below 22°C and not waterlogged is the prevention — the same logic I lay out in my root rot guide and the root development guide.
Step Five: Transplanting the Cube
The beauty of rockwool is that you never disturb the root to transplant. Once roots show through the sides, lift the whole cube — never the stem — and drop it into a net pot, packing clay pebbles around it for support. From there it goes into whatever system you run: near the waterline in a DWC bucket with an air stone going, or nested into a flood-and-drain bed.
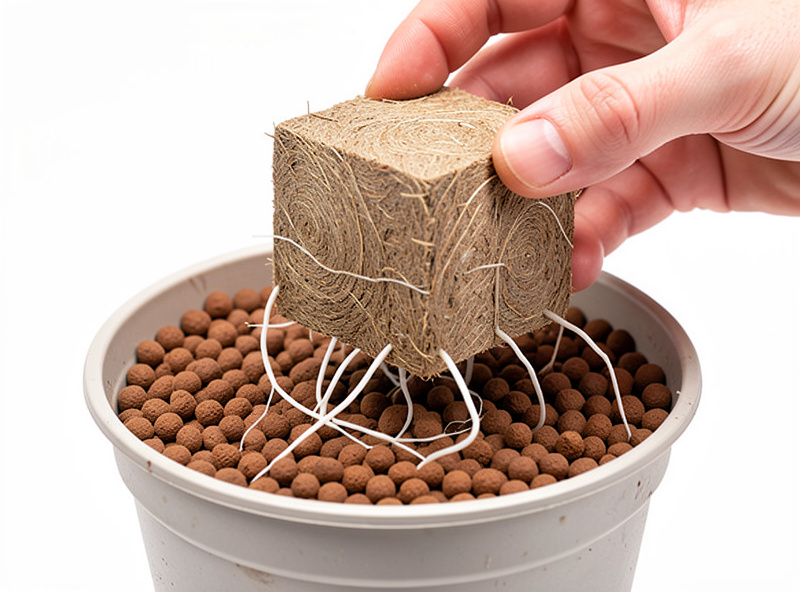
Keep the top of the cube slightly above the pebble line so the stem base stays dry and the crown does not stay soggy. The full seating-and-water-line walkthrough is in my net pot setup guide, and the timing of when to make the move is covered in the transplanting guide. Handle the cube by its body and the move is nearly stress-free.
Common Rockwool Mistakes
The mistakes are predictable. Skipping the pH pre-soak is number one — high pH stalls everything. Overwatering is number two; rockwool holds water far longer than people expect and a constantly soaked cube suffocates roots. Squeezing the cubes to “drain” them crushes the air structure. Burying the seed too deep slows emergence. And leaving the dome on after sprouting grows weak, stretched seedlings. Every one of these is avoidable once you treat the cube as a precision tool rather than a sponge.
Rockwool Versus the Alternatives, Honestly
I default to rockwool, but I will not pretend it is the only answer. If the mineral-wool dust bothers you — wear a mask when handling dry cubes — peat-free coir plugs or compressed coco discs germinate seeds well and compost afterward, at the cost of fussier moisture control. Oasis-type floral foam is cheap and pH-neutral for bulk leafy-green trays but offers zero buffering. And for testing whether old seed is even alive, nothing beats a damp paper towel before you commit a cube. The point is to match the medium to the job: rockwool for reliability across every method I run, coir when sustainability outweighs convenience, paper towel for viability checks. Whatever you choose, the rules that matter — pH in range, damp not soaked, warm enough to germinate — do not change. For the wider media picture and how each plays with different systems, the systems guide is the companion read.
Frequently Asked Questions
Do I have to pH balance rockwool before planting?
Yes. Rockwool ships alkaline at around pH 7 to 8, which stalls seedlings. Soak the cubes in pH 5.5 water for at least an hour before sowing so the medium sits in the 5.5 to 6.0 band where roots can take up nutrients.
How wet should rockwool cubes be for seeds?
Damp, never saturated. A properly drained cube holds about 80 percent water and 18 percent air. Keep about a centimeter of water in the tray and let cubes wick it up; a cube sitting in standing water loses its air space and the seed rots.
How many seeds per rockwool cube?
Sow one to two seeds per cube. Use two for older seed to insure against poor germination, then snip the weaker seedling at the base rather than pulling it, which would disturb the keeper’s roots.
When are rockwool seedlings ready to transplant?
When white roots poke through the sides or bottom of the cube and the plant has two or more sets of true leaves, usually 10 to 18 days for leafy greens. Lift the whole cube by its body, never the stem, and set it in a net pot.
Can I reuse rockwool cubes?
It is not recommended for seed starting. Used cubes carry old root matter and potential pathogens and lose their structure. Rockwool is cheap enough that fresh cubes for each sowing is the safer practice in propagation.
Why are my rockwool seedlings not growing after sprouting?
The usual cause is high pH from skipping the pre-soak, or a too-early or too-strong feed. Confirm the cube water sits at pH 5.5 to 6.0 and feed only at EC 0.6 once true leaves appear. Stalled seedlings almost always trace to pH lockout.