Running several DWC buckets off one air pump works when you feed them through a manifold with an individual ball valve on every line, keep it above the water, and size the pump so each bucket still clears at least 1 LPM per gallon after the split.
For years I ran a pump per bucket. It was loud, it was a tangle of cords, and every failed pump meant a dead reservoir I sometimes didn’t catch for a day. The way I build mine now is one properly sized pump feeding a manifold, and it has been quieter, cheaper, and more reliable across the methods I run side by side. This is exactly how I put one together on my bench, and where the mistakes hide.
Why one pump and a manifold beats a pump per bucket
The math is simple once you stop thinking per bucket and start thinking per gallon. Air stones want roughly 1 LPM of air per gallon of reservoir, and 1.5 to 2 LPM per gallon if I’m running warm or fruiting hard. A row of four 5-gallon DWC buckets is 20 gallons, so I need at least 20 LPM at the stones. One commercial pump in that range costs less than four small pumps, draws less wall power combined, and gives me a single point to maintain instead of four.
Noise is the part people underestimate. Four cheap diaphragm pumps buzzing on a shelf is genuinely worse in a small indoor room than one larger pump on a foam pad. Reliability cuts the same way: I check one pump, one filter, one power lead. When I ran a pump per bucket I had four times the failure surface and no easy way to tell at a glance which stone had gone quiet. If you’re still deciding on the pump itself, my air pump buyer’s guide and the DWC-specific pump picks cover what actually holds up.
The one thing a manifold does not do is create air. It splits what the pump already makes. That’s the whole reason sizing and valves matter, and it’s where most manifold builds quietly fail.
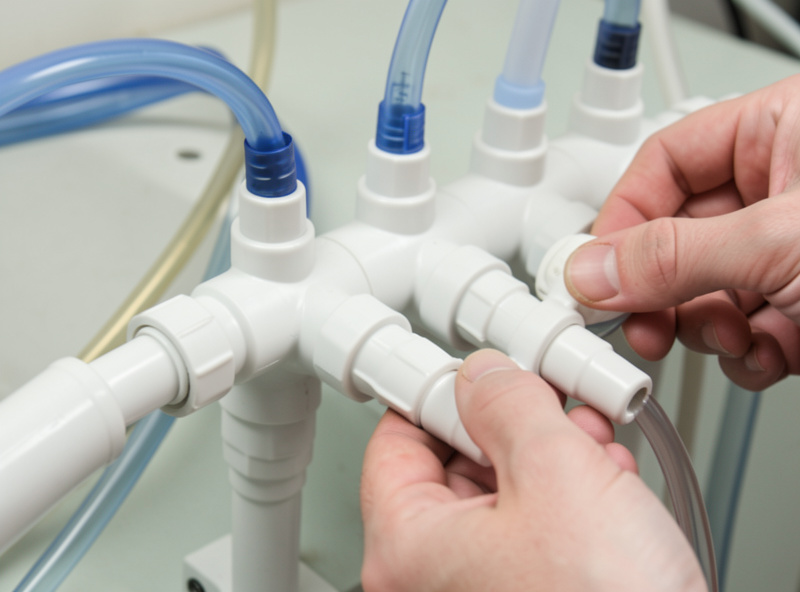
Manifold options: PVC, gang valves, and a 3D-printed build
There are three ways I’ve built a manifold, and all of them work if you respect the ball-valve rule below. The right one depends on how many lines you’re running and whether you own a printer.
Brass or plastic gang valves are the fastest path. These are the little bars of two, four, or six valved outlets sold for aquariums. You feed the inlet from the pump and each outlet has its own knurled valve. For a two-to-four bucket row this is what I reach for first. The plastic ones are fine; the brass ones just last longer and don’t crack if you overtighten. The one weakness is that the built-in valves are coarse, so fine balancing takes patience.
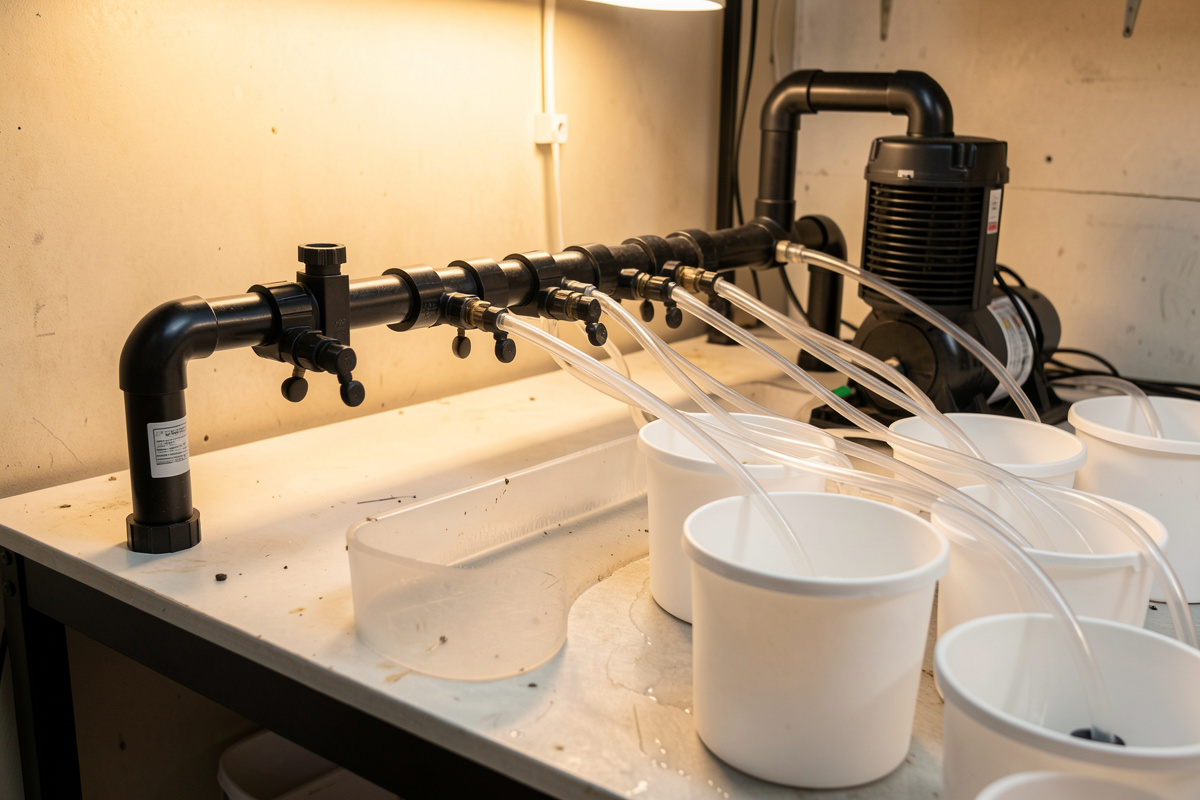
PVC pipe with barbed outlets is my choice for a longer row or when I want the manifold rigidly mounted to the bench. I take a length of 3/4in or 1in PVC, cap one end, feed the pump into the other, and drill and tap the body for barbed fittings — one barb per bucket. Then each barb gets its own inline ball valve before the tubing runs to the stone. It’s more work but it’s solid, it doesn’t wander around the bench, and I can add outlets later.
3D-printed manifold is where the maker crossover pays off. I print my reservoir lids and net-pot collars on the same printer that feeds the rest of my projects, so a manifold body is a natural extension. I model a plenum with barbed stubs at the spacing that matches my bucket row, print it in PETG so it shrugs off humidity, and thread the stubs for push-in valves. The advantage is exact outlet spacing and no drilling; the caution is to design the walls thick and test for leaks under pressure before you trust it, because a printed part with a bad layer line will weep air. Whichever body you pick, the valves are the non-negotiable part.
Why every line needs its own ball valve
Air is lazy. It takes the path of least resistance, every time, and in a manifold that path is the shallowest bucket. If I plumb four buckets off a bare manifold with no valves and one bucket sits an inch lower or has a fresher, less-clogged stone, that bucket steals the air and the deep bucket next to it barely fizzes. You can watch it happen — one reservoir boiling hard, the one beside it limping.
An individual ball valve on each line fixes this by letting me add back-pressure to the greedy lines until every bucket boils evenly. This is the single most important part of the build, and it’s the reason I don’t recommend a bare tee-and-tube splitter for more than two buckets. Back-pressure also matters for sizing: air-stone and pump ratings are measured at zero back-pressure, and they lose roughly 20 to 30 percent once the stone sits under 8 to 10 inches of water. The valves let me trim, but they can’t conjure air that the pump under load isn’t making.
Balancing is done by eye, not by a meter. I run the pump, open every valve fully, then walk the row and pinch back whichever buckets are boiling hardest until the surface churn looks even across all of them. It takes two minutes and I re-check it whenever I add or clean a stone. If you want the deeper reasoning on why an even boil equals even oxygen, I go into that in the dissolved oxygen guide, and the mechanics of DWC itself live in the DWC walkthrough.
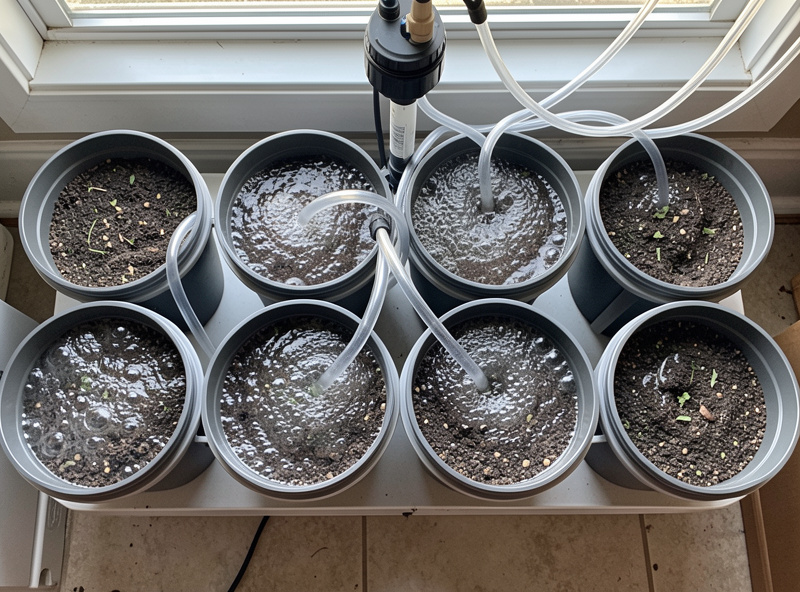
Sizing the pump so every line still clears after the split
Here’s the rule I never break: after you split the air across the manifold, the sum of the lines must still exceed 1 LPM per gallon of total reservoir. A manifold divides output, so a 15 LPM pump feeding four 5-gallon buckets — 20 gallons — is already short. It reads fine on the box but under 8 to 10 inches of water and split four ways, no bucket gets its gallon.
So I size up front. Total the gallons, multiply by 1 LPM (1.5 to 2 if warm or fruiting), then add a margin for the back-pressure loss and buy the next pump up. For that 20-gallon row I want a pump rated at 30-plus LPM at zero back-pressure so the real delivered figure under load clears 20. It’s cheaper to over-buy the pump once than to discover a whole row is oxygen-starved at week six. I keep res temperature under 68F (20C) as well, because warmer water holds less dissolved oxygen — around 9 mg/L at 68F dropping toward 8 at 77F — and above 72F (22C) the roots are already fighting. The full sizing method, with the numbers worked out, is in my air pump sizing guide.
The stones matter too. I run air stones 24/7 — never on a timer — and whether you use cylinder stones or disc diffusers changes the surface area and therefore the back-pressure on each line. I compare them in air stone vs disc diffuser, and the split doesn’t change the rule: every stone still needs its gallon.
Check valves and mounting the manifold above the water
Two failures will flood your gear if you skip them, and both are cheap to prevent.
First, a check valve on every line, between the manifold and each stone. If the pump cuts out — power blip, or you unplug it — water siphons back up the tubing toward the pump. Without a one-way check valve, nutrient solution can climb the line and wreck the pump or cross-contaminate reservoirs. One valve per line, arrow pointing toward the bucket, and the whole row is protected. My full take on the tubing and valve chain is in the check valve and tubing guide.
Second, mount the manifold above the water line. If the manifold body itself sits lower than the reservoir surface, gravity does the siphoning for you the moment the pump stops, and a check valve failure becomes a flood. I bracket the manifold to the bench or a shelf edge so it lives a hand’s width above the highest reservoir. Keeping it high also keeps water out of the pump if a check valve ever weeps. These two habits are why I’ve never come home to a pump full of nutrient.
What I use to build a manifold
This is the parts list I actually keep on the bench. Everything here is generic hardware — nothing proprietary — so buy on price and durability.
- One air pump sized above your total gallon demand (30-plus LPM for a 20-gallon four-bucket row)
- A brass or plastic gang valve, or a length of 3/4in-1in PVC with an end cap for a pipe manifold
- Barbed fittings — one per bucket — sized to your airline (usually 4mm/6mm)
- One inline ball valve per line, for balancing back-pressure
- One one-way check valve per line, arrow pointing toward the bucket
- Silicone or vinyl airline tubing, enough for the full run with slack
- Air stones or disc diffusers, one per bucket, matched in type across the row
- A mounting bracket or shelf clip to hold the manifold above the water line
- PTFE tape or a small tube of aquarium-safe sealant for threaded joints
If you’d rather buy a ready-made splitter to start, the aquarium air manifold gang valves on Amazon are the same parts I described. Disclosure: as an Amazon Associate I earn from qualifying purchases; it costs you nothing extra.
Once the manifold is dialed in, it mostly disappears — I balance it once, check the boil when I clean stones, and otherwise leave it alone. If you’re setting up the wider system around it, the systems overview puts DWC and the rest in context.
Can one air pump really run multiple DWC buckets?
Yes, as long as the pump is sized so the total air after the split still exceeds 1 LPM per gallon of combined reservoir. For a four-bucket, 20-gallon row I want a pump rated around 30 LPM to clear that under back-pressure.
Why does each line need its own ball valve?
Air takes the path of least resistance, so a shallow or freshly cleaned bucket steals air from a deeper one. An individual ball valve on each line lets you add back-pressure and balance every bucket to an even boil.
Should I use a PVC, gang valve, or 3D-printed manifold?
Gang valves are fastest for two to four buckets, PVC with barbed outlets is best for a long rigid run, and a 3D-printed body gives exact outlet spacing if you own a printer. All work if every line has its own ball valve.
Do I need a check valve on every line?
Yes. When the pump stops, solution can siphon back up the tubing and reach the pump. A one-way check valve on each line, arrow pointing toward the bucket, stops that backflow and protects the pump.
Where should the manifold be mounted?
Always above the highest water line. If the manifold sits lower than the reservoir surface, gravity siphons solution the moment the pump stops. I bracket mine a hand’s width above the reservoirs.