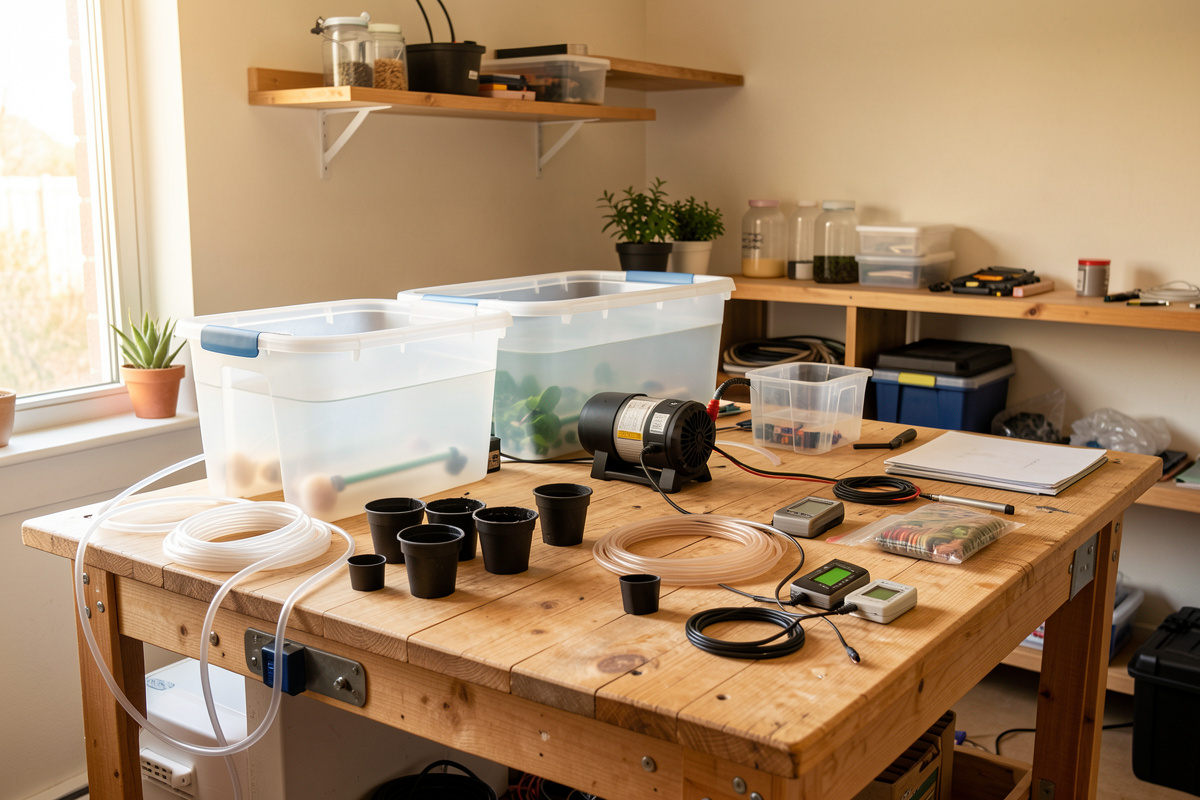
A working hydroponic setup is not one gadget — it is a stack of five jobs done by separate pieces of gear: holding water, oxygenating it, moving or feeding it, anchoring roots, and telling you what is actually happening. Get the stack right and almost any method grows. Get sold a sealed appliance instead, and you inherit its compromises for the life of the unit.
I run DWC, NFT, Kratky and ebb-and-flow side by side in a spare room in Sweden, and the single most useful thing I have learned across the methods I run is that the equipment overlaps far more than the marketing suggests. The same EC pen reads every reservoir. The same air pump can feed three buckets. Once you stop shopping by system name and start shopping by job, the whole thing gets cheaper and more reliable. This hydroponic equipment guide walks the full hardware stack, what each layer does, and where it is worth spending versus where it is theatre.
The Five Jobs Every Hydroponic Build Has to Do
Every soilless system — beginner countertop unit or a wall of buckets — solves the same five problems: contain the nutrient solution, keep it oxygenated, deliver it to the roots, hold the plant and its root mass in place, and let you measure the water chemistry. A system “type” is just a particular way of arranging those jobs.
That framing matters because it tells you what you can share and what you cannot. Reservoirs, air pumps, meters, timers and net pots cross every method I run. Only the delivery mechanism — bubbles in DWC, a thin film in NFT, a flood cycle in ebb-and-flow, or nothing at all in Kratky — is method-specific. If you are still deciding which to run, my decision guide on choosing a system covers that first; this page assumes you have picked one and now need to kit it out.
The Reservoir and Aeration Layer
The reservoir is the heart of the build, and the single best upgrade most growers can make costs nothing: use an opaque tank. Light in the res grows algae, and algae competes with your roots for the dissolved oxygen they depend on. I run opaque totes and buckets in volumes matched to crop count, and I size for stability — a bigger res swings slower in temperature and EC than a small one. My full reasoning on volume, temperature and maintenance lives in the reservoir guide, and the build-and-plumb walkthrough is in the reservoir setup article.
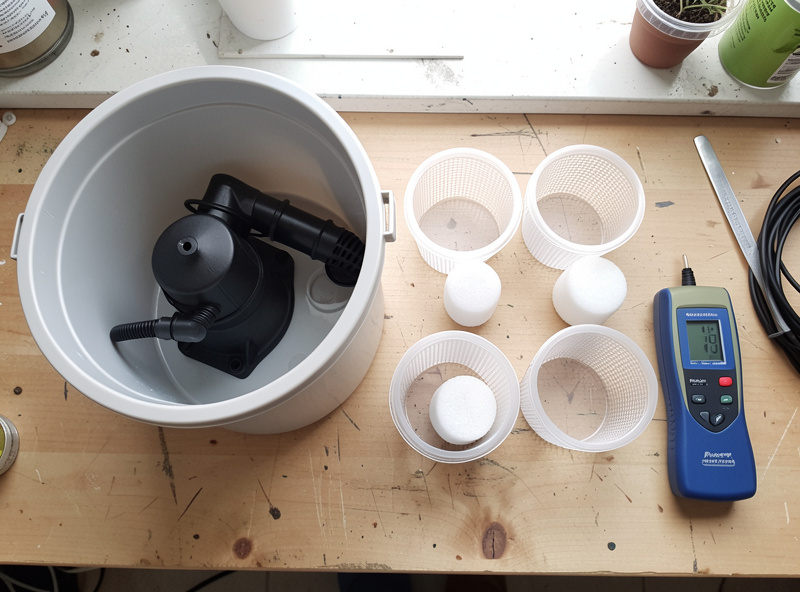
Aeration is non-negotiable in any system where roots sit in or near standing water. Roots respire — they need oxygen at the root zone or they suffocate and rot. An air pump pushing through an air stone is the cheapest insurance you can buy against Pythium and root rot. I keep air stones running 24/7 and target a reservoir at or below 68°F (20°C), because warm water holds far less dissolved oxygen than cool water. The mechanics of why this matters — and how to actually raise oxygen — are in my dissolved oxygen explainer, and the gear side, choosing pumps and stones, is covered in the air stones and dissolved oxygen guide.
Start With Your Source Water
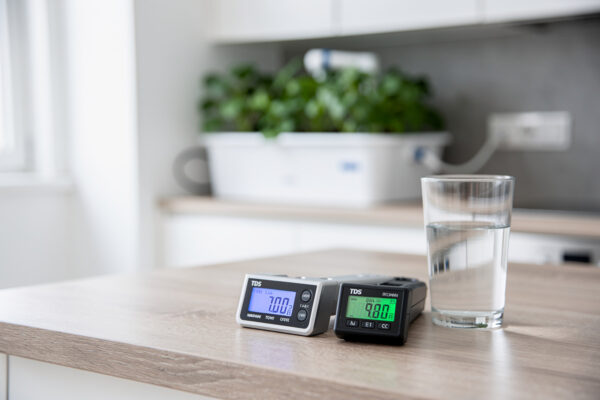
The input everyone forgets is the water itself. Before you add a single drop of nutrient, your tap water already carries dissolved minerals — typically reading 0.2–0.4 mS/cm (roughly 100–250 ppm) straight from the tap, and higher in hard-water areas. That starting EC is part of your nutrient total, so I measure source water first and subtract it from my target rather than mixing on top of an unknown. The EPA’s drinking water resources are a sensible reference for what municipal supply actually contains.
If your tap reads above about 0.5 mS/cm, or runs heavy in calcium and magnesium, it narrows how much room you have to add nutrients before hitting lockout, and a reverse-osmosis filter starts to earn its place — you rebuild the profile from near-zero with CalMag and your base nutrients instead of fighting whatever the utility sent. Soft-water growers can usually skip RO and simply account for the baseline. Either way the rule holds: know your starting number before you mix to a target.
Water Movement: Pumps
There are two pump jobs in hydroponics and people constantly conflate them. An air pump pushes air into the water for oxygen. A water pump moves the nutrient solution — circulating a DWC res, feeding the film in NFT, or filling and draining an ebb-and-flow bed. Kratky uses neither, which is exactly why it is the method I hand beginners first.
Water pumps are rated by flow (gallons or litres per hour) and by head height — how high they can lift water vertically. The mistake I see most is buying on flow alone and ignoring head height, so a pump that looks powerful on the box stalls the moment it has to lift water up to an NFT channel. Match the pump to the lift, not the headline number. The full sizing logic, submersible versus inline, and the duty-cycle question for flood-and-drain are in the water pump guide.
Whatever you buy, oversizing slightly and throttling down beats running a small pump flat out — pumps run cooler and last longer with headroom. A submersible pump also dumps its waste heat straight into the res, which works against you in summer; that is one more reason to watch reservoir temperature.
Net Pots and Grow Media
Net pots hold the plant; the media inside them holds moisture and gives roots something to grip while they find the water. I run 2-inch and 3-inch net pots across my builds and print my own collars to adapt odd lids — a maker habit that earns its keep when a kit ships with a single proprietary pot size.

Media choice is a real decision, not a default. Clay pebbles (hydroton) are reusable, drain freely and suit ebb-and-flow beds and DWC top media. Rockwool cubes are the propagation standard for starting seeds and cuttings. Coco coir, perlite and others each have a place. The trade-offs — what to start seeds in, what to top a net pot with, what to fill a flood bed with — are laid out in the net pots and grow media guide. The short version: pick media by how much water it holds and how often your system delivers, not by what was on the shelf.
Timers and Automation: The Control Loop
The “smart” in a smart hydro lab is the control loop, and it starts with the humblest part in the kit: the timer. Photoperiod is the dominant lever you have over a plant indoors, and a cheap mechanical timer that drifts or sticks will quietly wreck a grow. Ebb-and-flow lives or dies on its flood timer; NFT often runs its pump on a duty cycle too. I treat timers the way I treat any home-automation rig — sensors, schedules, and intervention only when the loop fails.
For lights I want a timer (or smart plug) that holds an exact daily schedule without drift, and for flood-and-drain I want short, repeatable intervals — something a basic 24-hour mechanical dial cannot do well. Which timers actually deliver, mechanical versus digital versus Wi-Fi smart plugs, is in the timers guide. If you want the schedule on your phone and a log of when the pump actually ran, a Wi-Fi smart plug is the upgrade that pays for itself in peace of mind.
Measurement: The Layer Most Builds Skip
This is the layer that separates a hydro lab from a hopeful tote of water, and it is where most beginner kits are silent. You cannot see EC or pH. If you are not measuring them, you are growing blind and the plant is the only instrument telling you something is wrong — by which point you have lost time. I mix every reservoir to a target EC rather than by feel, and I cross-check pH with a pen and reagent drops.
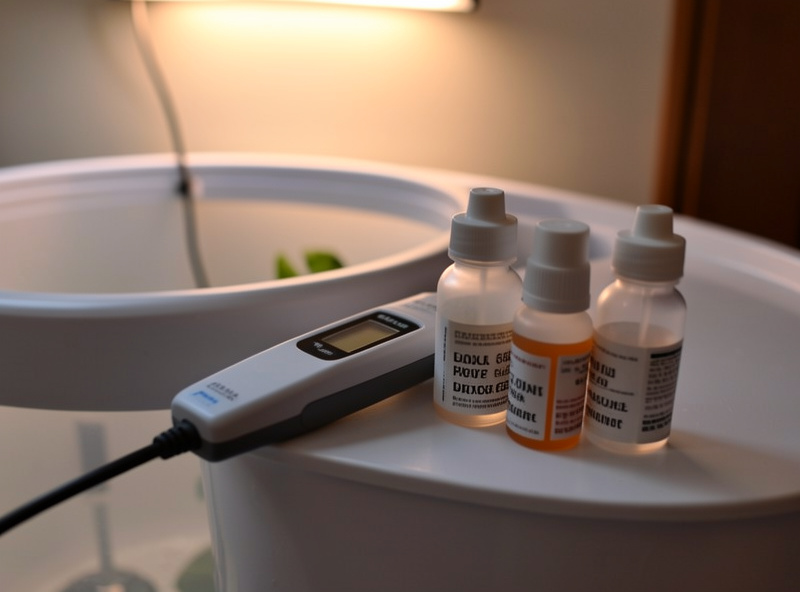
The minimum useful measurement kit is an EC/TDS pen, a pH pen, and the calibration solutions to keep them honest (pH 4.0 and 7.0 buffers, EC 1.413 mS/cm standard). A meter that has not been calibrated is a random number generator. How to read and calibrate an EC meter is covered in detail in the EC meter guide, and which meters are worth buying at each budget — pen, combo, or benchtop — is in the meters buying guide. Once you have numbers, the nutrients guide tells you what to do with them.
Lighting
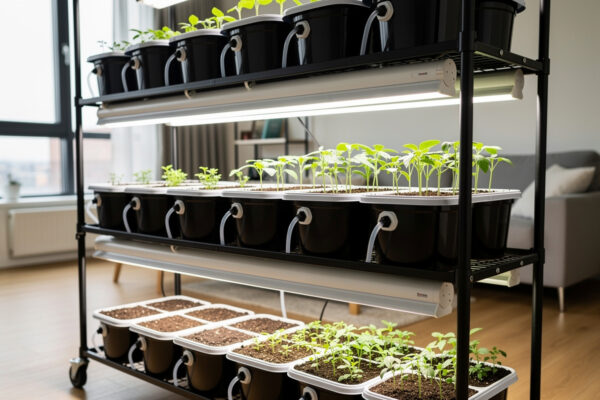
Indoors, light is food, and in a Nordic winter the sun is not going to do the job — supplemental light and a bit of DLI math are mandatory here, not optional. I run full-spectrum LED bars and panels at a measured PPFD and target a daily light integral (DLI) appropriate to the crop, hung at a distance I have actually metered rather than guessed. Leafy greens are forgiving; fruiting crops are hungry. The how-to-choose, how-to-hang and how-to-schedule details are in the grow lights guide. Treat the cheap appliance light with suspicion — an underpowered fixture is the most expensive grow you will run, because it wastes every other input.
What Each Method Actually Needs
Here is the equipment stack mapped across the four hobby methods I run side by side, so you can see exactly what carries over and what is method-specific. Note how much is shared — the reservoir, aeration, net pots, meters and a timer appear almost everywhere.
| Component | DWC | NFT | Kratky | Ebb & Flow |
|---|---|---|---|---|
| Reservoir (opaque) | Required | Required | Required | Required |
| Air pump + air stone | Required | Optional (in res) | Not used | Optional (in res) |
| Water pump | Optional (recirc) | Required | Not used | Required |
| Net pots | 2-3 inch | 2 inch typical | 2-3 inch | In media bed |
| Primary media | Clay pebbles | Rockwool/pebbles | Clay pebbles | Clay pebbles |
| Timer | Lights only | Lights + pump cycle | Lights only | Lights + flood cycle |
| EC + pH meters | Required | Required | Required | Required |
| Grow light | Required indoors | Required indoors | Required indoors | Required indoors |
The pattern is the obvious one once you see it: buy the shared layer well — a good meter, a reliable air pump, a timer that holds schedule — and it follows you across every system you ever build. Method-specific parts (water pumps for NFT and ebb-flow, the channel or flood table itself) are the only things you re-buy when you switch methods.
DIY or Buy a Kit?
You can build a credible DWC system from a tote, an air pump and a few net pots for the price of a takeaway meal, and I have grown plenty of lettuce that way. You can also buy a sealed countertop garden that handles light, pump and schedule for you. Both are legitimate; they suit different people. A kit buys convenience and a tidy footprint at the cost of flexibility and proprietary parts. DIY buys flexibility and cheap repairs at the cost of your time and a learning curve.
If you want the honest trade-off — what a kit hides, what DIY demands, and where each one actually wins — read the DIY vs commercial comparison. And if you would rather skip the shopping and start with one box, the starter kits compared guide ranks the ones worth owning. New to all of this? Start with the beginners guide before you spend anything.
As an Amazon Associate I earn from qualifying purchases. Where a specific category of gear earns its place I link to where you can browse air pumps and stones, EC and pH meters, and net pots — buy by job, not by brand.
Where the Money Actually Goes
Spend on the parts that touch every grow and fail expensively; save on the parts that are commodities. After running four methods side by side for years, my spending priorities are clear: the grow light and the meter pair are where good money buys real results, and almost everything else is a commodity you should buy adequately and forget about.
A grow light is the input that determines whether the plant has the energy to use everything else you give it. An underpowered fixture caps your yield no matter how perfectly you mix nutrients, so this is the one place I refuse to cheap out — I want a fixture I can run at a measured PPFD and a known distance, not a glowing toy. Meters come second because they convert guessing into managing; a calibrated EC and pH pen pays for itself the first time it catches drift before the plant shows it.
Where you can relax: net pots, tubing, fittings and basic media are commodities — buy them adequately and move on. In round numbers, a first DIY stack lands roughly like this: an opaque tote and lid for $10–20, an air pump and stone for $15–25, net pots and a bag of clay pebbles for $15–25, a digital timer or smart plug for $15–30, and an EC/pH meter pair with buffers for $40–60. The grow light is the variable that dwarfs the rest — a credible full-spectrum LED for a small footprint runs $60–150, and that is the line item I tell people to protect. All in, a real, measured single-bucket system comes together for well under $200, most of which carries to every future build. Air pumps are cheap and reliable, so buy a slightly larger one than you think you need and run it gently. Timers are inexpensive enough that there is no reason to run a flaky one. The reservoir itself can be a food-grade tote rather than a branded tank, as long as it is opaque and the right volume.
Common Equipment Mistakes I See
The failures I see repeated are nearly always equipment-shaped, not plant-shaped — the grower did everything right and the gear quietly let them down. The most common is the clear or translucent reservoir: it grows algae within days under a grow light, and the algae steals oxygen and clogs stones and pumps. Swap to opaque and the problem disappears.
Second is undersized aeration in DWC — one tiny stone in a large bucket is not enough surface area to keep roots oxygenated, especially as the root mass grows and the water warms. More air, cooler water, every time. Third is the water pump bought on flow rating alone that cannot lift to the NFT channel because nobody checked head height. Fourth is the mechanical timer running an ebb-and-flow flood cycle it was never designed for — those dials cannot do short, repeatable intervals, and a stuck pin floods or starves the bed. Match the timer to the job. Get these four right and the bench mostly runs itself; the rest is tuning EC, pH and light, which is the fun part.
My Recommended Build Order
If you are assembling a first proper system rather than a sealed kit, buy in this order and you will never strand money: reservoir first, then aeration, then a meter pair, then media and net pots, then a timer, then the light, and only then the water pump if your chosen method needs one. The meter pair comes early on purpose — the moment you can read EC and pH, every other decision gets easier, and you stop guessing. A simple DWC bucket is the cheapest way to put that whole stack to work and learn what each layer does before you scale up.
Frequently Asked Questions
What equipment do I actually need to start hydroponics?
At minimum: an opaque reservoir, an air pump with an air stone, net pots and clay pebbles, a grow light, and an EC and pH meter pair. A basic DWC build with that stack grows lettuce for the price of a takeaway meal. Only NFT and ebb-and-flow add a water pump and timer.
Do I need a water pump and an air pump, or just one?
They do different jobs. An air pump oxygenates the water through an air stone; a water pump moves nutrient solution around. DWC needs an air pump and optionally a water pump for recirculation. NFT and ebb-and-flow need a water pump. Kratky needs neither.
Is a DIY hydroponic system or a store-bought kit better?
Neither is universally better. A kit buys convenience and a tidy footprint but locks you into proprietary parts. DIY costs your time but is cheaper, repairable and flexible. Beginners who want fast results often start with a kit; growers who want to scale and tinker do better building their own.
What is the most overlooked piece of hydroponic equipment?
The meter pair. Most beginner kits ship without an EC or pH meter, so growers run blind until a plant shows damage. An EC and pH pen with calibration solutions is the single upgrade that improves every other decision, because you can finally see what your reservoir is doing.
How much does a basic hydroponic setup cost to build?
A functional DIY DWC system — tote, air pump, air stone, net pots and media — can be built very cheaply, often for under the cost of a restaurant meal, excluding the light and meters. The grow light and an EC/pH meter pair are the two items worth spending real money on, because they affect every grow you run.
Can I use the same equipment if I switch hydroponic methods?
Mostly yes. The reservoir, air pump, net pots, meters, timer and grow light carry across DWC, NFT, Kratky and ebb-and-flow. Only the delivery hardware is method-specific: NFT and ebb-and-flow need a water pump and channel or flood table that DWC and Kratky do not.
Related Guides
- Hydroponic Water Pump Guide: Sizing, Flow and Head Height
- Air Stones and Dissolved Oxygen: Aeration Done Right
- Net Pots and Grow Media: What to Use and When
- Best Timers for Hydroponic Systems
- Choosing Hydroponic Meters: EC, pH and PPFD
- Hydroponic Starter Kits Compared
- DIY vs Commercial Hydroponic Systems